
In the midst of a bustling kitchen, I stumbled upon an unexpected revelation—desserts could be both indulgent and effortlessly elegant. Enter the Eggless Rose Tiramisu, a no-bake Indian fusion delight that reimagines a beloved classic. This dreamy dessert is a showstopper, featuring the enchanting flavors of rose milk and fragrant rosewater, transporting you straight to a spring garden with every luscious bite. Not only is it simple to prepare, but it also makes it the perfect centerpiece for any occasion, allowing you to impress your guests without breaking a sweat. So, are you ready to whisk together a slice of floral heaven? Let’s dive in!
Why is this Rose Tiramisu special?
Elegance in Simplicity: Whipping up this delightful dessert requires minimal effort, making it perfect for any home cook eager to impress.
Florally Infused Joy: The captivating essence of rose syrup and water will elevate your dessert game like never before!
Egg-Free Assurance: Enjoy the same classic tiramisu delight without any raw eggs, ensuring that it’s safe for everyone.
Versatile Layers: Feel free to customize each layer with additional flavors like cardamom or fruit purees for a unique twist!
No-Bake Convenience: Skip the oven! This no-bake recipe means you can prepare it stress-free, making it ideal for gatherings.
Jazz up your dessert table with this stunning Eggless Rose Tiramisu that not only tastes divine but looks gorgeous too!
Rose Tiramisu Ingredients
• Here’s everything you’ll need for this delightful Rose Tiramisu:
For the Base
- Ladyfinger Cookies – These form the essential base layers; feel free to use store-bought or homemade for a personal touch.
For the Cream Mixture
- Mascarpone Cheese – The star of the show, ensuring a creamy texture; make sure it’s very cold for easier whipping.
- Powdered Sugar – Sweetens the dessert delicately; adjust depending on the sweetness of your rose syrup.
- Heavy Cream – Adds that fluffy richness; be sure it’s chilled for best results.
For the Rose Flavor
- Rose Syrup – Provides floral sweetness; you can substitute it with Rooh Afza or any other rose syrup brand.
- Rose Water – Enhances the aromatic flavor profile; a drop of rose essence can work as a substitute in a pinch.
For Assembly and Decoration
- Full Fat Milk – Adds creaminess to the rose mixture; it balances the flavors beautifully.
- Food Grade Rose Buds and Silvered Pistachios – Optional, but they make for a stunning garnish that elevates the presentation.
Enjoy whipping up this Rose Tiramisu that promises to be a delightful experience for your taste buds and an eye-catching centerpiece!
Step‑by‑Step Instructions for Rose Tiramisu
Step 1: Prepare the Rose Milk Mixture
In a medium bowl, combine the rose syrup, full fat milk, and rose water, whisking until fully blended. Taste and adjust sweetness to your liking; it should have a pleasant floral flavor. Set aside for the flavors to meld while you prepare the cream mixture, ensuring it’s ready for the layering process.
Step 2: Whip the Mascarpone Mixture
In a separate bowl, beat the cold mascarpone cheese with powdered sugar and a hint of rose essence using an electric mixer on medium speed until smooth and well-combined. This should take about 2-3 minutes. You want a uniform mixture without lumps, as this will create a smooth and creamy base for your Rose Tiramisu.
Step 3: Whip the Heavy Cream
In a large mixing bowl, pour in the very cold heavy cream and whip it using a hand mixer or stand mixer on high speed. Continue until soft peaks form, which should take about 3-5 minutes. This step is crucial for achieving the light and airy texture of your final Rose Tiramisu, so keep a close eye on it to avoid overwhipping.
Step 4: Combine Cream Mixtures
Gently fold the whipped cream into the mascarpone mixture using a spatula. Carefully incorporate the two mixtures until just combined, taking care not to deflate the cream. This will create a light fluffy filling that perfectly complements the soaked ladyfingers, ensuring your Rose Tiramisu has that delightful melt-in-the-mouth texture.
Step 5: Begin Layering the Ladyfingers
Prepare an 8×8 dish and dip each ladyfinger quickly into the rose milk mixture, ensuring they soak but do not become overly soggy. Arrange the dipped ladyfingers tightly in a single layer at the bottom of the dish, creating a solid foundation for your Rose Tiramisu. This layer will absorb the rich flavors of the rose milk beautifully.
Step 6: Spread the Cream Mixture
Once the ladyfingers are in place, evenly spread half of the whipped cream mixture over them, smoothing it out with a spatula to create an even layer. This cream layer will perfectly contrast the texture of the ladyfingers, introducing that luscious creaminess characteristic of a classic Rose Tiramisu.
Step 7: Add Another Layer of Ladyfingers
Repeat the process by dipping another set of ladyfingers into the rose milk mixture and layering them over the whipped cream. Ensure the ladyfingers are tightly packed for a beautiful presentation. Following this method helps lock in the delightful flavors as they meld with the cream in the fridge.
Step 8: Final Cream Layer
Top the second layer of dipped ladyfingers with the remaining whipped cream mixture. Spread it evenly across the surface, creating a smooth finish that will be both creamy and visually appealing. This final layer should be generous, forming the perfect topping for your gorgeous Rose Tiramisu.
Step 9: Chill the Tiramisu
Cover the dish with plastic wrap and refrigerate the Rose Tiramisu for at least 6 hours, but overnight is ideal for the best flavor absorption. As it chills, the layers will set, allowing the creamy filling to meld beautifully with the soaked ladyfingers, creating a luscious dessert that is ready to impress.
Step 10: Garnish and Serve
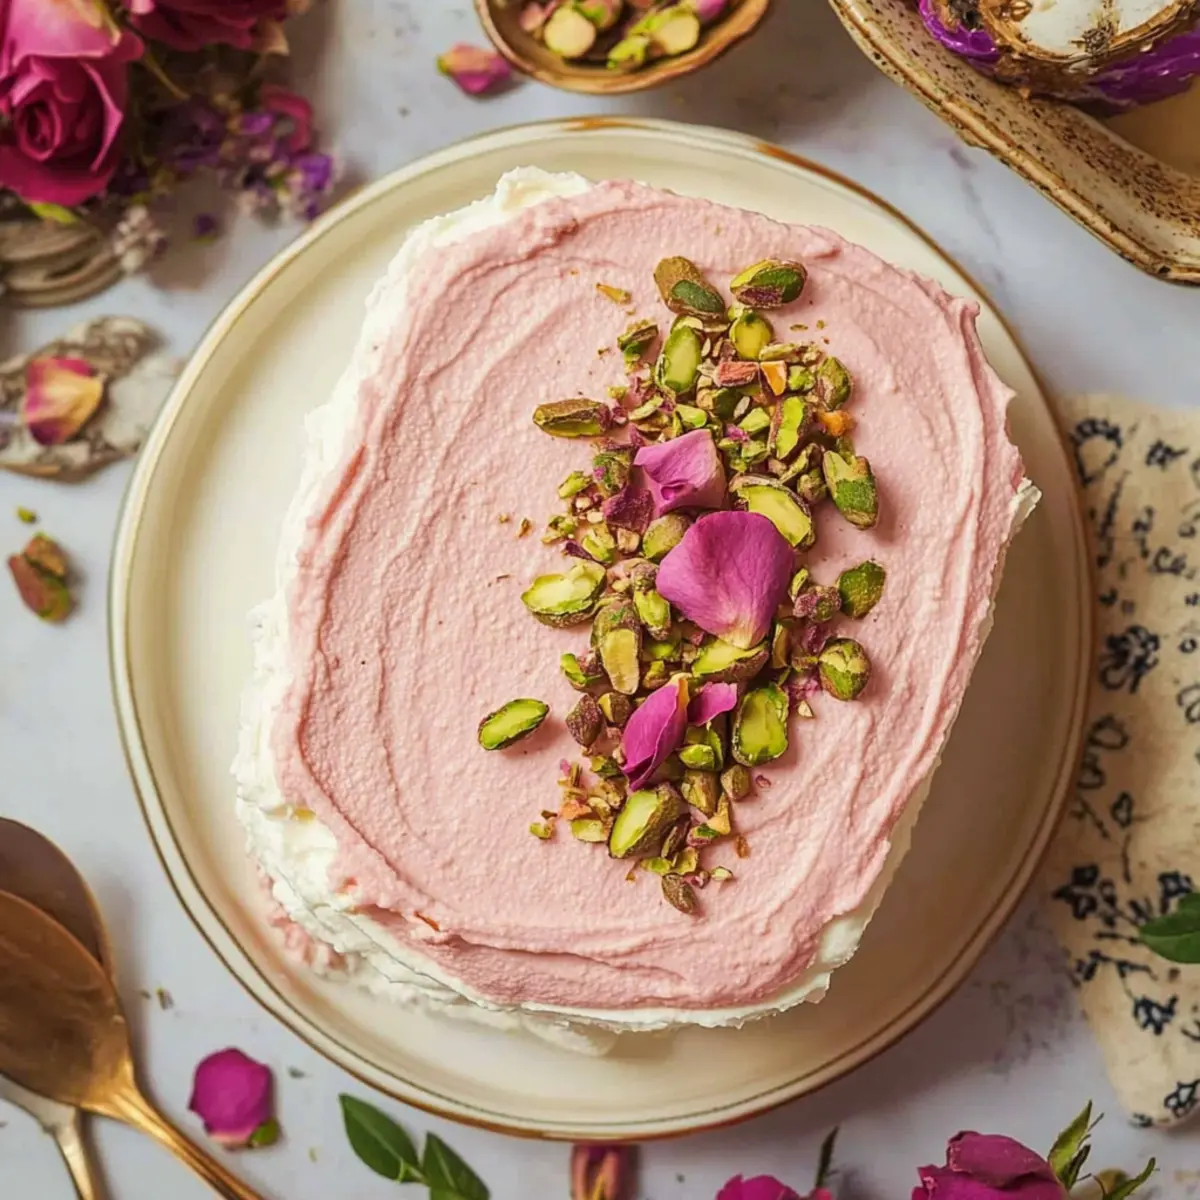
Before serving, decorate the top of your chilled Rose Tiramisu with food-grade rose buds and silvered pistachios for a touch of elegance. Slice into squares and serve chilled, enjoying this beautiful eggless dessert that merges traditional tiramisu with delightful rose flavors, perfect for any occasion.
Make Ahead Options
These delightful Eggless Rose Tiramisu are perfect for busy weeknights and can be prepped in advance to save you precious time! You can prepare the cream mixture and layer it with ladyfingers up to 24 hours ahead of time; simply refrigerate them tightly covered. To maintain quality, ensure that the cream mixture is well combined and chilled before layering to prevent separation. When you are ready to serve, just garnish with rose buds and pistachios for that elegant touch. This way, you can enjoy a stunning no-bake dessert that is just as delicious while freeing up your schedule for other activities!
Rose Tiramisu Variations & Substitutions
Feel free to get creative and make this delightful Rose Tiramisu your own with these fun and intriguing variations!
-
Cream Cheese: Swap mascarpone for cream cheese for a tangy twist that adds depth to your dessert.
-
Cardamom Infusion: Incorporate a pinch of cardamom or saffron to echo the floral notes and add a unique flavor profile.
-
Dairy-Free Delight: Use coconut cream instead of heavy cream and substitute the milk with almond or oat milk for a vegan-friendly version.
-
Fruit Purees: Layer in mango, raspberry, or strawberry purees for bursts of color and fruity flavor that complement the rose beautifully.
-
Chocolate Twist: Drizzle melted dark chocolate or use cocoa powder in the layers to create a delightful contrast with the floral sweetness.
-
Nuts Galore: Add crushed almonds or walnuts between layers for a satisfying crunch that balances the creamy texture.
-
Spice It Up: For a spicy kick, sprinkle in a touch of chili powder or cayenne between the layers—it’s an unexpected yet delightful twist!
-
Fancy Garnish: Elevate your presentation by using edible flowers along with pistachios to wow your guests visually as well as taste-wise.
Embrace your inner culinary artist and enjoy whipping up this stunning Eggless Rose Tiramisu that’s sure to impress at any gathering!
Expert Tips for Rose Tiramisu
-
Chill Equipment: Keep your bowls and mixers chilled before whipping cream to achieve firm peaks for your Rose Tiramisu.
-
Gentle Mixing: Be cautious when folding the whipped cream into the mascarpone mixture. Overmixing can deflate the cream and affect texture.
-
Quick Dips: Dip ladyfingers quickly into the rose milk mixture to prevent sogginess. A swift soak ensures moisture without compromising structure.
-
Adjust Sweetness: Taste the rose milk mixture before layering. You can always adjust the sweetness according to your preference with powdered sugar or rose syrup.
-
Overnight Rest: For the best flavor and texture, refrigerate your Rose Tiramisu overnight. This allows the flavors to meld deliciously!
What to Serve with Eggless Rose Tiramisu
Savoring every creamy, floral bite of this dessert is delightful, but pairing it with the right accompaniments can elevate your experience even further.
- Herbal Tea: The calming notes of chamomile or mint tea complement the floral essence of the tiramisu, enhancing its aromatic qualities.
- Fresh Fruit Salad: A medley of seasonal fruits adds a refreshing contrast, balancing the creamy richness with light, juicy texture.
- Almond Biscotti: Crunchy and subtly sweet, these delightful cookies are perfect for dipping, creating a beautiful synergy with the tiramisu’s softness.
- Lightly Sweetened Whipped Cream: A dollop of whipped cream can add extra fluffiness and a hint of sweetness to each slice of your tiramisu.
- Cardamom-Spiced Coffee: This aromatic drink enhances the dessert’s flavor profile while providing a comforting warmth that beautifully contrasts the chilled tiramisu.
- Rose-Infused Sparkling Water: A sparkling drink infused with rose petals mirrors the dessert’s delicate flavors and adds an effervescent touch to your meal.
Each of these pairings brings its unique flavor and texture to the table, ensuring that your eggless rose tiramisu is undeniably memorable!
Storage Tips for Rose Tiramisu
-
Fridge: Store covered in the refrigerator for up to 3 days. This keeps the dessert fresh and ensures the layers remain intact.
-
Freezer: For longer storage, freeze without the cream for up to 1 month. Assemble and add the cream filling right before serving to retain the desired texture.
-
Thawing: To enjoy frozen Rose Tiramisu, thaw it in the refrigerator overnight. This gradual process helps maintain its delightful flavors and mouthfeel.
-
Reheating: Since this is a no-bake dessert, simply slice and serve chilled straight from the fridge or after thawing from the freezer for the best experience with your Rose Tiramisu.
Rose Tiramisu Recipe FAQs
What type of rose syrup should I use?
I recommend using a high-quality rose syrup like Rooh Afza for its rich floral notes. However, any good brand will work! If you’re in a pinch, you can substitute with a drop of rose essence for flavor, keeping in mind that it will be less sweet.
How should I store leftover Rose Tiramisu?
You can store your Rose Tiramisu covered in the refrigerator for up to 3 days. This will keep the layers intact and maintain freshness. If you plan to keep it longer, consider freezing the dessert without the cream for up to 1 month. Just assemble it with the cream filling right before serving for the best texture.
Can I freeze Rose Tiramisu?
Absolutely! To freeze, omit the cream filling and wrap the assembled layers in plastic wrap and foil. It can stay in the freezer for up to 1 month. When you’re ready to enjoy, thaw it overnight in the refrigerator, and then add the whipped cream before serving for that creamy, indulgent finish.
What if my whipped cream doesn’t whip up properly?
If your whipped cream isn’t forming soft peaks, ensure that your heavy cream is very cold and your mixing bowl and utensils are also chilled. If it seems overwhipped, try gently folding it into your mascarpone mixture, as this can help lighten it up a bit. If it’s too far gone and clumpy, unfortunately, you may need to start over.
Is this recipe suitable for people with egg allergies?
Yes! This Rose Tiramisu recipe is completely egg-free, making it a safe and delicious option for anyone avoiding eggs. Just ensure all your other ingredients, especially the rose syrup and mascarpone cheese, are free from any egg-related products, which they typically are.
What should I do if my ladyfingers are too soggy?
If you find that your ladyfingers become overly soggy, it’s crucial to quickly dip them in the rose milk mixture. Aim for a swift soak—just a second or two—so they maintain their structure while still absorbing that lovely rose flavor. You can also adjust the quantity of the rose milk used to prevent too much soaking.
Rose Tiramisu: Eggless No-Bake Delight for All Occasions
Ingredients
Equipment
Method
- Prepare the rose milk mixture by combining rose syrup, full fat milk, and rose water in a bowl. Whisk until blended and set aside.
- In another bowl, beat cold mascarpone cheese with powdered sugar until smooth.
- Whip cold heavy cream until soft peaks form.
- Fold whipped cream into the mascarpone mixture gently.
- Dip ladyfingers quickly into the rose milk mixture and layer them at the bottom of an 8x8 dish.
- Spread half of the cream mixture over the ladyfingers.
- Repeat layering with another set of dipped ladyfingers and the remaining cream mixture on top.
- Chill the tiramisu in the refrigerator for at least 6 hours or overnight.
- Before serving, garnish with rose buds and silvered pistachios.
Leave a Reply