
There’s something magical about summer—warm sunshine, laughter, and of course, ice cream! My Homemade Orange Ice Cream captures those sweet, nostalgic moments with each creamy scoop, reminiscent of carefree childhood days spent devouring orange creamsicles. Made with zesty fresh orange juice and a hint of aromatic vanilla, this dessert is not only a breeze to whip up, but it’s also a refreshing treat perfect for hot afternoons or casual get-togethers. Plus, with a simple dairy-free twist, everyone can join in on the fun! Are you ready to dive into a deliciously delightful summer experience with me?
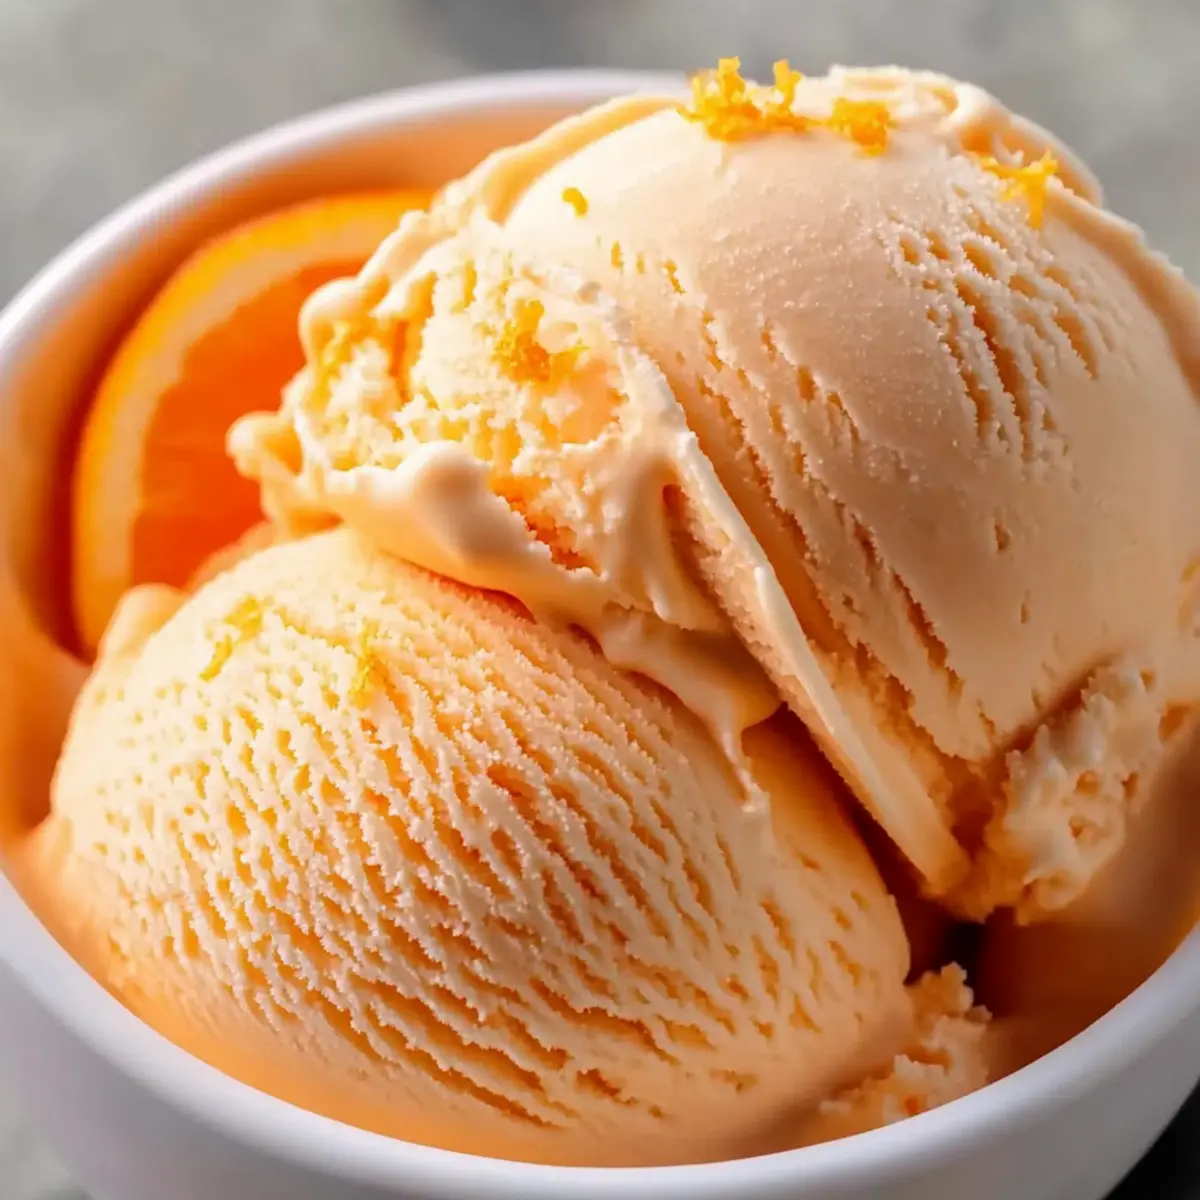
Why Is Orange Ice Cream So Irresistible?
Creamy Indulgence: Each scoop of this Homemade Orange Ice Cream melts in your mouth, offering a smooth texture that’s hard to resist. Fresh Flavors: The use of freshly squeezed orange juice gives it a vibrant fruitiness, elevating your dessert game to a whole new level. Quick and Easy: With minimal ingredients and effort required, this recipe is perfect for anyone looking to create a memorable summer treat without the fuss. Dairy-Free Option: Don’t miss out on the joy—simply swap dairy for coconut milk to enjoy this delight without compromise. Why not serve it alongside a slice of Strawberry Cream Cheese Muffins for an unforgettable dessert experience?
Orange Ice Cream Ingredients
• Discover the delicious components of homemade orange ice cream.
For the Base
- Heavy Cream – Provides creaminess and richness; substitute with whole milk for a lighter version.
- Whole Milk – Contributes to overall creaminess; for a dairy-free option, use almond or coconut milk.
- Sugar – Balances the tanginess of the oranges; consider sugar substitutes, but they may alter texture.
For Flavor
- Fresh Orange Juice – Gives a bright, zesty flavor and natural sweetness; freshly squeezed is best for optimal taste.
- Vanilla Extract – Enhances the flavor profile; always choose high-quality pure vanilla.
- Orange Extract – Intensifies the orange flavor; optional based on your personal preference.
Optional Enhancements
- Food Coloring – A few drops can enhance the visual appeal; mix in during preparation for a richer hue.
Step‑by‑Step Instructions for Homemade Orange Ice Cream
Step 1: Mix the Base
In a large mixing bowl, combine the heavy cream, sugar, freshly squeezed orange juice, whole milk, vanilla extract, and, if using, orange extract. Whisk thoroughly using a sturdy whisk or electric mixer for about 2-3 minutes until the sugar is fully dissolved, and the mixture is smooth and creamy with no lumps. This flavorful base will be the foundation of your luscious homemade orange ice cream.
Step 2: Add Color (Optional)
If you desire a more vibrant appearance for your orange ice cream, now is the time to add a few drops of food coloring to the mixture. Stir gently but thoroughly until the color is evenly distributed and the mixture takes on a bright, cheerful hue. This step is purely optional, but it can elevate the visual appeal of your delightful summer treat!
Step 3: Churn the Mixture
Pour the cream mixture into the ice cream maker, ensuring not to overfill it. Churn according to the manufacturer’s instructions, which typically takes about 20-25 minutes, until the ice cream reaches a soft-serve consistency. You’ll know it’s ready when it becomes thick and holds its shape when you scoop a small amount with a spatula, creating a delightful texture for your homemade orange ice cream.
Step 4: Freeze to Firm Up
Transfer the churned orange ice cream into a sealed, airtight container, pressing plastic wrap against the surface to minimize ice crystals. Cover the container with a lid and place it in the freezer. Allow the ice cream to freeze for at least 4-6 hours or overnight until it is firm. This step is crucial for achieving that creamy, scoopable texture loved by all.
Step 5: Scoop and Serve
When you’re ready to enjoy your homemade orange ice cream, take it out of the freezer and let it sit at room temperature for about 5-10 minutes to soften slightly. This will make scooping easier. Use an ice cream scoop or large spoon to serve generous portions into bowls or cones, and bask in the refreshing, zesty flavor that captures the essence of summer.

How to Store and Freeze Orange Ice Cream
Fridge: Keep your homemade orange ice cream in the fridge for up to 3 days if you plan to enjoy it right away; however, it’s best served fresh from the freezer.
Freezer: Store orange ice cream in an airtight container for up to 2 months. Press plastic wrap against the surface to prevent freezer burn and maintain its creamy texture.
Reheating: If your ice cream becomes too hard, let it sit at room temperature for 5-10 minutes before scooping. This will make it easier to serve and keep that delightful texture intact.
Orange Ice Cream Variations & Substitutions
Customize your Orange Ice Cream experience with these delightful twists that enhance flavor and accommodate different dietary needs!
- Dairy-Free: Substitute whole milk and heavy cream with coconut or almond milk for a creamy, guilt-free option. This twist maintains the luscious texture while fitting into dairy-free diets.
- Citrus Blend: Swap out some orange juice for lemon or lime juice to create a zesty citrus medley. This adds a playful tang that perfectly complements the sweetness of the ice cream!
- Sweetener Swap: Use honey or maple syrup instead of sugar for a natural sweetness. Just remember that this may alter the texture slightly, making it even more unique.
- Flavor Boost: Add a splash of orange liqueur (like Grand Marnier) for an adult twist. This elevates the flavor profile, making it a fun treat for gatherings.
- Chocolate Delight: Fold in mini chocolate chips or chunks during the final minutes of churning. This adds a delightful contrast to the citrusy flavor, creating a taste explosion in each bite!
- Nutty Crunch: Incorporate crushed pistachios or almonds for added texture. This crunch perfectly complements the smoothness of the ice cream and adds a beautiful color contrast.
- Spiced Up: Infuse the base with a pinch of cinnamon or ginger for a warm, spicy kick. These spices bring a cozy twist to your summer dessert.
- Tropical Vibes: Mix in bits of fresh pineapple or mango for a tropical getaway in a scoop. This fruity addition brings a whole new dimension to the classic orange flavor!
Feel free to experiment with variations, and if you need more inspiration, try pairing your ice cream with these delicious recipes like Orange Creamsicle Mini or Pineapple Cream Cupcakes. Embrace creativity in your kitchen!
Make Ahead Options
These Homemade Orange Ice Cream preparations are perfect for busy home cooks! You can mix the base ingredients (heavy cream, sugar, orange juice, and whole milk) up to 24 hours in advance and keep it refrigerated in an airtight container. To prevent browning and maintain freshness, ensure the mixture is thoroughly combined and stored properly. When you’re ready to enjoy, simply churn the mixture in your ice cream maker according to the manufacturer’s instructions, then transfer to a container and freeze for at least 4-6 hours or overnight until firm. This way, you’ll have creamy, zesty orange ice cream ready with minimal effort, making your summer gatherings a breeze!
Expert Tips for Perfect Orange Ice Cream
-
Thorough Mixing: Ensure all ingredients are well combined before churning; under-mixing can lead to unwanted ice crystals, ruining the creamy texture of your orange ice cream.
-
Use Fresh Juice: Always opt for freshly squeezed orange juice to achieve a crisp, vibrant flavor—you’ll taste the difference!
-
Chilling the Mixture: Consider chilling your base in the refrigerator for an hour before churning; this can speed up the ice cream-making process and improve texture.
-
Avoiding Freezer Burn: Store the ice cream in an airtight container and press plastic wrap directly on the surface to minimize exposure to air and prevent freezer burn.
-
Softening Before Scooping: Allow your orange ice cream to sit at room temperature for a few minutes before serving; this eases scooping and enhances the eating experience.
What to Serve with Homemade Orange Ice Cream
There’s nothing quite like the joy of indulging in a creamy dessert that evokes summer memories, making it perfect for pairing with delightful accompaniments.
- Fresh Berries: A medley of strawberries, raspberries, and blueberries adds a burst of color and a tart contrast to the creamy sweetness.
- Chocolate Sauce: Drizzling rich chocolate sauce over your orange ice cream creates a delightful flavor harmony that is simply irresistible.
- Shortcake Biscuits: Fluffy shortcake biscuits offer a comforting, crumbly texture that beautifully complements the smoothness of the ice cream.
- Toasted Almonds: Toasted almond slices bring a delightful crunch and nutty flavor, enhancing the overall enjoyment of your dessert.
- Mint Leaves: A few fresh mint leaves on top not only enhance presentation but also introduce a refreshing herbal note that brightens every scoop.
- Lemon Sorbet: For a dual dessert experience, serve alongside zesty lemon sorbet to refresh the palate with every bite.
- Sparkling Water: Pair with a glass of citrus-flavored sparkling water for a light, refreshing drink that complements the vibrant flavors of the ice cream.
- Coconut Macaroons: These chewy, coconut-infused treats add a tropical twist that resonates perfectly with the orange flavor.
- Brownie Bites: Rich brownie bites add a fudgy contrast, making for a truly decadent sweet combination that feels indulgent and special.

Homemade Orange Ice Cream Recipe FAQs
What is the best way to select oranges for this ice cream?
Absolutely! When selecting oranges, look for ones that are firm and have a vibrant, smooth skin. Avoid any with dark spots or blemishes, as those can indicate overripeness. The heavier an orange is for its size, the juicier it will be. I recommend navel oranges for their sweet flavor!
How should I store homemade orange ice cream to keep it fresh?
Very! You can store your homemade orange ice cream in an airtight container in the freezer for up to 2 months. Make sure to press plastic wrap against the surface before sealing with the lid to prevent freezer burn and maintain that creamy texture.
Can I freeze homemade orange ice cream? How?
Of course! To freeze your homemade orange ice cream, simply pour the churned mixture into an airtight container and cover it tightly with plastic wrap, pressing it against the ice cream’s surface to minimize air exposure. Seal the lid and place it in the freezer for at least 4-6 hours or overnight until it’s firm. You can keep it frozen for up to 2 months.
What if my orange ice cream turns out icy?
If your ice cream has ice crystals, this usually happens due to under-mixing or not enough churning. To prevent this, ensure you thoroughly mix your ingredients before churning and keep an eye on the consistency during the process. If you encounter icy ice cream, you can try re-churning it with a splash of milk to restore creaminess!
Is this orange ice cream safe for people with dietary restrictions?
Definitely! You can make this orange ice cream dairy-free by substituting both the whole milk and heavy cream with almond or coconut milk. Just be cautious of any allergies to these alternatives. Always do a quick ingredient check if serving someone with dietary restrictions to ensure they’re safe to indulge!

Creamy Orange Ice Cream to Beat the Summer Heat
Ingredients
Equipment
Method
- Combine the heavy cream, sugar, freshly squeezed orange juice, whole milk, vanilla extract, and orange extract in a large mixing bowl. Whisk until smooth and creamy.
- If desired, add food coloring and stir until evenly distributed.
- Pour the mixture into the ice cream maker and churn according to the manufacturer's instructions, typically taking about 20-25 minutes.
- Transfer the churned ice cream into a sealed, airtight container, pressing plastic wrap against the surface to minimize ice crystals. Freeze for at least 4-6 hours or overnight until firm.
- Let the ice cream sit at room temperature for 5-10 minutes before scooping to make serving easier.
Leave a Reply