
The aroma of sizzling chicken tenders fills the kitchen, transforming an ordinary day into a celebration of comfort food. These oven-baked Crunchy Chicken Tenders are a revelation—juicy on the inside and perfectly crisp on the outside, all without a drop of frying oil. Not only are they an easy solution for busy weeknights, but they also bring joy to the table as a family-friendly dish that everyone adores. Their quick prep time means you’ll have more moments to share with loved ones, while the irresistible crunch will keep you wanting more. Ready to delight your taste buds with these easy-to-make tenders? Let’s dive into this recipe and discover your new favorite way to enjoy homemade chicken!

Why Are These Crunchy Chicken Tenders a Must-Try?
Quick Prep Time: In just 30 minutes, you can whip up a batch of deliciousness, making dinner or snacks a breeze.
No Frying Required: Enjoy the crispy goodness without the guilt of frying; these tenders are baked to perfection.
Family-Friendly Fun: Kids and adults alike will love making and munching on these tasty treats, perfect for any gathering.
Versatile Serving Options: Serve them with your favorite dipping sauces, toss them in a salad, or add them to a sandwich for a delightful twist.
Healthier Yet Satisfying: With juicy chicken and a flavorful, crunchy coating, you won’t feel deprived of the traditional fried version.
Crunchy Chicken Tenders Ingredients
For the Chicken
• Chicken Tenderloins – The star of the dish! Use boneless skinless chicken breasts as a substitute if you prefer.*
For the Coating
• Panko Breadcrumbs – These create that essential crunchy texture; feel free to use regular breadcrumbs, though the crunch might be less satisfying.
• Plain Flour (All-Purpose) – Helps bind the coating; you can swap it for gluten-free flour if needed.
• Onion Powder – Adds a savory depth; substitute with garlic powder for a flavor boost.
• Garlic Powder – Enhances the flavor profile of the tenders; omit if you’re not a fan.
For the Binding
• Eggs – Binds the crispy coating to the chicken; a flax egg can work great for a vegan version.
• Water – Adjust this to thin the egg mixture as needed, making it easier to coat the chicken.
For Flavor
• Salt – Brings out all the flavors; adapt based on your salt preference, especially if you’re dry brining.
• Oil – Aids in browning the breadcrumbs; any neutral oil will do, but olive oil adds a nice touch.
**And there you have it! Your *Crunchy Chicken Tenders* are just a few ingredients away from being a family favorite!**
Step-by-Step Instructions for Crunchy Chicken Tenders
Step 1: Brine the Chicken
Begin by mixing your chicken tenderloins with 1.5 to 3 teaspoons of salt in a bowl. Cover it and refrigerate for about 30 to 40 minutes. This process helps to enhance the flavor and moisture of the chicken. After brining, gently rinse the tenders under cold water and pat them dry with paper towels to prepare for coating.
Step 2: Toast the Breadcrumbs
Preheat your oven to 350°F (175°C). In a baking dish, combine the panko breadcrumbs with a drizzle of oil, mixing well. Spread the breadcrumb mixture evenly in the dish and bake for 8 to 10 minutes until golden brown, stirring halfway to ensure even toasting. This step is crucial to achieve the crispy texture for your Crunchy Chicken Tenders.
Step 3: Prepare the Batter
In a mixing bowl, whisk together the eggs and a splash of water until frothy, then incorporate the flour, salt, onion powder, and garlic powder. You want a smooth batter that will nicely coat your chicken tenders. Adjust the consistency with more water if needed. This mixture will help the breadcrumbs adhere perfectly when you coat the chicken.
Step 4: Coat the Chicken
Take the brined and dried chicken tenderloins and dip each piece into the egg batter, allowing any excess to drip off. Immediately roll the tenderloins in the toasted panko breadcrumbs, pressing firmly to ensure a good coating. Repeat this process until all the tenders are well-coated, ensuring they are covered evenly for that satisfying crunch.
Step 5: Bake the Tenders
Line a baking sheet with parchment paper and arrange your coated chicken tenders in a single layer, making sure they don’t touch. Preheat your oven to 400°F (200°C) and bake the tenders for 10 to 12 minutes. You’ll know they’re done when they turn golden brown and reach an internal temperature of 165°F (74°C).
Step 6: Serve and Enjoy
Once baked, remove your Crunchy Chicken Tenders from the oven and let them cool slightly. Serve them warm with your favorite dipping sauces, such as ranch or sweet chili, for a delightful family-friendly meal. Enjoy the delicious crunch and juicy interior that everyone will love!

What to Serve with Crunchy Oven-Baked Chicken Tenders
Nothing elevates a family meal like perfectly paired accompaniments that complement the dish’s flavors and textures.
-
Crispy French Fries: Golden and salty, they bring that classic comfort food vibe that goes hand-in-hand with chicken tenders. Dipping them into ketchup or a spicy aioli enhances the experience.
-
Fresh Garden Salad: A light and refreshing salad adds a crisp contrast to the warm tenders. Toss in mixed greens with cherry tomatoes, cucumbers, and a zesty vinaigrette for balance.
-
Creamy Coleslaw: The crunch of shredded cabbage in tangy dressing offers a delightful freshness, perfectly offsetting the richness of the chicken tenders and making every bite enjoyable.
-
Macaroni and Cheese: Indulge in creamy, cheesy goodness that provides a comforting side to your crunchy chicken. It’s a hit with both kids and adults, making for a fun meal that feels like a treat.
-
Garlic Bread: Warm, buttery garlic bread adds a rich flavor that pairs beautifully with chicken. Not only does it complement the meal, but it also makes that dinner table feel like home.
-
Sweet Chili Dipping Sauce: Elevate your tenders with a sauce that delivers sweet and spicy notes. It’s the perfect accompaniment for those who love a little zing in their bites.
-
Sparkling Lemonade: Refreshing and slightly tart, this drink cleanses the palate between bites, enhancing the overall flavor experience of the crunchy chicken tenders.
-
Chocolate Chip Cookies: End your meal on a sweet note with soft, warm cookies. They bring a comforting touch, ensuring everyone leaves the table smiling.
Make Ahead Options
These Crunchy Chicken Tenders are perfect for busy weeknights or meal prep enthusiasts looking to save time. You can brine and coat the chicken up to 24 hours in advance; simply refrigerate the prepared tenders in an airtight container to maintain their quality. If you’re looking to prepare even further ahead, you can freeze the coated tenders for up to 3 months, ensuring they’re layered between parchment paper to prevent sticking. When you’re ready to bake, just place the frozen tenders on a lined baking sheet and increase the cooking time by a few minutes. This way, you can enjoy crispy, delicious chicken tenders with minimal effort, any day of the week!
Expert Tips for Crunchy Chicken Tenders
• Brining Matters: Always brine your chicken for at least 30 minutes. This enhances moisture and flavor; just don’t forget to rinse thoroughly afterward.
• Perfectly Toast the Breadcrumbs: Toasting the panko breadcrumbs is crucial for achieving that irresistible crunch. Skipping this step may lead to softer texture.
• Coating Consistency: If your egg batter seems too thick, add a splash more water. A smoother coating will help the breadcrumbs adhere beautifully without clumps.
• Single Layer Baking: Ensure you arrange the chicken tenders in a single layer on the baking sheet. Overcrowding can steam them instead of allowing them to crisp up.
• Check Internal Temp: Always ensure the chicken reaches an internal temperature of 165°F (74°C) for safety. A meat thermometer eliminates guesswork!
Storage Tips for Crunchy Chicken Tenders
Fridge: Keep cooked Crunchy Chicken Tenders in an airtight container for up to 3-4 days. Reheating in the oven will retain their crispy texture.
Freezer: Freeze uncooked, coated tenders layered with parchment paper for up to 3 months. To cook from frozen, increase baking time by a few minutes.
Reheating: For best results, reheat baked tenders in the oven or air fryer at 375°F (190°C) for about 10 minutes, keeping them crisp and delicious.
Make-Ahead: Prep tenders in advance, refrigerating uncooked ones in an airtight container for 2-3 days before baking for convenience.
Crunchy Chicken Tenders Variations & Substitutions
Feel free to get creative and personalize your crunchy chicken tenders experience with these tasty ideas!
-
Gluten-Free: Use gluten-free breadcrumbs and flour to adapt this recipe, ensuring everyone can enjoy the crunch.
With these swaps, everyone can savor the delightful texture without compromise. -
Spicy Twist: Add cayenne pepper or paprika to the breadcrumbs for a flavorful kick that tantalizes your taste buds.
Spice things up by adjusting the heat level based on your family’s preference for a fun twist! -
Dairy-Free: Swap eggs for a flax egg (1 tbsp ground flaxseed mixed with 2.5 tbsp water) for a delightful, egg-free option.
This variation keeps the crunch while accommodating dairy-sensitive diners, making it a win-win! -
Prep-Ahead: Prepare the tenders ahead of time, freeze them unbaked, and pop them in the oven on busy nights.
You’ll have a quick meal ready to go, ideal for those evenings when time is tight but hunger is high. -
Flavor Infusion: Marinate the chicken in your favorite dressing before brining to infuse additional flavors.
Think outside the box with choices like Italian or ranch dressings for an exciting twist on taste! -
Baking from Frozen: Cook the tenders straight from the freezer, adding a few extra minutes to the baking time.
This method is great for last-minute dinners, providing a crispy bite with no prep needed! -
Herb Coating: Mix dried herbs like oregano, thyme, or rosemary into your breadcrumb mixture for an earthy flavor boost.
Herbed tenders add an aromatic quality, elevating your dish to gourmet status—perfect for dinner parties! -
Nutritional Boost: Incorporate ground flaxseeds or chia seeds into the breadcrumbs for added fiber and nutrition.
This way, you not only keep the crunch but also enhance the health benefits of your chicken tenders!
For even more delicious ideas, check out my recipes for Buffalo Chicken Bacon or Spicy Garlic Chicken to inspire your next culinary adventure!

Crunchy Chicken Tenders Recipe FAQs
How do I select ripe chicken tenderloins for this recipe?
Absolutely! When choosing chicken tenderloins, look for a pinkish color and avoid any that appear dull or may have dark spots. Fresh chicken should be firm to the touch and free from any strange odors—this way, you’ll ensure optimal flavor in your crunchy chicken tenders.
What is the best way to store leftover Crunchy Chicken Tenders?
You can keep cooked crunchy chicken tenders in an airtight container in the refrigerator for up to 3-4 days. When reheating, I recommend using the oven at 375°F (190°C) for about 10 minutes to restore that delightful crunch!
Can I freeze the chicken tenders before baking?
Yes! You can absolutely freeze uncooked, coated chicken tenders. Layer them between parchment paper in an airtight container, and they’ll stay good for up to 3 months. To bake from frozen, simply increase the baking time by a few minutes and check that they reach an internal temperature of 165°F (74°C).
What should I do if my breadcrumbs aren’t sticking to the chicken?
Not a problem! If you find that your breadcrumbs aren’t adhering properly, it may be that your egg mixture is too thick. Just add a splash of water to thin it out. Additionally, ensure you press the breadcrumbs firmly onto the chicken after dipping them in the batter, which will help them stay nice and crunchy during baking.
Are there any dietary considerations I should be aware of?
Certainly! This recipe can be easily adapted for various dietary needs. For a gluten-free option, simply use gluten-free breadcrumbs and flour. If you’re looking to create a vegan version, swap out the eggs for a flax egg and ensure you use panko that is free from animal products.
How long can I leave the chicken in the brine?
Brining the chicken for about 30-40 minutes is ideal for enhancing flavor and moisture. Avoid leaving it longer than this, as it might become too salty. Rinse off the brine thoroughly afterward to ensure balanced seasoning in your crunchy chicken tenders.
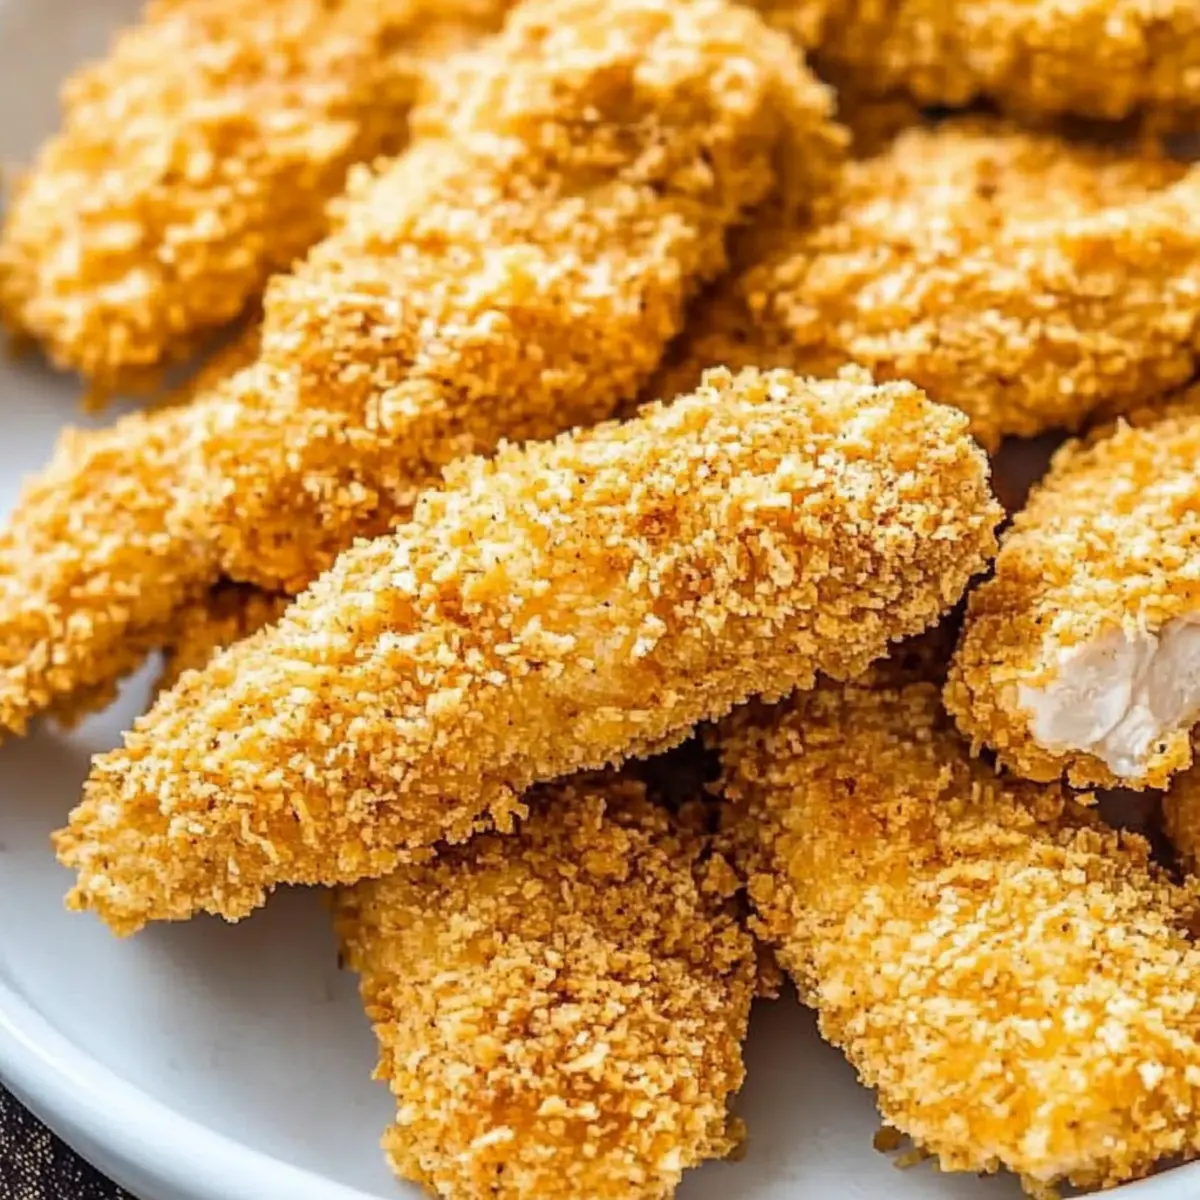
Crispy Crunchy Chicken Tenders Ready in Just 30 Minutes
Ingredients
Equipment
Method
- Begin by mixing your chicken tenderloins with 1.5 to 3 teaspoons of salt in a bowl. Cover and refrigerate for about 30 to 40 minutes.
- Preheat your oven to 350°F (175°C). In a baking dish, combine the panko breadcrumbs with a drizzle of oil, mixing well. Bake for 8 to 10 minutes until golden brown.
- In a mixing bowl, whisk together the eggs and a splash of water until frothy, then incorporate the flour, salt, onion powder, and garlic powder.
- Dip each brined chicken tenderloin into the egg batter and roll in the toasted panko breadcrumbs, pressing firmly to ensure a good coating.
- Line a baking sheet with parchment paper and arrange the coated chicken tenders in a single layer. Preheat your oven to 400°F (200°C) and bake for 10 to 12 minutes.
- Once baked, remove from the oven and let cool slightly. Serve warm with your favorite dipping sauces.
Leave a Reply