
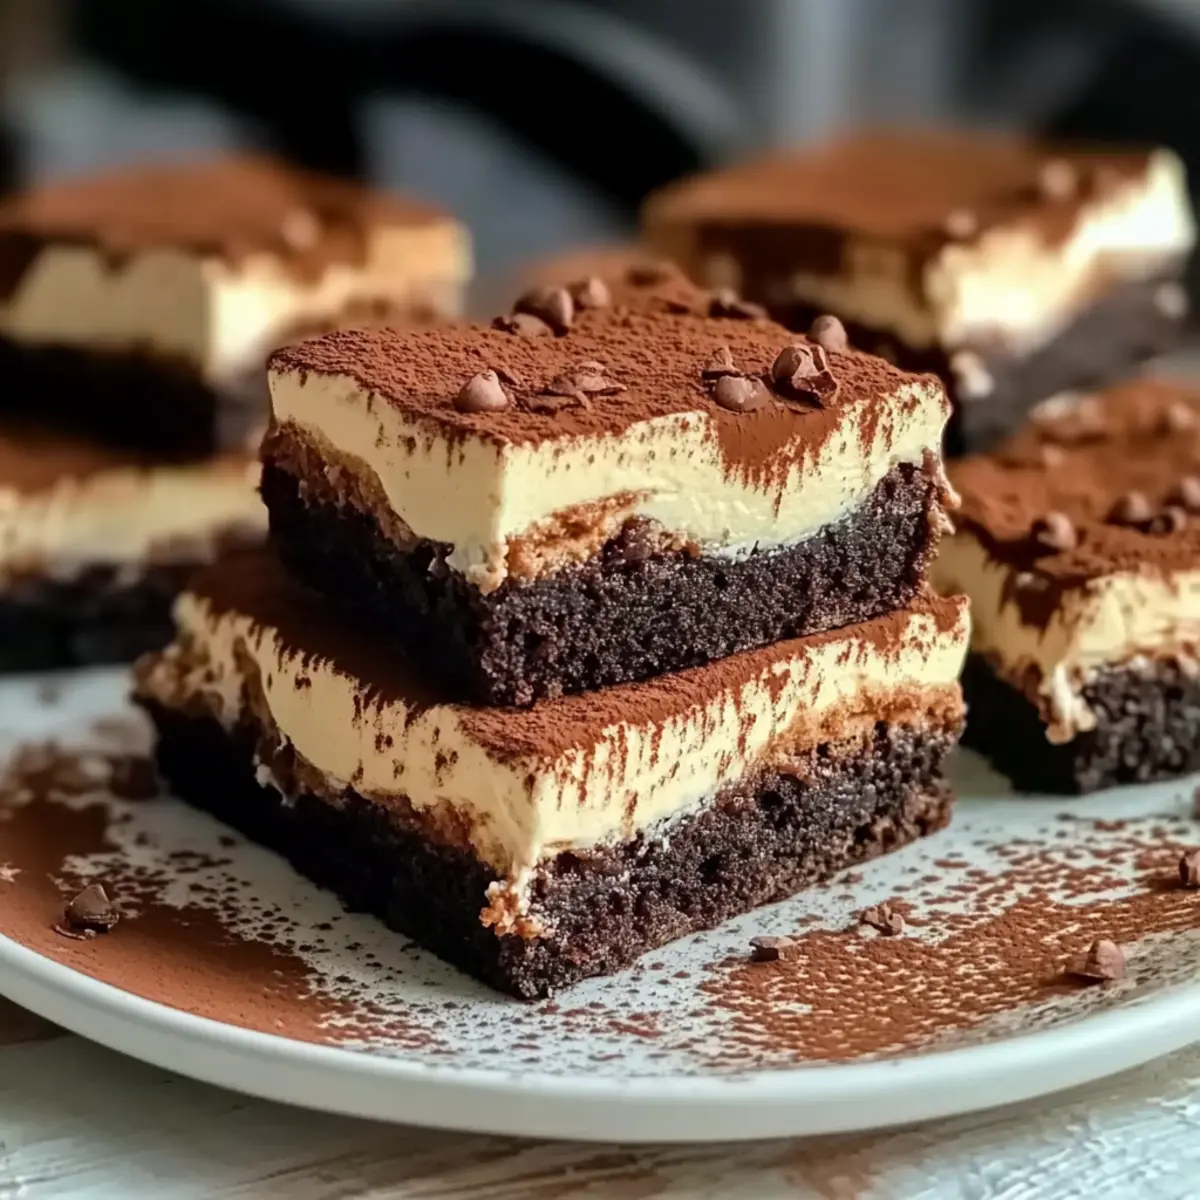
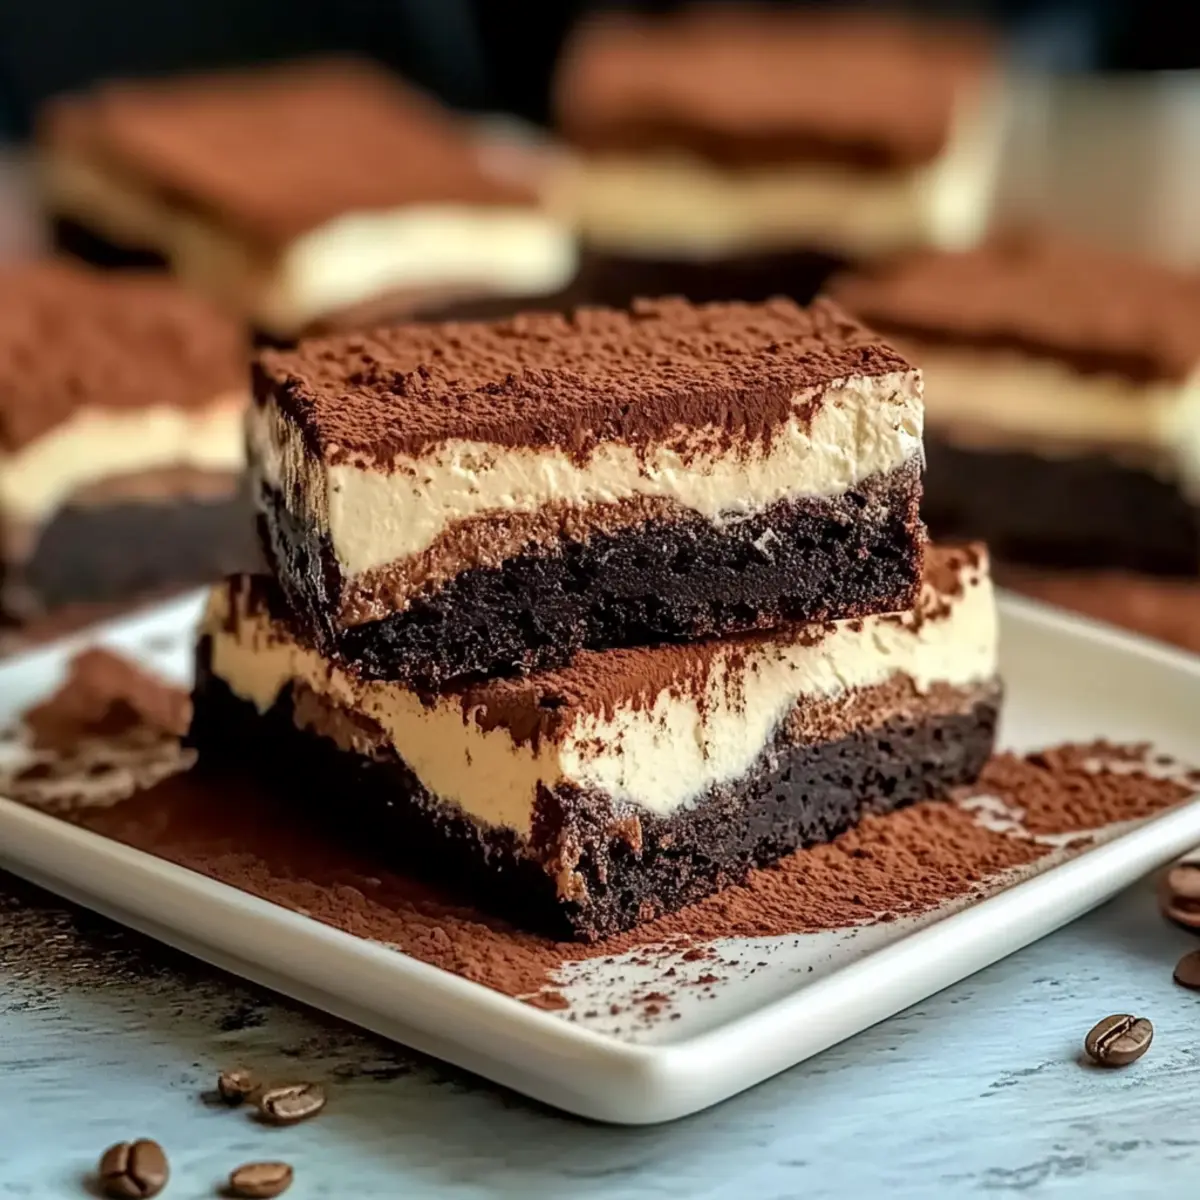
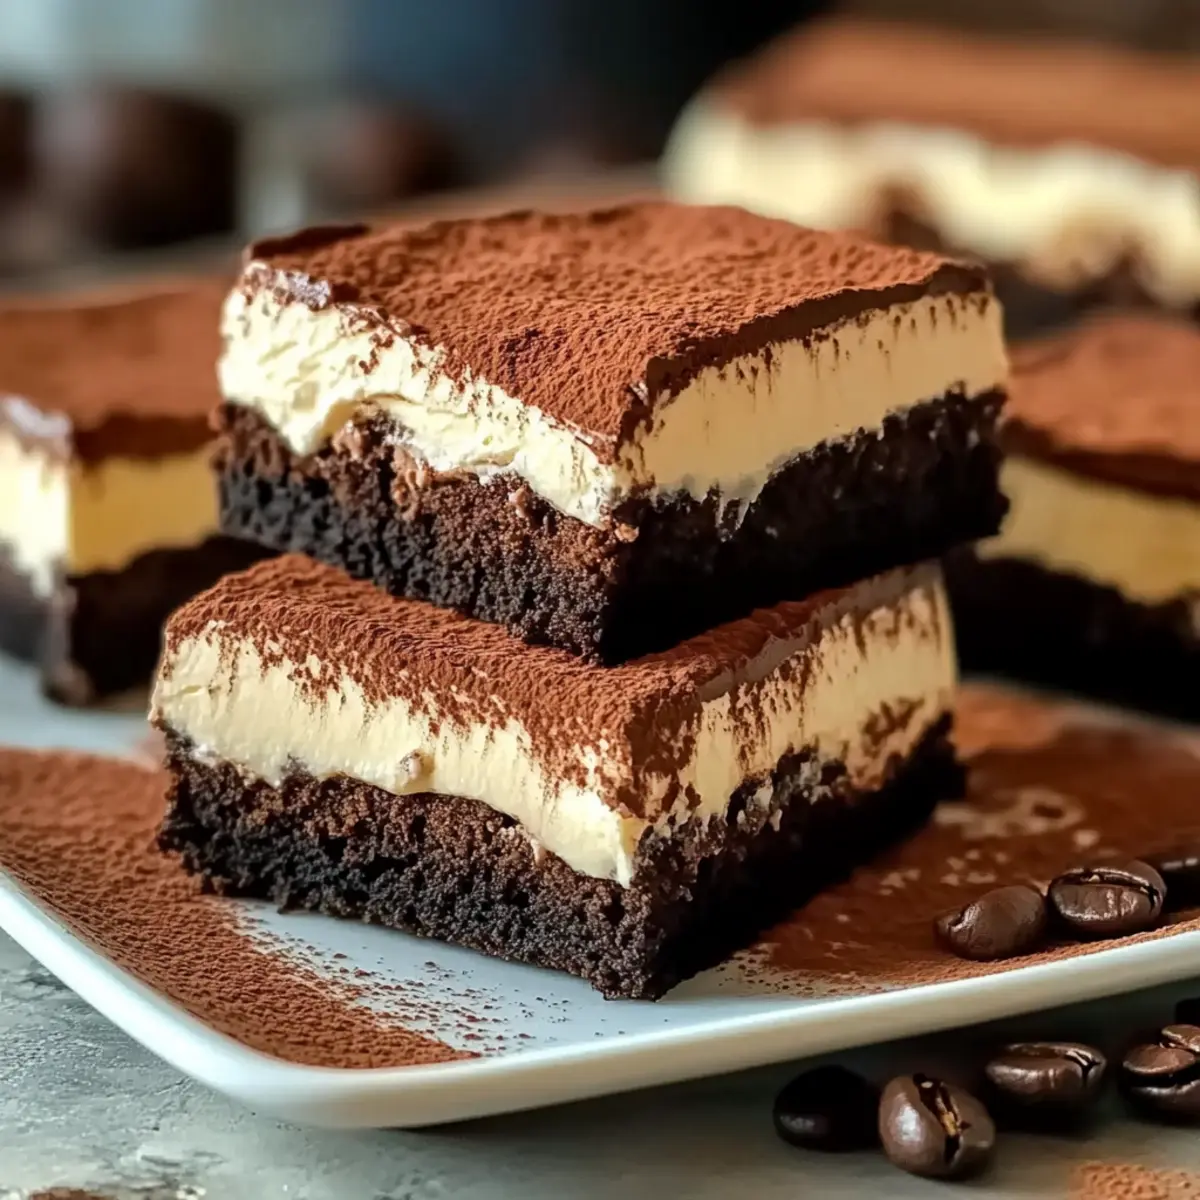
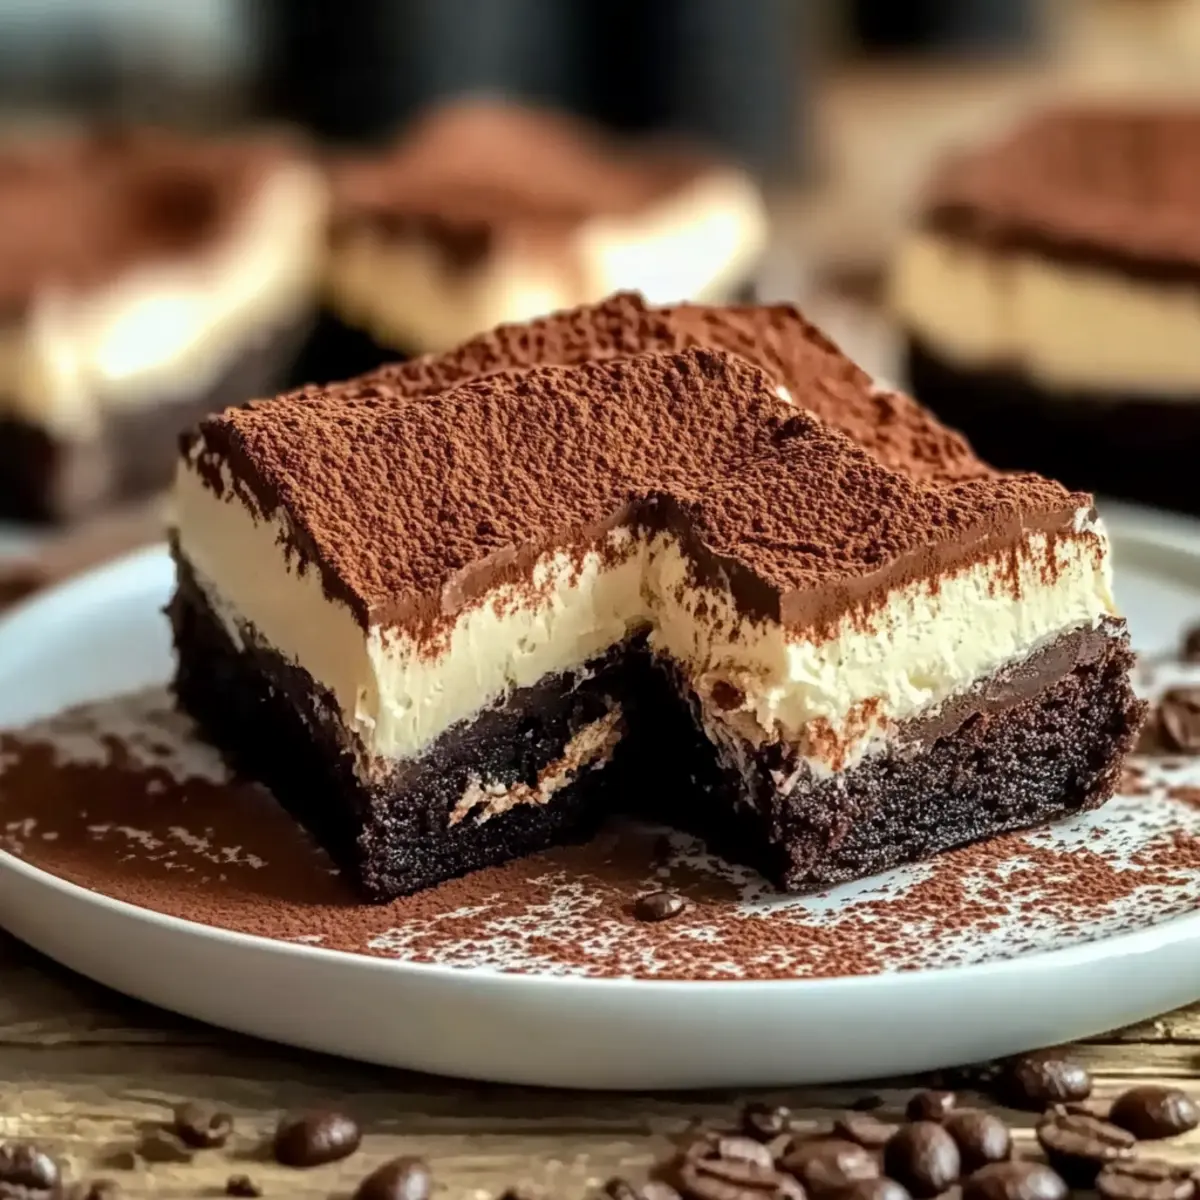
The aroma of fresh coffee and melted chocolate wafts through my kitchen, immediately transporting me to a cozy Italian café. Today, I’m excited to share my Ultimate Tiramisu Brownies Recipe—a delightful blend of two favorite indulgences: fudgy brownies and creamy tiramisu. This delightful dessert showcases a rich brownie base layered with a luscious mascarpone filling, making it an easy homemade dessert that’s sure to impress. Not only are these brownies a crowd-pleaser perfect for gatherings, but they also allow you to indulge in a little slice of heaven without the fuss of traditional tiramisu. How can you resist a treat that’s both simple to make and bursting with that delicious coffee flavor? Let’s dive into the delightful world of tiramisu brownies!
Why Are Tiramisu Brownies So Irresistible?
Indulge your senses: These Ultimate Tiramisu Brownies are a dreamy fusion of two beloved desserts, delivering rich flavors with every bite. Easy to make: You don’t need to be a pastry chef to whip these up; they come together quickly in just a few simple steps. Crowd-pleaser: Whether at a family gathering or a celebration, these brownies are bound to impress your guests! Versatile options: With suggested variations, like adding coffee liqueur or using almond flour for gluten-free brownies, you can tailor this dessert to suit your taste. Decadent texture: The fudgy brownie base contrasts beautifully with the creamy mascarpone layer, creating a delightful experience that coffee lovers won’t forget. Get ready to enjoy this show-stopping dessert that you can make at home!
Tiramisu Brownies Recipe Ingredients
For the Brownie Base
- Dark Chocolate – A rich foundation for fudgy brownies; semi-sweet chocolate can be used for a sweeter option.
- Granulated Sugar – Sweetens your brownies while enhancing browning during baking.
- All-Purpose Flour – Provides essential structure and stability to the brownies.
- Unsalted Butter – Adds moisture and richness; swap for coconut oil for a dairy-free treat.
- Eggs – Vital for binding the ingredients together and providing leavening.
For the Mascarpone Layer
- Mascarpone Cheese – The star of the tiramisu layer, bringing that classic creamy texture; feel free to substitute with cream cheese for a more tangy flavor.
- Espresso (or Espresso Powder) – Intensifies the coffee flavor, crucial for that tiramisu essence; strongly brewed coffee can also be used if you’re in a pinch.
- Cocoa Powder – This adds a dusting of flavor and a beautiful finish on top.
- Coffee Liqueur (optional) – Adds an extra kick of coffee flavor perfect for gatherings; leave it out for a non-alcoholic version.
Remember, these Tiramisu Brownies combine the best of both worlds—decadent brownies and creamy tiramisu layers!
Step‑by‑Step Instructions for Tiramisu Brownies Recipe
Step 1: Prepare the Brownie Base
Begin by preheating your oven to 350°F (175°C). In a medium saucepan, melt together 8 ounces of dark chocolate and ½ cup of unsalted butter over low heat, stirring until smooth and glossy. Once melted, remove from heat and mix in 1 cup of granulated sugar until fully combined. The mixture should be warm and shiny.
Step 2: Combine Wet Ingredients
Allow the chocolate-butter mixture to cool slightly before whisking in 3 large eggs, one at a time. Make sure each egg is fully incorporated before adding the next, creating a smooth and rich batter. The glossy finish should now begin to appear, indicating that your wet ingredients are perfectly combined.
Step 3: Add Dry Ingredients
Gently fold in ½ cup of all-purpose flour using a spatula, being careful not to overmix. The batter should be thick and slightly lumpy, which is perfect for the fudgy texture of your Tiramisu Brownies. Once mixed, pour the batter into a greased 9×9-inch baking pan, smoothing out the top for even baking.
Step 4: Bake
Place the brownie pan in your preheated oven and bake for 25–30 minutes. Keep an eye on them; you’re looking for a set top with a toothpick testing clean but with a few moist crumbs sticking to it. Once done, take them out and allow the brownies to cool in the pan for about 15 minutes.
Step 5: Prepare the Mascarpone Layer
In a mixing bowl, combine 1 cup of mascarpone cheese, 1 tablespoon of espresso or espresso powder, and 2 tablespoons of granulated sugar. Use an electric mixer to blend these ingredients until smooth and creamy. The mixture should be light and fluffy, ready to create a luscious layer on top of your brownies.
Step 6: Assemble the Tiramisu Brownies
Once the brownies are completely cool, spread the mascarpone mixture evenly over the brownie base using a spatula. This layer will contrast beautifully with the fudgy brownie below. Ensure the mascarpone is spread all the way to the edges for every delicious bite to have that iconic tiramisu flavor.
Step 7: Dust with Cocoa
To finish, dust a generous layer of cocoa powder over the mascarpone, using a fine sieve for even coverage. This will add both flavor and a beautiful presentation. The rich cocoa on top will enhance the overall appearance, making your Tiramisu Brownies even more irresistible.
Step 8: Chill
Refrigerate the brownies for at least 2 hours to allow the layers to set and the flavors to meld together beautifully. Once chilled, slice them into squares for serving. The waiting time helps achieve that delightful balance between the creamy mascarpone and fudgy brownies, creating a truly indulgent dessert.
Expert Tips for Tiramisu Brownies
-
Chill Time Matters: Always refrigerate your brownies for at least 2 hours to enhance flavor and allow the mascarpone layer to set properly.
-
Cutting Technique: Use a sharp knife dipped in hot water for clean cuts when slicing, ensuring beautiful presentation slices of your Tiramisu Brownies.
-
Quality Ingredients: Opt for high-quality dark chocolate and fresh mascarpone to elevate the flavors of your dessert; it truly makes a difference!
-
Flavor Variations: Feel free to experiment with different coffee flavors or liqueurs for special occasions, but remember to keep the balance of flavors in your Tiramisu Brownies.
-
Don’t Overmix: When folding in the flour, do it gently to maintain the fudgy texture; overmixing can lead to denser brownies than desired.
Tiramisu Brownies Recipe Variations
Feel free to put your own spin on these delightful brownies and let your taste buds run wild!
- Gluten-Free: Substitute almond flour for all-purpose flour to create a gluten-free version that’s just as delicious.
- Dairy-Free: Use coconut oil instead of unsalted butter for a dairy-free option while still ensuring the richness of the brownies.
- Extra Espresso: For a stronger coffee flavor, add 1 teaspoon of brewed espresso to the mascarpone mixture—this can elevate that tiramisu essence!
- Nutty Crunch: Fold in chopped walnuts or hazelnuts into the brownie batter for added texture and a delightful crunch in each bite.
- Minty Delight: Add a few drops of peppermint extract to the mascarpone layer for a refreshing mint twist that complements the coffee beautifully.
- Choco-Mocha: Swap half of the dark chocolate for milk chocolate for a sweeter take, perfect for those who enjoy a sweeter brownie.
- Spiced Touch: Sprinkle a pinch of cinnamon or even nutmeg into the brownie batter for an aromatic flavor that adds warmth and depth.
- Layered Surprise: For an indulgent twist, create a layer of raspberry puree between the brownie and mascarpone layers—this fruity contrast is delightful!
With so many delicious possibilities, you’ll never get bored of these Tiramisu Brownies! Don’t hesitate to explore different flavors, and while you’re at it, check out my guide on how to make homemade whipped cream to elevate your dessert even more. Enjoy your kitchen adventures!
How to Store and Freeze Tiramisu Brownies
Fridge: Store your Tiramisu Brownies covered in the refrigerator for up to 5 days. This ensures they stay fresh and the flavors meld beautifully.
Freezer: For longer storage, freeze individual slices wrapped in plastic wrap and placed in airtight containers for up to 2 months.
Thawing: To enjoy, simply transfer the brownies from the freezer to the fridge overnight to thaw, allowing them to maintain their delightful texture.
Reheating: If preferred, you can enjoy them warm by gently microwaving a slice for about 10-15 seconds, letting the creamy mascarpone layer soften.
Make Ahead Options
These Ultimate Tiramisu Brownies are perfect for busy home cooks looking to save time on meal prep! You can prepare the brownie base up to 24 hours in advance; simply bake, cool, and wrap tightly in plastic wrap before refrigerating. The mascarpone layer can also be made ahead; combine it and refrigerate for up to 3 days. When you’re ready to serve, spread the mascarpone over the cooled brownies, dust with cocoa powder, and chill for at least 2 hours before slicing. This ensures each bite retains that perfect texture and flavor, making your dessert just as delicious as if made fresh! Enjoy the ease and convenience of these prepped Ultimate Tiramisu Brownies with minimal fuss.
What to Serve with Ultimate Tiramisu Brownies?
Indulging in rich, coffee-infused brownies is an experience that deserves to be paired with equally delightful companions.
-
Vanilla Ice Cream: The creaminess of vanilla ice cream complements the brownie’s fudgy layers, creating a blissful contrast.
-
Espresso: A shot of hot espresso enhances the coffee flavor of the brownies and offers a delightful pick-me-up.
-
Whipped Cream: Light and airy whipped cream adds a touch of sweetness, balancing the richness of the mascarpone layer.
-
Fresh Berries: Juicy strawberries or raspberries provide a burst of freshness and a delightful tartness that cuts through the chocolatey indulgence.
-
Chocolate Sauce: Drizzling warm chocolate sauce enhances the decadence, making every bite even more indulgent.
-
Hazelnut Liqueur: For a sophisticated touch, serve with a small glass of hazelnut liqueur; the nutty flavor pairs beautifully with chocolate.
The combination of these pairings will elevate your Ultimate Tiramisu Brownies into a truly memorable dessert experience!
Tiramisu Brownies Recipe FAQs
What type of chocolate should I use for the brownies?
For the best flavor and fudginess, I recommend using dark chocolate with at least 70% cocoa. If you prefer a sweeter taste, semi-sweet chocolate can also be used as a substitute.
How should I store leftover Tiramisu Brownies?
Store the Tiramisu Brownies covered in the refrigerator for up to 5 days. Make sure to keep them in an airtight container to maintain their freshness and ensure the flavors meld beautifully.
Can I freeze Tiramisu Brownies?
Absolutely! For longer storage, freeze individual slices wrapped in plastic wrap and placed in airtight containers for up to 2 months. When ready to enjoy, simply transfer them from the freezer to the fridge overnight to allow them to thaw while keeping their delightful texture.
What if I want to make the brownies gluten-free?
Not a problem! You can substitute all-purpose flour with almond flour or a gluten-free flour blend to create a gluten-free version of these delicious Tiramisu Brownies. Just be mindful to check the moisture content as it may vary with different flour types.
How can I tell when the brownies are done baking?
Keep a close eye on your brownies! Bake them at 350°F (175°C) for 25–30 minutes. They’re done when the top is set, and a toothpick inserted comes out with a few moist crumbs clinging to it. Remember, a little underbaking is okay for that fudgy texture!
What can I use as a dairy-free alternative for mascarpone cheese?
You can substitute mascarpone with a high-quality dairy-free cream cheese. This will provide a similar tangy flavor and creamy texture, making it a perfect match for the Tiramisu Brownies. Enjoy your creation without compromising on taste!
Irresistible Tiramisu Brownies Recipe for Coffee Lovers
Ingredients
Equipment
Method
- Preheat your oven to 350°F (175°C). Melt together dark chocolate and unsalted butter over low heat, stirring until smooth.
- Remove from heat and mix in granulated sugar until fully combined.
- Whisk in eggs one at a time, mixing until smooth.
- Fold in all-purpose flour gently, then pour batter into a greased baking pan.
- Bake for 25–30 minutes until set top. Let cool for 15 minutes.
- In a bowl, combine mascarpone, espresso, and sugar. Blend until smooth and creamy.
- Spread the mascarpone mixture evenly over the cooled brownie base.
- Dust cocoa powder over the mascarpone layer.
- Refrigerate for at least 2 hours before slicing into squares.
Leave a Reply