
As I stood in my kitchen, contemplating yet another round of stale, store-bought snacks, inspiration struck. What if I could whip up something quick, delicious, and healthy? Enter my 4-Ingredient No-Bake Peanut Butter Protein Bars! These delightful bars combine the creamy goodness of peanut butter with chocolate chips for a chewy treat that’s irresistibly satisfying. Best of all, they come together in under 10 minutes—no oven required. Packed with protein and gluten-free, they’re perfect for busy days or post-workout recovery. Plus, with customizable flavors and simple substitutions, there’s always room for creativity. Curious about how to make this easy snack that your body will thank you for? Let’s dive in!
Why are these bars a game-changer?
Quick and Easy: These bars come together in under 10 minutes, making them a lifesaver for busy schedules.
Customizable Flavors: Feel free to experiment with different nut butters or protein powders, ensuring every batch is uniquely delicious.
Protein-Packed Nutrient Boost: Each bar is loaded with protein and healthy fats, keeping you energized throughout the day.
No-Bake Convenience: No oven means no hassle! Simply mix, chill, and enjoy these delectable treats.
Crowd-Pleasing Snack: Perfect for family gatherings or a fitness boost, impress your friends with homemade goodness without the fuss.
If you love experimenting with flavors, why not check out my recipe for Chocolate Peanut Butter bars next time?
No-Bake Peanut Butter Protein Bars Ingredients
For the Base
• Peanut Butter – A creamy foundation that provides healthy fats; swap with almond butter for a nut-free alternative.
• Protein Powder – Essential for that protein boost, keeping you full; use plant-based powder for a vegan-friendly option.
• Maple Syrup – Natural sweetener that binds the ingredients together; you can use honey or agave syrup if preferred.
For the Topping
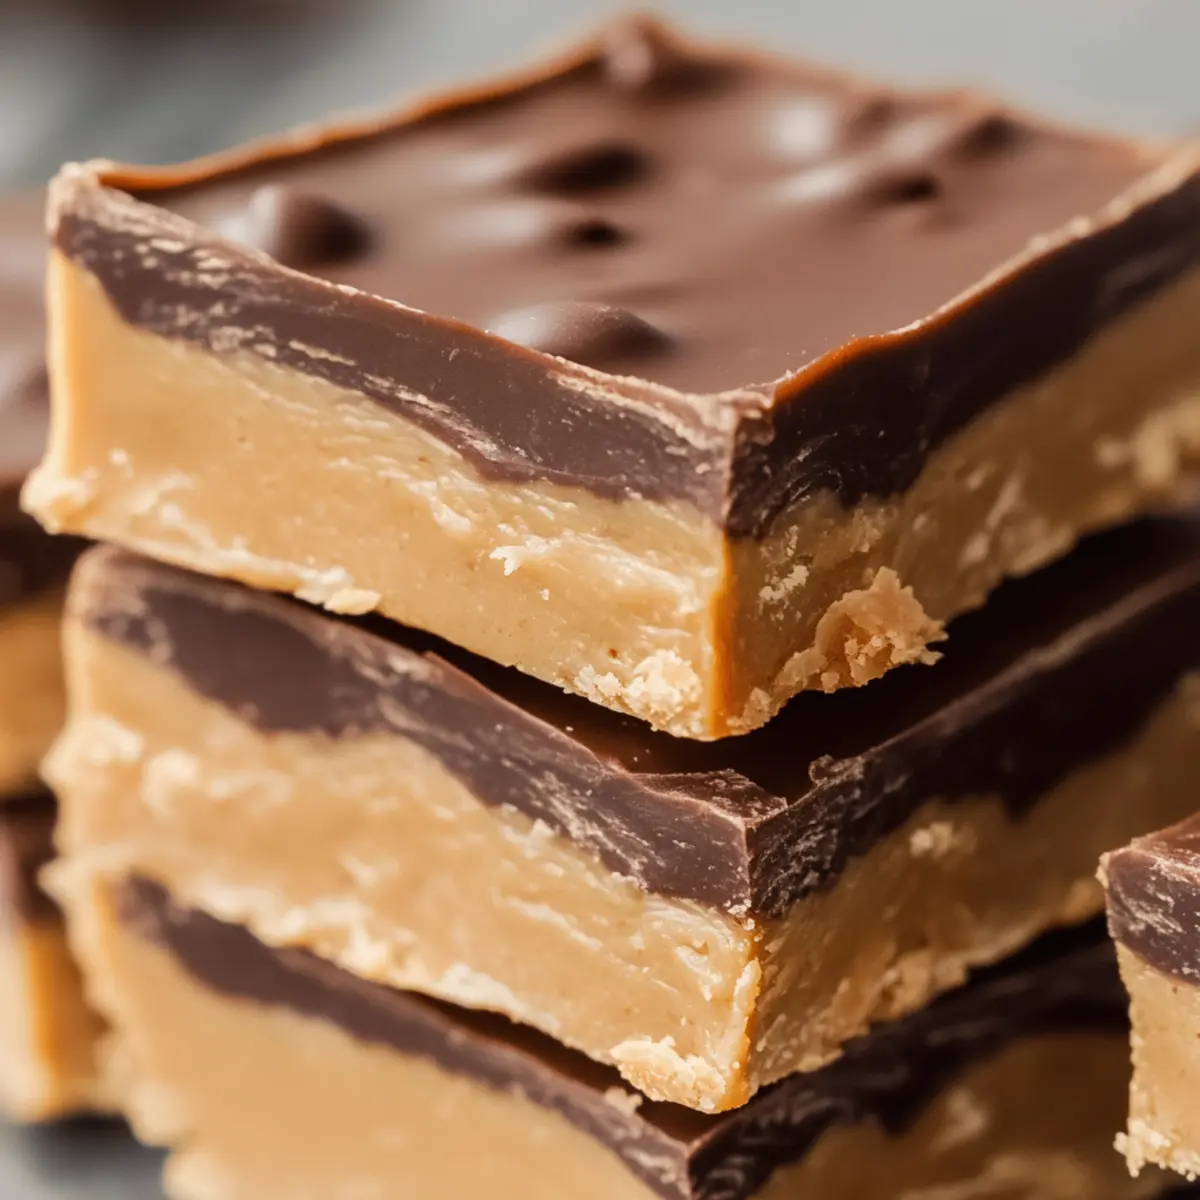
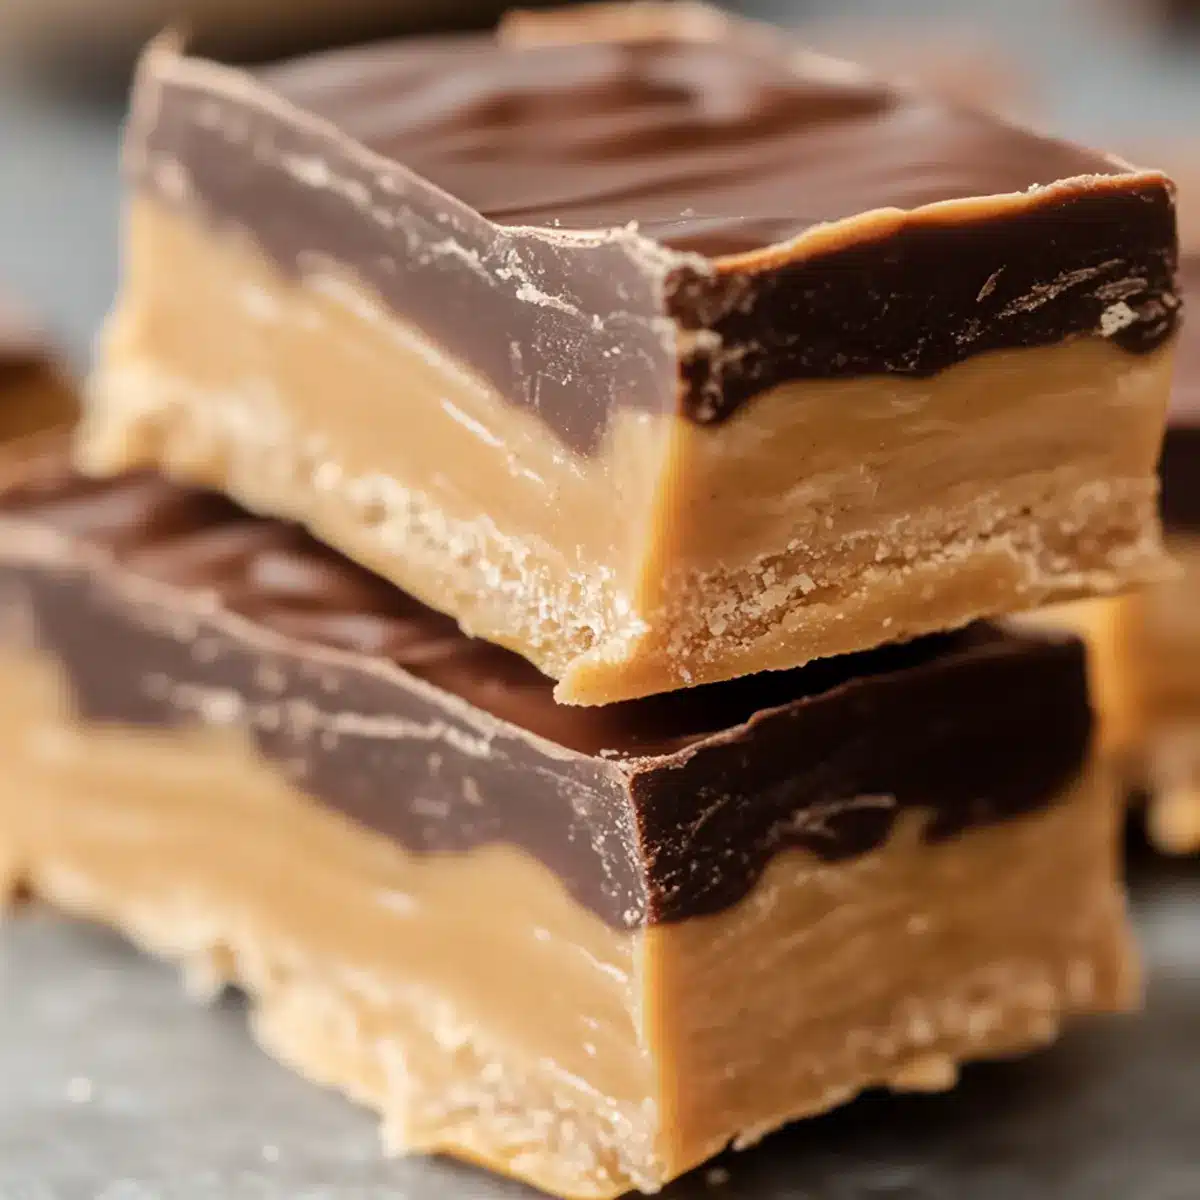
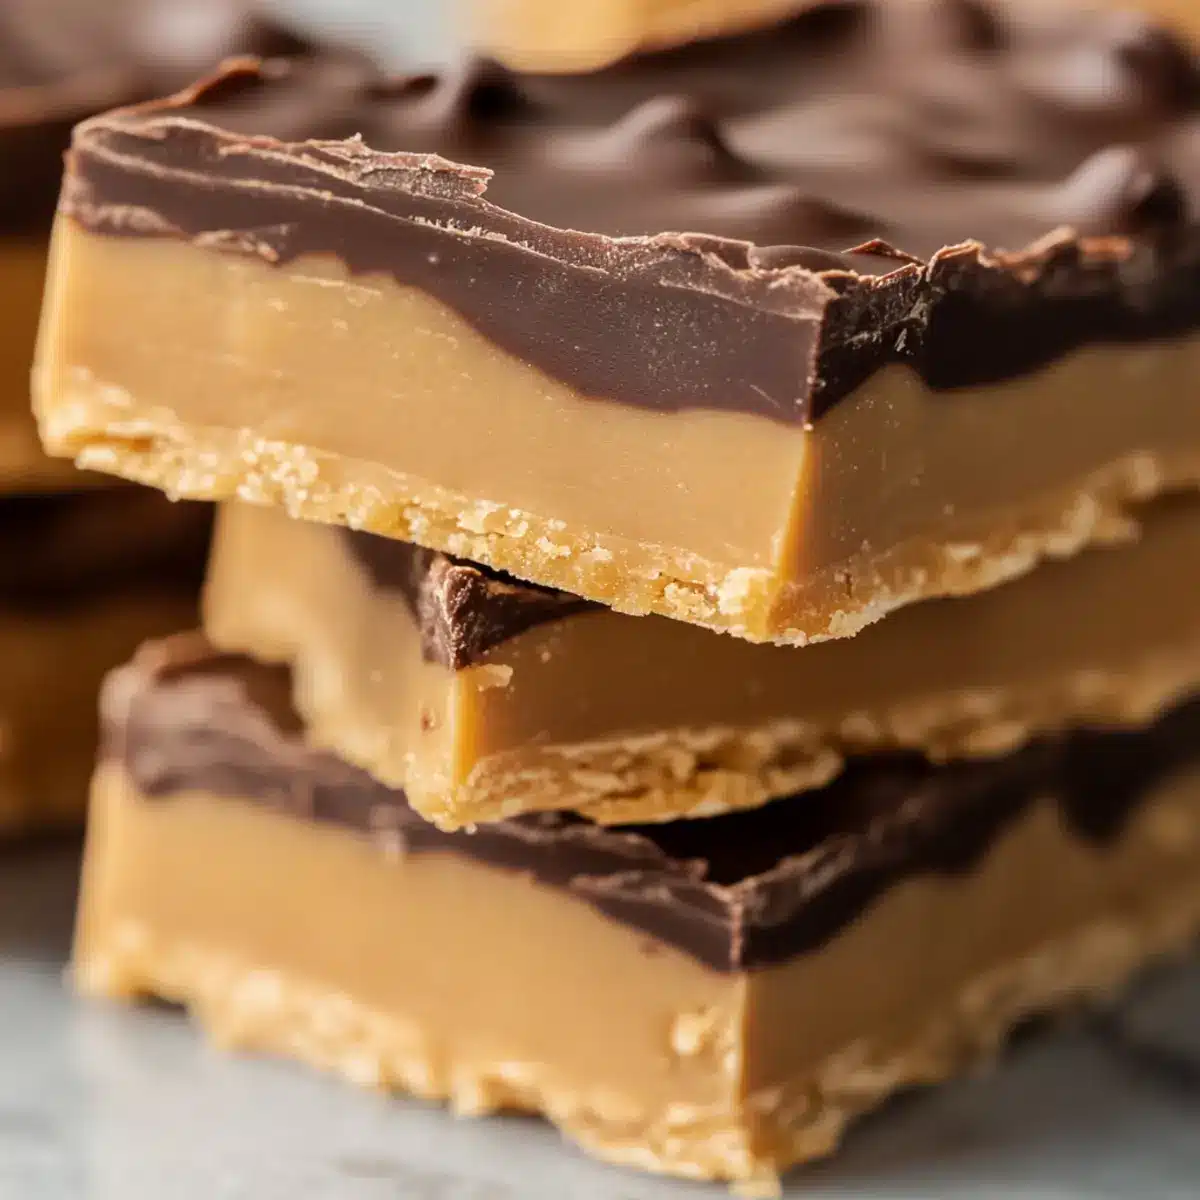
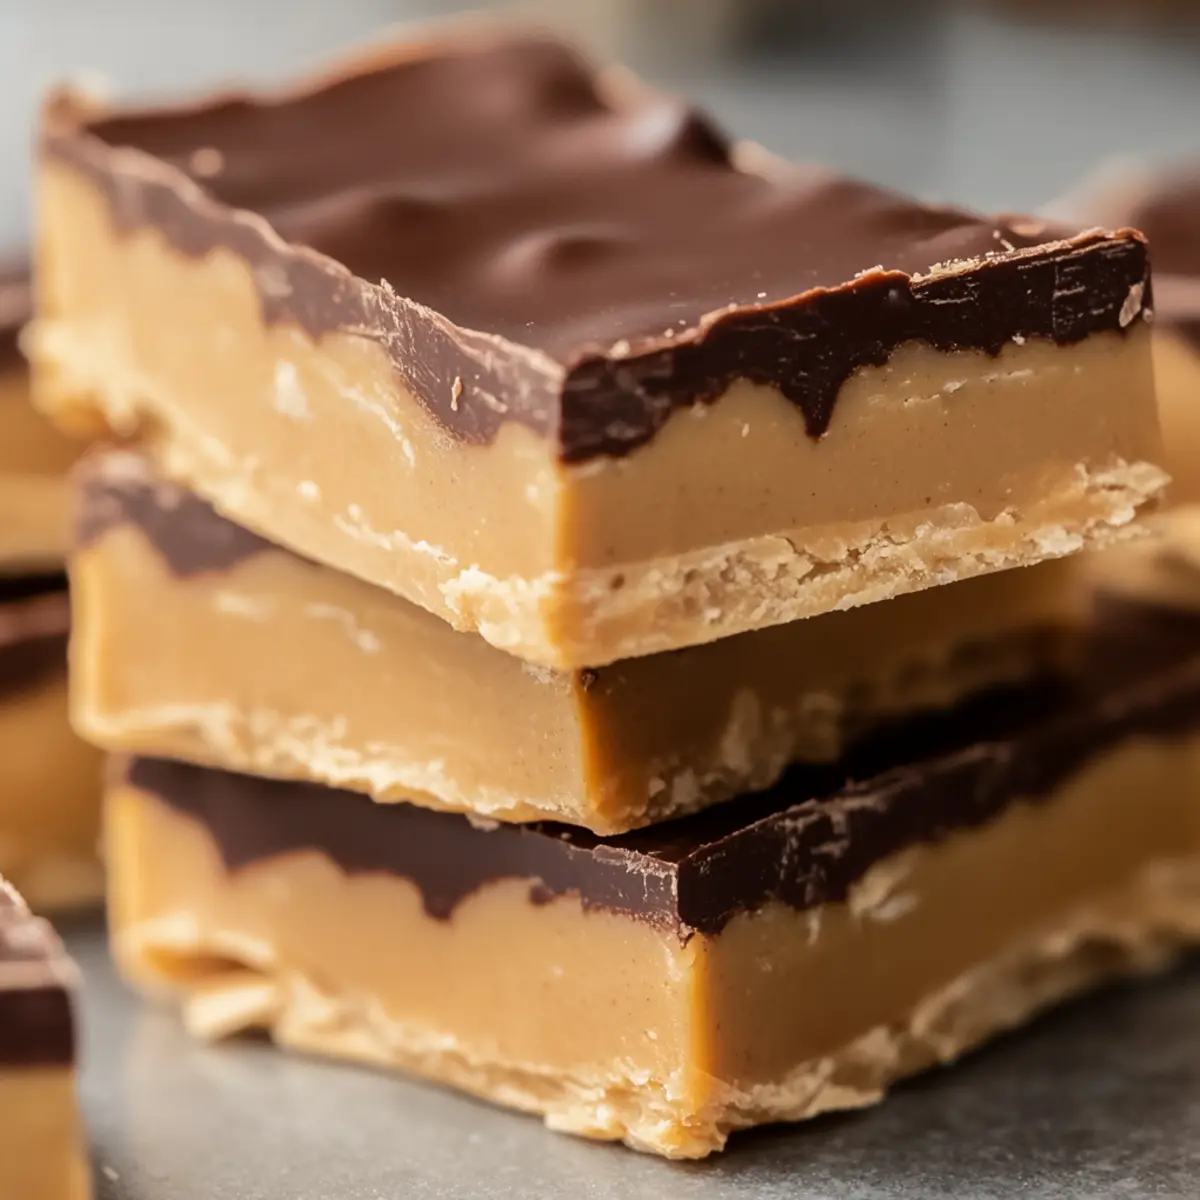
• Chocolate Chips – Add a rich flavor and delightful texture; opt for dairy-free chips for a vegan take.
These delightful No-Bake Peanut Butter Protein Bars are not only easy to make but also customizable to cater to your taste!
Step‑by‑Step Instructions for No-Bake Peanut Butter Protein Bars
Step 1: Mix the Base Ingredients
In a large mixing bowl, combine 1 cup of creamy peanut butter, 1 cup of protein powder, and a ½ cup of maple syrup. Use a spatula to blend the mixture until it becomes smooth and well-combined, which should take about 2-3 minutes. The goal is to achieve a thick, sticky consistency that holds together easily, signaling the perfect base for your No-Bake Peanut Butter Protein Bars.
Step 2: Incorporate the Chocolate Chips
Gently fold in ½ cup of chocolate chips into the peanut butter mixture, ensuring even distribution without breaking the chips. Use a spatula for this step, and take care to mix until you see the chocolate chips dotted throughout. This process will add a rich flavor and delightful texture to your protein bars, making them even more irresistible.
Step 3: Prepare the Baking Dish
Line an 8×8-inch baking dish with parchment paper, leaving some overhang to help remove the bars later. Transfer the peanut butter mixture into the prepared dish, using a spatula to spread it evenly across the bottom. Press down firmly to compact the mixture, creating an even layer—this should take about 1-2 minutes. Ensuring a flat surface will help the bars set properly when chilled.
Step 4: Chill to Set
Place the baking dish into the refrigerator and allow the mixture to chill for at least 1 hour. This cooling time is crucial as it helps the bars firm up, making them easier to cut and enjoy later. You’ll know they’re ready when the mixture feels solid to the touch and retains its shape without sinking under pressure.
Step 5: Cut and Serve
Once set, remove the peanut butter protein bars from the dish by gently lifting them out using the parchment paper overhang. Place them on a cutting board and slice into bars of your desired size, usually about 8-10 pieces. These No-Bake Peanut Butter Protein Bars can be stored in an airtight container in the fridge for up to two weeks, ready to fuel your busy day with deliciousness!
Make Ahead Options
These No-Bake Peanut Butter Protein Bars are a dream for meal prep enthusiasts! You can mix the base with peanut butter, protein powder, and maple syrup up to 24 hours in advance, then store it in the fridge until you’re ready to finish. Simply prepare the mixture, press it into the lined baking dish, and refrigerate as instructed. To maintain quality, cover the dish tightly with plastic wrap—this helps prevent any excess moisture. When you’re ready to enjoy, just add the chocolate chips, chill for at least 1 hour, and then cut into bars. You’ll have delicious, chewy snacks at your fingertips, perfect for busy days!
No-Bake Peanut Butter Protein Bars Variations
Feel free to get creative and enhance the flavor of your protein bars with these delightful twists!
- Nut-Free: Swap peanut butter for sunflower seed butter to ensure a tasty treat that’s safe for nut allergies.
- Vegan Delight: Use plant-based protein powder and dairy-free chocolate chips to craft a completely vegan version that’s equally delicious.
- Chocolate Boost: Add 2 tablespoons of cocoa powder to create a rich, chocolatey flavor that pairs perfectly with the peanut butter.
- Fruity Twist: Mix in a ½ cup of dried fruits like cranberries or apricots for a chewy, sweet surprise in every bite.
- Crunch Factor: Incorporate ¼ cup of chopped nuts or seeds for an added crunch that elevates the texture and flavor.
- Salted Caramel: Drizzle a bit of melted caramel over your bars before chilling for a sweet and salty flavor that takes them to the next level.
- Spicy Kick: Add a pinch of cayenne or red pepper flakes for a tantalizing heat that contrasts beautifully with the sweetness.
And if you’re a fan of all things peanut butter, don’t forget to check out my Thai Grilled Peanut for another scrumptious peanut-infused recipe!
What to Serve with No-Bake Peanut Butter Protein Bars
These delightful bars make the perfect centerpiece for a wholesome snack spread, inspiring creativity and comfort around your kitchen table.
- Fresh Fruit Salad: A vibrant mix of seasonal fruits will add a refreshing contrast, boosting your snack with juicy flavors and nutrients.
- Greek Yogurt: A creamy scoop alongside your bars not only enhances texture but also ups the protein content for a balanced treat.
- Nutty Trail Mix: Pair with a handful of your favorite nuts and seeds for added crunch and a diverse flavor profile that complements the bars beautifully.
- Chocolate Smoothie: A rich, chocolatey smoothie serves as a drinkable dessert that harmonizes with the chocolate chips in your bars.
- Celery Sticks with Hummus: Crisp celery adds a fresh crunch, while hummus introduces a savory twist, balancing the sweetness of the bars.
- Matcha Green Tea: This lightly grassy beverage provides a calming contrast, creating a soothing moment with a touch of elegance alongside your energy bars.
- Chia Seed Pudding: Fold in some cocoa for a luscious dessert that mirrors the bars’ flavors, ensuring a delightful and indulgent experience.
- Mini Cheese Platter: Offer a selection of cheeses for a savory-complement that perfectly pairs with the sweet, nutty energy of your peanut butter bars.
Expert Tips for No-Bake Peanut Butter Protein Bars
-
Choose Quality Peanut Butter: Using natural peanut butter without added sugar or oils ensures a richer flavor and healthier bars.
-
Mixing Consistency Matters: If the mixture feels too dry, a splash of milk or water can help achieve that sticky texture needed for your No-Bake Peanut Butter Protein Bars.
-
Pressing Technique: When pressing the mixture into the dish, use a spatula or damp hands to ensure even thickness and proper setting.
-
Chill Time is Key: Don’t rush the chilling process; allowing at least 1 hour in the fridge helps the bars solidify for perfect slicing later.
-
Experiment with Variations: Feel free to add in dried fruit, seeds, or coconut flakes for extra texture and flavor that can enhance your No-Bake Peanut Butter Protein Bars!
How to Store and Freeze No-Bake Peanut Butter Protein Bars
-
Fridge: Keep your bars in an airtight container in the fridge for up to 2 weeks. This helps maintain their freshness and chewiness, making them a perfect, quick snack at any time.
-
Freezer: For longer storage, freeze the bars individually wrapped in plastic wrap or in a freezer-safe bag for up to 3 months. Thaw in the fridge or at room temperature before enjoying.
-
Cut Before Storing: Cut the bars into portions before storing. This makes it easier to grab a quick snack when you’re on the go, without needing to thaw the entire batch.
-
Reheating: If you prefer them warm, microwave the bars briefly for 10-15 seconds to enjoy a gooey texture, enhancing the flavors of the No-Bake Peanut Butter Protein Bars.
No-Bake Peanut Butter Protein Bars Recipe FAQs
What type of peanut butter should I use?
Absolutely! Opt for natural peanut butter that contains just peanuts and salt; this ensures a richer flavor without unwanted additives. Avoid brands with added sugars or oils for the healthiest bars.
How should I store my No-Bake Peanut Butter Protein Bars?
Store your bars in an airtight container in the fridge for up to 2 weeks. This keeps them fresh, chewy, and ready for a quick snack anytime you crave a delicious pick-me-up!
Can I freeze No-Bake Peanut Butter Protein Bars?
Yes! For longer storage, wrap the bars individually in plastic wrap or place them in a freezer-safe bag. They’ll stay fresh for up to 3 months. Thaw in the fridge overnight or at room temperature before enjoying!
What if my peanut butter mixture is too dry?
No worries! If your mixture feels too dry while mixing, adding a splash of milk or water can help achieve that perfect sticky texture essential for your No-Bake Peanut Butter Protein Bars. Just mix until the desired consistency is reached.
Are there any dietary considerations for these bars?
Definitely! If you’re concerned about allergies, you can substitute peanut butter with almond butter or sunflower seed butter for nut-free options. For a vegan-friendly version, ensure you use plant-based protein powder and substitute maple syrup with agave syrup.
Can I customize the flavors in these bars?
Very much so! Experimentation is encouraged! You can mix in dried fruits, cocoa powder for a chocolatey twist, or even add a sprinkle of sea salt on top for enhanced flavor. The more the merrier when it comes to creativity!
Delicious No-Bake Peanut Butter Protein Bars for Quick Fuel
Ingredients
Equipment
Method
- In a large mixing bowl, combine peanut butter, protein powder, and maple syrup. Blend until smooth and well-combined, about 2-3 minutes.
- Gently fold in chocolate chips into the peanut butter mixture until evenly distributed.
- Line an 8x8-inch baking dish with parchment paper and transfer the mixture into the dish. Spread evenly and press down firmly.
- Place the baking dish into the refrigerator and chill for at least 1 hour to firm up.
- Once set, lift the bars out using parchment paper, slice into desired sizes, and store in an airtight container.
Leave a Reply