
The moment you pull a tray of warm, golden-brown flaky cheese danishes from your oven, you will understand why breakfast can be the best part of the day. As the sweet aroma fills your kitchen, it’s hard to resist the urge to dive in right away. This recipe for Flaky Cheese Danish not only brings a touch of gourmet café flair to your mornings, but it also offers the chance to showcase your baking skills with its simple yet rewarding technique. With just a handful of ingredients, you’ll create a delightful treat that’s flaky on the outside and creamy on the inside—perfect for impressing guests or simply enjoying during a quiet moment. Plus, these homemade danishes are freezer-friendly, meaning you can savor the deliciousness anytime without the rush. Aren’t you curious to see just how easy it is to whip up these scrumptious pastries? Let’s get started!
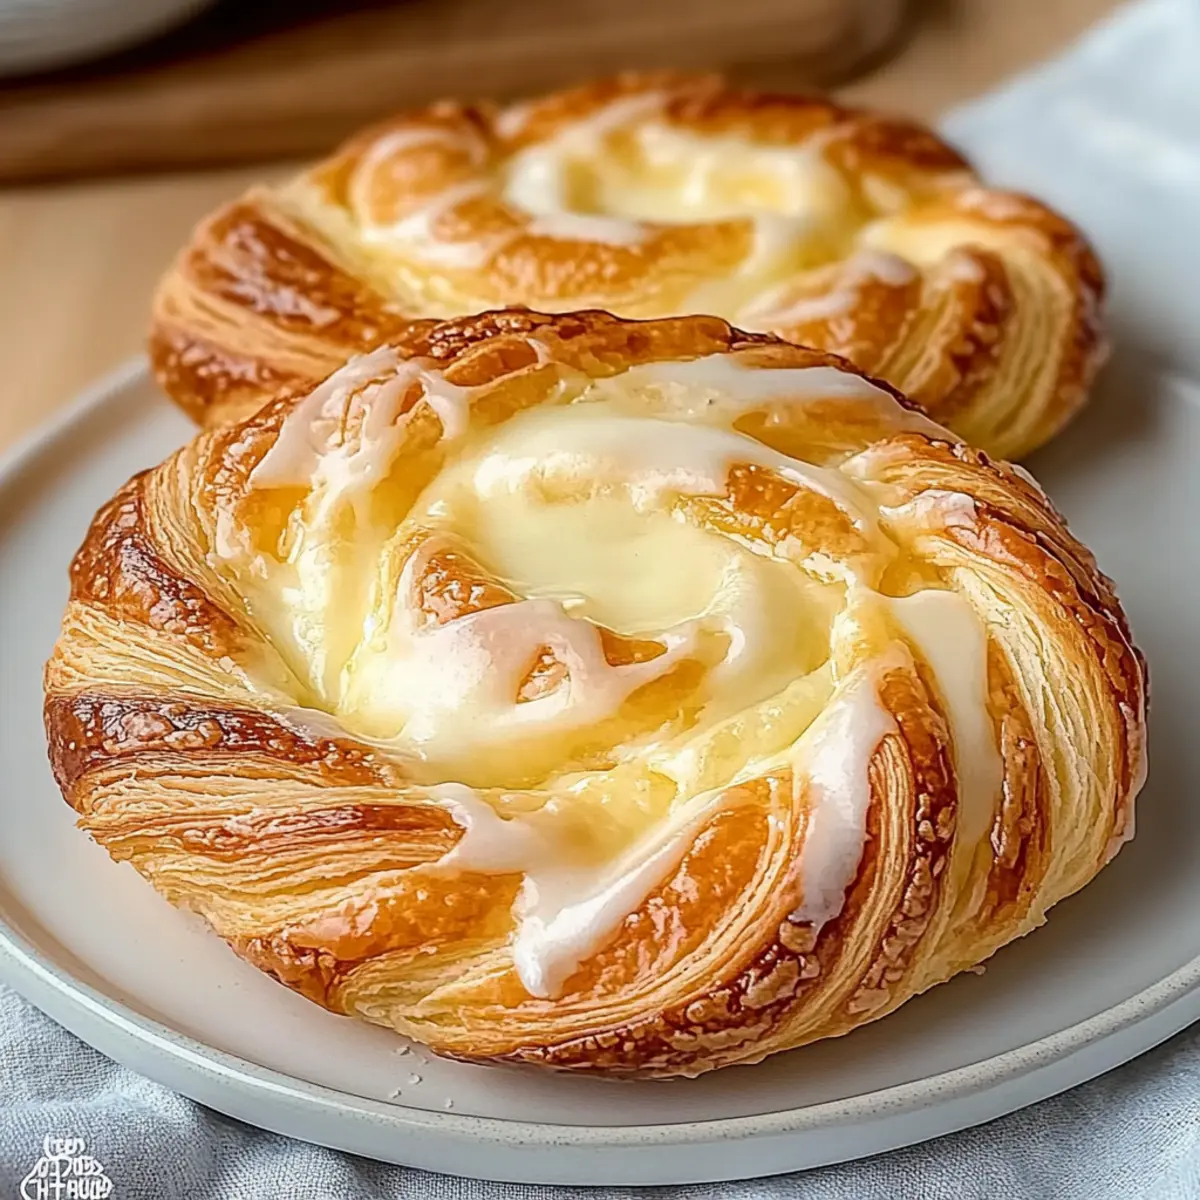
Why is this Flaky Cheese Danish irresistible?
Melt-in-Your-Mouth Texture: The combination of flaky pastry and rich cream cheese filling creates a heavenly experience with every bite.
Simplicity: With just a few key ingredients, this recipe ensures that anyone can achieve pastry perfection.
Versatile Customization: Add a variety of fillings like fresh jam or fruit to personalize your danishes, making them suitable for any palate.
Perfect for Sharing: Ideal for brunch gatherings or cozy family breakfasts, these danishes are sure to impress everyone at the table.
Make-Ahead Friendly: Prepare a batch and freeze them, so you can enjoy fresh pastries on those busy mornings without hassle!
Eager to explore more cheesy delights? Check out our Goat Cheese Grilled sandwich for a savory twist!
Flaky Cheese Danish Ingredients
For the Dough
• All-Purpose Flour – Structure for the pastry; using bread flour can give it more chewiness.
• Granulated Sugar – Adds sweetness to the dough; coconut sugar can be a great lower glycemic substitute.
• Salt – Enhances the flavor of the dough; no direct substitute recommended.
• Active Dry Yeast – Acts as a leavening agent for rise; instant yeast can be used without proofing.
• Warm Milk – Activates yeast and adds moisture; try non-dairy milk as a substitute if needed.
• Egg – Binds the dough and enriches flavor; a flax egg works well for a vegan alternative.
• Butter – Provides flakiness and flavor to your pastry; vegan butter is perfect for a dairy-free option.
For the Filling
• Cream Cheese – Creates a rich, creamy texture in the filling; mascarpone is a delightful alternative.
For the Glaze
• Powdered Sugar – Used for the glaze; feel free to omit for a less-sweet treat.
• Milk or Lemon Juice – Helps achieve glaze consistency; almond milk is a great dairy-free choice.
• Vanilla Extract – Enhances the glaze’s flavor; opt for pure vanilla for the best taste.
This Flaky Cheese Danish recipe is not just a regular breakfast treat; it’s a beautiful expression of love served warm from your own kitchen!
Step‑by‑Step Instructions for Flaky Cheese Danish
Step 1: Make the Dough
In a large mixing bowl, combine all-purpose flour, granulated sugar, and salt. In a separate bowl, gently mix warm milk with active dry yeast and let it sit for about 5 minutes until frothy. Add in the egg, combining all ingredients, and knead the mixture for 6 to 8 minutes until smooth. Wrap the dough in plastic, refrigerate it for 30 minutes to chill and enhance the flakiness of your flaky cheese danish.
Step 2: Prepare Butter Block
While the dough is chilling, prepare the butter block. Take cold butter and place it between two sheets of parchment paper, pressing it out to form an 8-inch square. Ensure the butter is firm yet pliable—this is crucial for the lamination process. Once shaped, pop it back in the fridge to keep chilled while you wait for the dough to finish its rest.
Step 3: Laminate the Dough
Roll the chilled dough into a 16-inch square on a lightly floured surface. Place the chilled butter in the center and fold the corners of the dough over the butter to fully enclose it. Roll the dough out to create an 8×24 inch rectangle, then fold the dough into thirds like a letter. Wrap it tightly and refrigerate for 30 minutes to an hour, repeating this folding and rolling process two more times to create layers in the flaky cheese danish.
Step 4: Shape the Danish
After the final chill, roll the dough out to a thickness of 1/4 inch and cut it into 4-inch squares. In the center of each square, place a generous spoonful of cream cheese filling. Fold the corners of the square towards the center to create a beautiful shape, or leave them open for a rustic look. Transfer the shaped danishes onto a parchment-lined baking sheet.
Step 5: Proof and Bake
Cover the pastries with a clean kitchen towel and allow them to proof in a warm area for about 1 hour until puffed and slightly risen. Preheat your oven to 390°F (200°C). Once the danishes have risen, brush each one with an egg wash for that golden finish and bake for 15 to 20 minutes or until they’re beautifully golden brown and flaky.
Step 6: Glaze and Serve
After baking, remove the danishes from the oven and let them sit for a few minutes to cool slightly. In a small bowl, whisk together powdered sugar, milk or lemon juice, and vanilla extract until smooth to create your glaze. Drizzle the glaze generously over the warm flaky cheese danishes, and get ready to serve this delightful pastry that’s sure to impress!

Expert Tips for Flaky Cheese Danish
-
Warm Milk Matters: Always ensure the milk is warm, not hot, as excess heat can kill the yeast, preventing your flaky cheese danish from rising.
-
Knead Well: Knead the dough sufficiently for 6 to 8 minutes to develop the gluten, which gives your pastry its delightful structure.
-
Chill Often: Don’t skip the chilling steps! Keeping your dough and butter chilled between lamination processes helps achieve maximum flakiness.
-
Egg Wash for Shine: Brush your danishes with an egg wash before baking to get that irresistible golden color and glossy finish.
-
Cool Before Glazing: Let your baked danishes cool for a few minutes before applying the glaze; this ensures it doesn’t melt off and allows for better adhesion.
-
Freezing Tip: If you plan to freeze your flaky cheese danish, freeze them right after shaping, and let them rise before baking whenever you’re ready for a fresh treat!
What to Serve with Flaky Cheese Danish
Indulging in flaky cheese danish is a delightful experience, but pairing it with the right sides can elevate your breakfast or brunch to a whole new level.
- Fresh Fruit Salad: A bright medley of seasonal fruits adds a refreshing contrast to the richness of the pastry, balancing flavors beautifully.
- Herbal Tea: Sipping on chamomile or mint tea complements the pastry’s sweetness and adds a soothing element to your morning routine.
- Crispy Bacon: The savory crunch of crispy bacon pairs perfectly, creating a delightful sweet and salty combination that will tantalize your taste buds.
- Creamy Yogurt Parfait: Layered with granola and fresh berries, this parfait offers a creamy texture that enhances your cheese danish experience.
- Nutty Granola: Adding a sprinkle of homemade granola brings a delightful crunch and nutty flavor that contrasts beautifully with the flaky pastry.
- Iced Coffee: A chilled iced coffee with a splash of cream enhances the deliciousness of the danish while providing a refreshing lift in the morning.
Serve your flaky cheese danish alongside these delightful options, and watch as every bite transforms into a gourmet morning experience!
Flaky Cheese Danish Variations
Discover exciting ways to customize your flaky cheese danish and create your perfect pastry experience!
-
Berry Bliss: Add fresh berries or your favorite jam on top of the cheese filling for a fruity explosion. It adds a pop of color and flavor, making each bite even more delightful. A touch of sweetness is always welcome!
-
Cinnamon Spice: Sprinkle some ground cinnamon into the cream cheese filling to add warmth and a cozy twist. This comforting spice takes the classic danish to a new level, filling your kitchen with enticing aromas.
-
Nutty Crunch: Incorporate chopped nuts like pecans or almonds into the cream cheese filling for extra flavor and texture. The delightful crunch contrasts beautifully with the pastry’s softness, creating a delightful bite every time.
-
Chocolate Swirl: For a rich treat, swirl in some chocolate ganache or cocoa powder into the cream cheese filling. Chocolate lovers will adore this indulgent variation—decadence at its finest!
-
Lemon Zest: Add fresh lemon zest to the cream cheese mixture for a refreshing citrus kick. This bright twist will balance the sweetness, making your danishes feel lighter and more vibrant—perfect for spring.
-
Savory Option: Replace the cream cheese with a herbed goat cheese for a savory take on this classic pastry. Pairing it with a drizzle of honey creates an unexpected yet heavenly combination—great for brunch gatherings!
-
Vegan Delight: Substitute the cream cheese with a plant-based alternative and use vegan butter for a completely dairy-free option. Your friends won’t believe these danishes are vegan!
-
Spicy Kick: Mix in a touch of chili powder or red pepper flakes into the cheese filling for a surprising bit of heat. This bold flavor will tantalize the taste buds and make your danishes stand out—perfect for adventurous eaters!
Don’t forget to pair your danish with a warm cup of coffee or explore more cheesy options like our Fried Goat Cheese or mouthwatering Ham Cheese Puff. Enjoy your baking adventure!
How to Store and Freeze Flaky Cheese Danish
Airtight Container: Store any leftover flaky cheese danish in an airtight container for up to 2 days at room temperature, ensuring they stay fresh and delicious.
Refrigeration: If you prefer a longer storage option, refrigerate them wrapped in plastic wrap. They can last up to 5 days, just be sure to reheat them for a few minutes for optimal taste.
Freezer-Friendly: For long-term storage, freeze your shaped, unbaked danishes by placing them on a baking sheet until firm, then transfer them to a freezer-safe bag. They stay good for up to 2 months.
Reheating Instructions: When ready to enjoy, thaw the frozen danishes in the refrigerator overnight, then let them rise for about an hour before baking to restore their flaky texture.
Make Ahead Options
These flaky cheese danishes are perfect for busy home cooks looking to save time during hectic mornings! You can prepare the dough and shape the danishes up to 24 hours in advance, simply refrigerate them on a parchment-lined baking sheet covered with plastic wrap to prevent drying out. The cream cheese filling can also be made up to 3 days ahead; just keep it in an airtight container in the fridge. When you’re ready to bake, allow the danishes to proof for about an hour before popping them in the oven for that fresh, warm pastry experience. With this make-ahead strategy, you can enjoy delicious cheese danishes without the morning rush!

Flaky Cheese Danish Recipe FAQs
How do I choose the right ripeness for my cream cheese?
When selecting your cream cheese, go for one that is fresh and smooth. Avoid packages that show any signs of bulging, as this indicates spoilage. The cream cheese should be creamy and spreadable, free of any dark spots or discoloration. I often recommend using block cream cheese rather than the spreadable variety, as it has a firmer texture that holds up better in a danish.
How should I store leftover flaky cheese danishes?
Absolutely! Store any leftover flaky cheese danish in an airtight container at room temperature for up to 2 days. For longer storage, wrap them securely in plastic wrap and refrigerate for up to 5 days. Reheat in a microwave for about 10-15 seconds for a quick treat or pop them in the oven for a few minutes to restore their flakiness!
Can I freeze flaky cheese danishes?
Yes, indeed! To freeze your danishes, shape them and place them on a parchment-lined baking sheet. Freeze until solid, then transfer them to a freezer-safe bag or container. They will keep well for up to 2 months. When you’re ready to enjoy, thaw in the refrigerator overnight, let them rise for about an hour, then bake as directed!
What if my dough doesn’t rise?
If your dough isn’t rising, it might be due to the yeast being inactive. Ensure that you use warm milk (around 110°F) to activate the yeast and give it enough time to froth up before mixing it into the dry ingredients. Also, check the expiration date on your yeast. If all else fails, a quick trick is to create a warm environment by preheating your oven to its lowest setting for a minute, turning it off, and then placing your dough inside while keeping it covered!
Are flaky cheese danishes suitable for people with allergies?
Good question! This recipe isn’t inherently gluten-free or nut-free due to the use of all-purpose flour and butter. However, you can make adjustments by substituting the flour with a gluten-free flour blend and using vegan butter to accommodate dairy allergies. Always carefully read labels if you’re cooking for someone with allergies to avoid cross-contamination.

Irresistibly Flaky Cheese Danish for a Perfect Morning Delight
Ingredients
Equipment
Method
- In a large mixing bowl, combine all-purpose flour, granulated sugar, and salt.
- In a separate bowl, gently mix warm milk with active dry yeast and let it sit for about 5 minutes until frothy.
- Add in the egg, combining all ingredients, and knead the mixture for 6 to 8 minutes until smooth.
- Wrap the dough in plastic, refrigerate it for 30 minutes.
- Take cold butter and place it between two sheets of parchment paper, pressing it out to form an 8-inch square.
- Keep the butter chilled while the dough finishes resting.
- Roll the chilled dough into a 16-inch square.
- Place the chilled butter in the center and fold the corners of the dough over the butter to enclose it.
- Roll the dough out to create an 8x24 inch rectangle, fold it into thirds, and refrigerate for another 30 minutes.
- After the final chill, roll the dough out to a thickness of 1/4 inch and cut it into 4-inch squares.
- Place cream cheese filling in the center of each square and fold the corners toward the center.
- Transfer the shaped danishes onto a parchment-lined baking sheet.
- Cover the pastries with a towel and allow them to proof for 1 hour.
- Preheat the oven to 390°F (200°C) and brush danishes with an egg wash.
- Bake for 15 to 20 minutes until golden brown.
- Let danishes cool slightly, then whisk together powdered sugar, milk or lemon juice, and vanilla extract for the glaze.
- Drizzle the glaze over the warm danishes.
Leave a Reply