
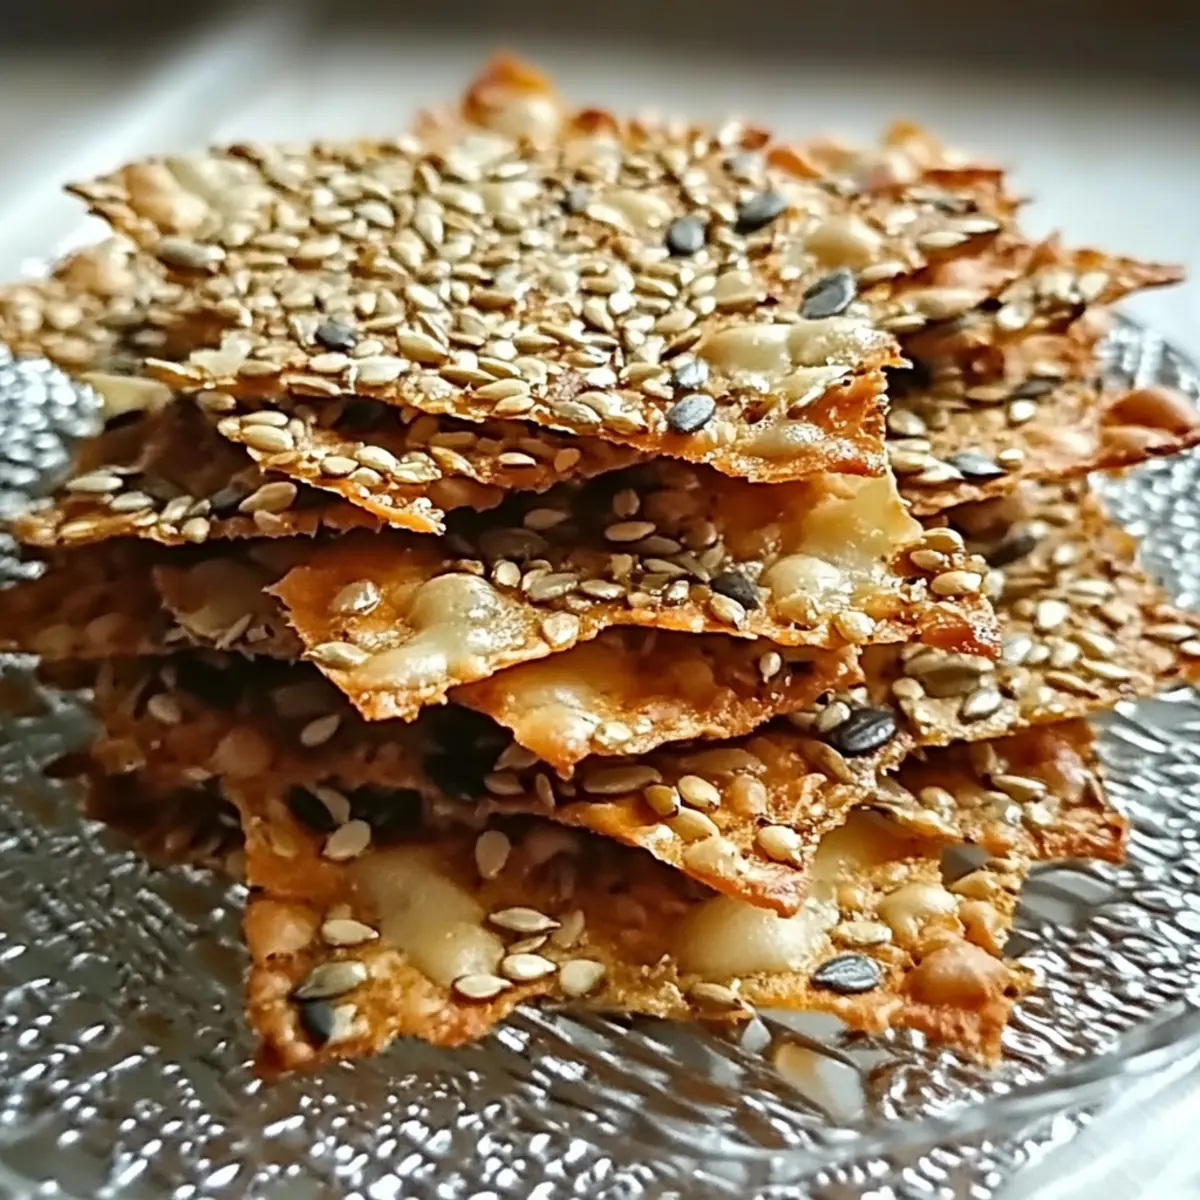
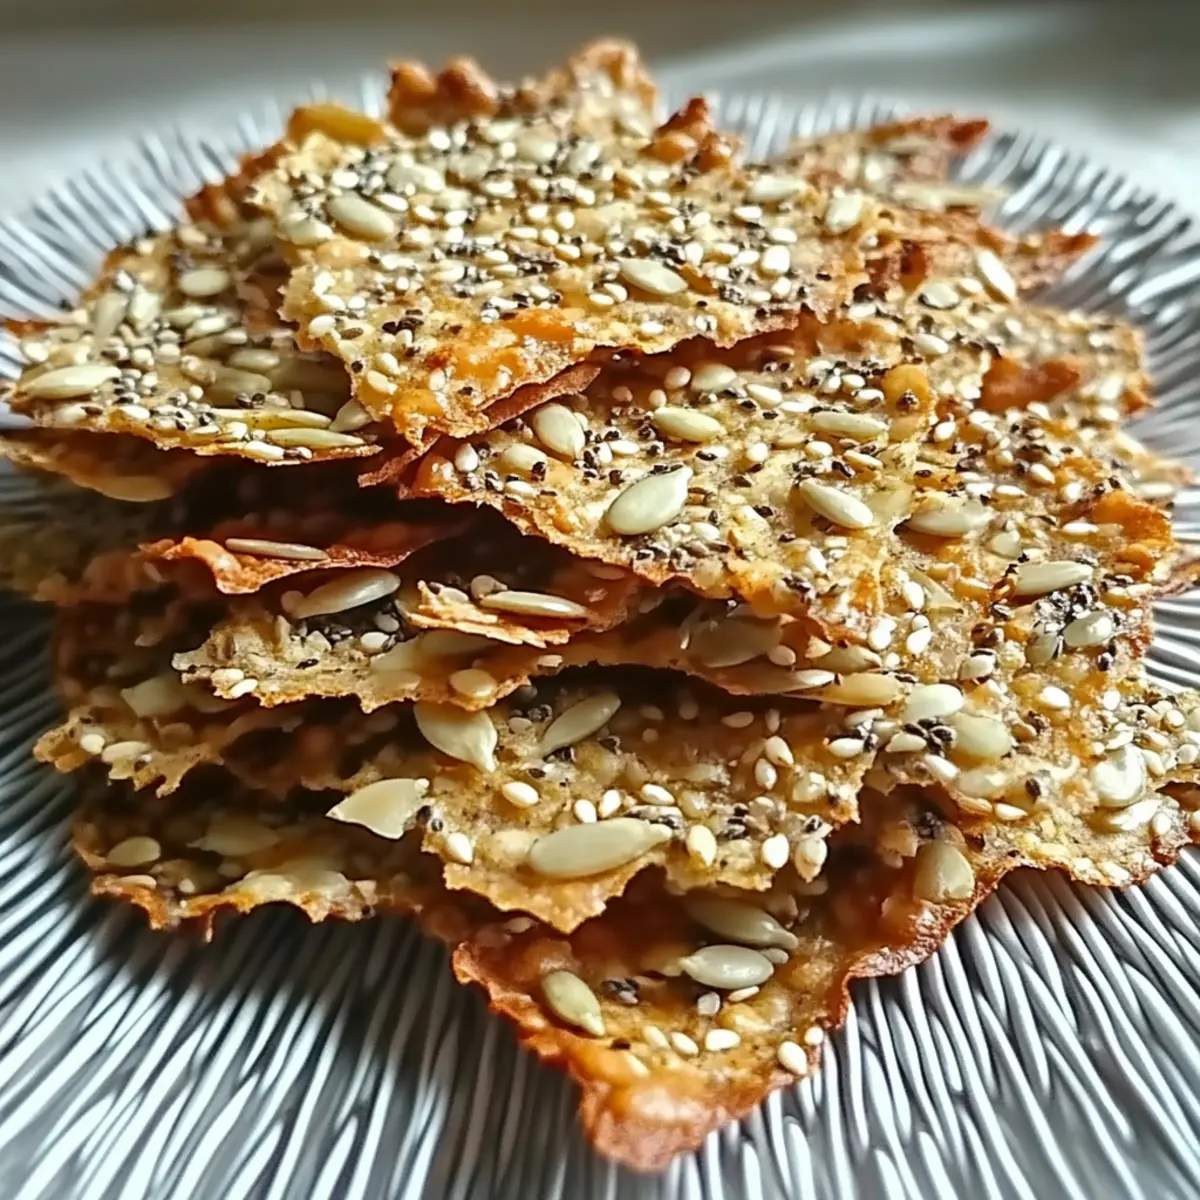
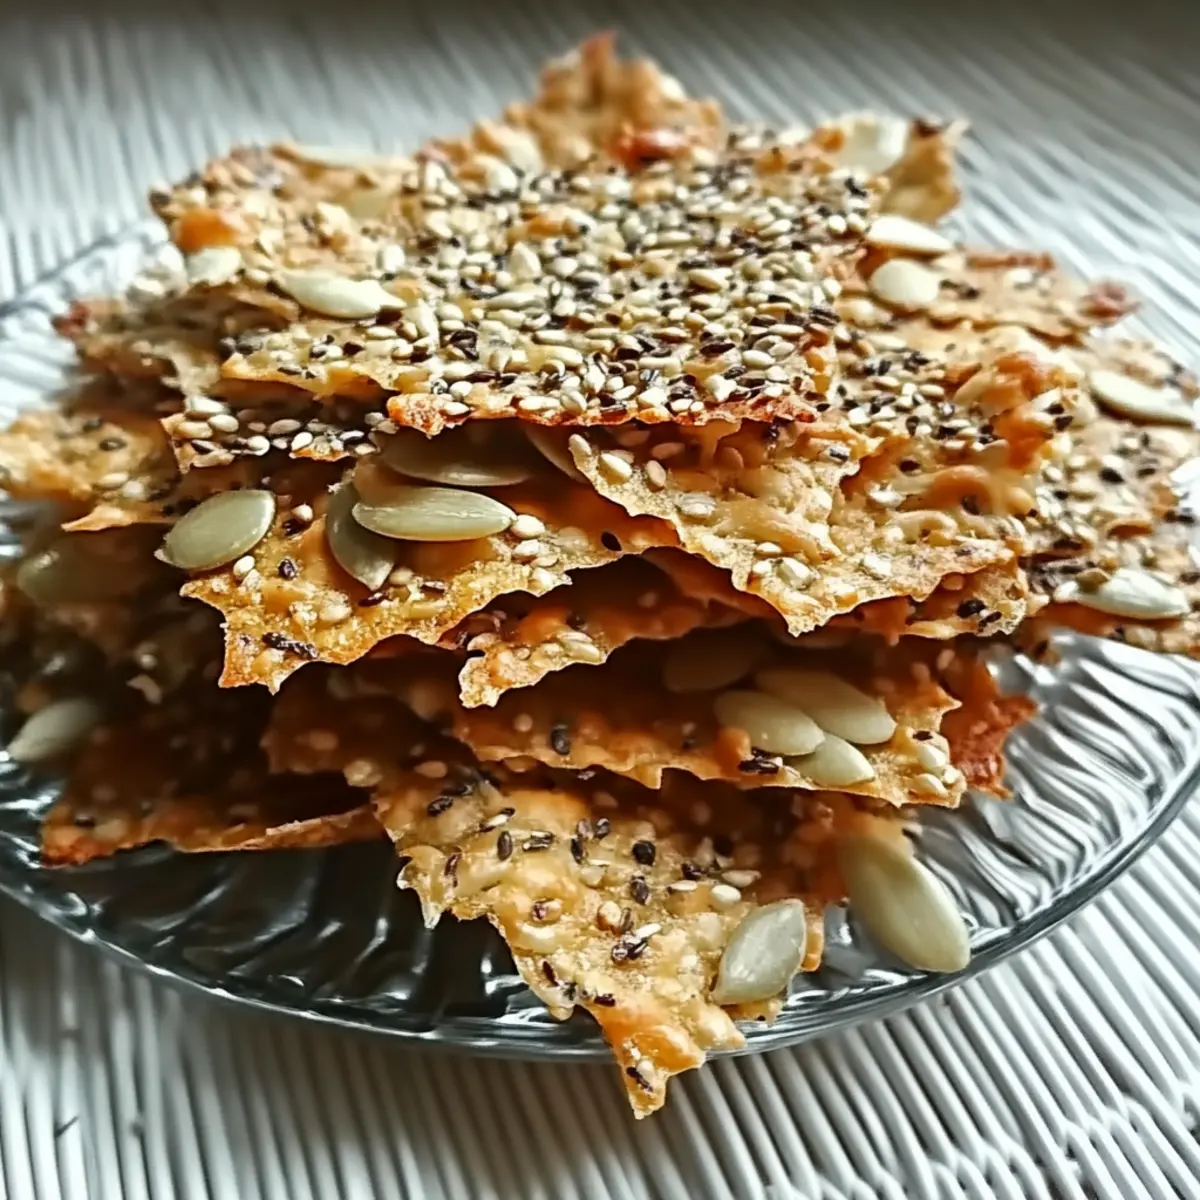
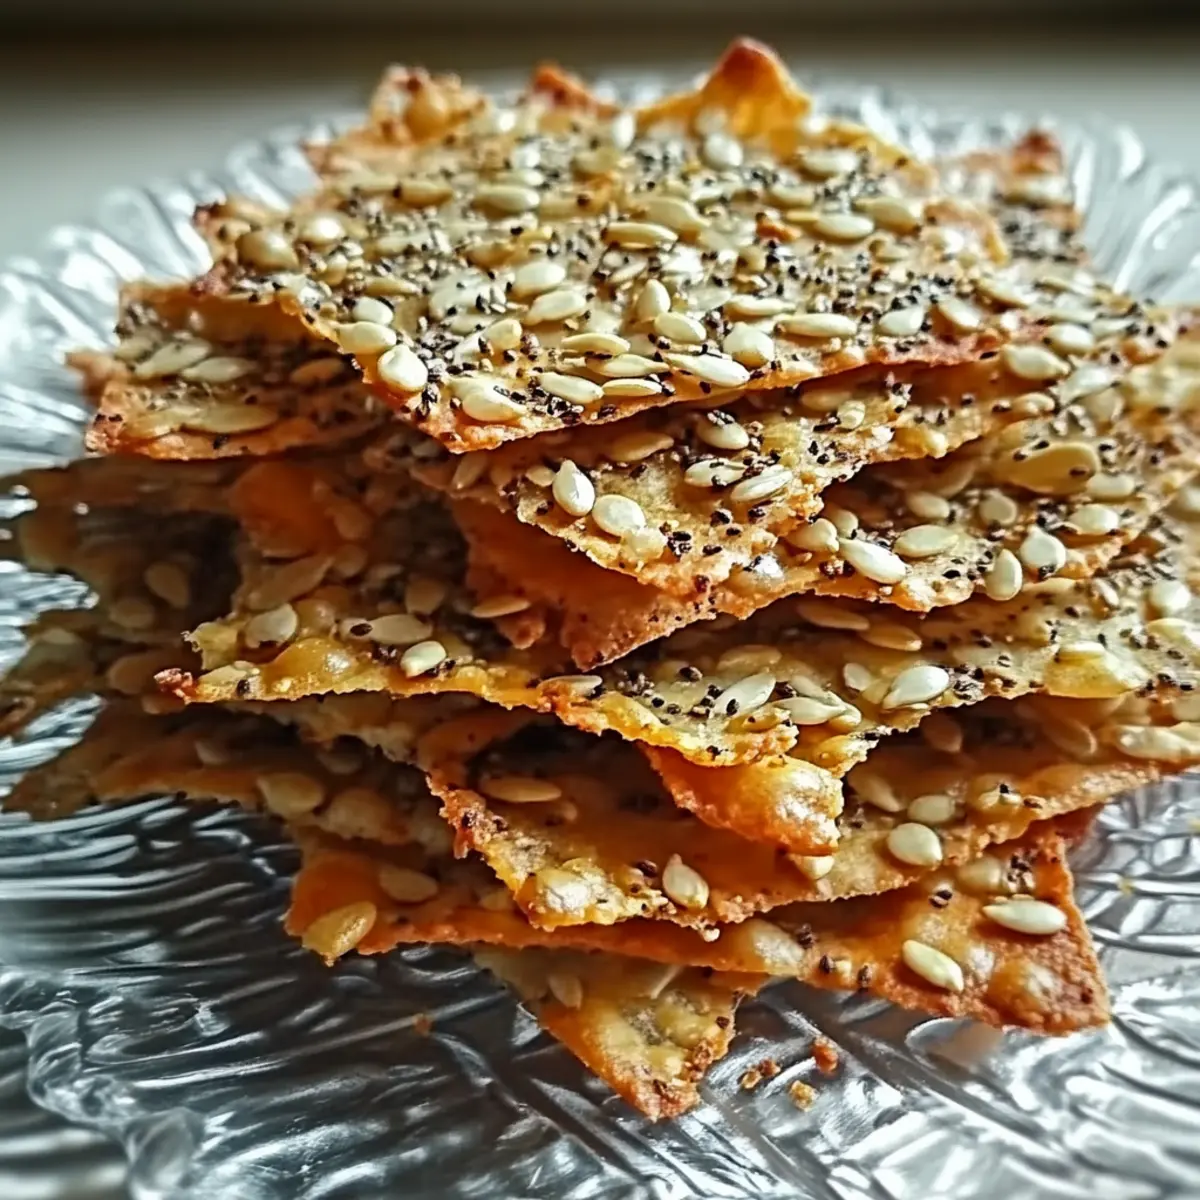
As I was rummaging through my pantry last week, I stumbled upon a bag of mixed seeds that had been begging for attention. That’s when the idea struck me: why not create something deliciously simple yet satisfying? Enter my Easy Cheesy Seed Crisps—the perfect way to transform those overlooked ingredients into a quick, gluten-free snack. These crispy bites are not just a healthier alternative to chips; they’re fully customizable to suit your taste and dietary preferences. Whether enjoying a quiet night in or hosting a gathering of friends, these crunchy delights are bound to impress. Plus, they’re low-carb, making them a guilt-free option that’s ready in mere minutes! Curious about how to make this snack magic happen? Let’s dive into the recipe!
Why Should You Try Cheesy Seed Crisps?
Amazingly Versatile: These crisps are fully customizable, allowing you to experiment with different cheeses, seeds, and spices to match your cravings.
Quick and Easy: With just a handful of ingredients and minimal prep time, you can whip up a delicious batch in under 10 minutes!
Guilt-Free Indulgence: At only 110 calories per crisp, they’re the perfect snack to satisfy those midday cravings without the guilt.
Crispy Perfectness: Each bite delivers an irresistible crunch and satisfying chew, making them a delightful substitute for conventional chips.
Great for Sharing: Whether you pair them with guacamole, salsa, or your favorite dip, these Cheesy Seed Crisps are sure to impress family and friends at any gathering.
Check out the Fried Egg Quesadilla for another delicious snack idea that’s both easy and tasty!
Cheesy Seed Crisps Ingredients
For the Crisps
• Aged Cheddar or Mozzarella Cheese – Finely shredded cheese provides rich flavor and structure for the crisps.
• Mixed Seeds (Sesame, Pumpkin, Sunflower) – This combination adds a delightful crunch and is packed with nutrition; feel free to use just one type if you prefer.
• Quinoa (optional) – Enhances texture; omit if sticking strictly to gluten-free options.
For Flavoring
• Herbs/Spices (Thyme, Garlic Powder, Red Pepper Flakes) – Elevate the flavor profile by mixing and matching your favorite herbs and spices; they add a wonderful aroma and taste!
• Honey (optional) – Introduces a subtle sweetness; you can substitute with maple syrup for a different twist.
Dive into making these Cheesy Seed Crisps and enjoy a snack that truly satisfies without the guilt!
Step‑by‑Step Instructions for Cheesy Seed Crisps
Step 1: Preheat the Oven
Begin by preheating your oven to 400°F (200°C). This temperature is crucial for achieving those perfectly golden, crispy Cheesy Seed Crisps. While the oven heats up, gather your ingredients and line a baking sheet with parchment paper, ensuring a non-stick surface for your delicious creations.
Step 2: Mix the Cheese and Seeds
In a medium mixing bowl, combine the finely shredded aged cheddar or mozzarella cheese with your choice of mixed seeds, such as sesame, pumpkin, and sunflower. Use a spatula to fold the ingredients together until they are evenly distributed. This mixture will form the base of your Cheesy Seed Crisps and should be visually cohesive and thick.
Step 3: Add Flavor Enhancements
Now it’s time to elevate the flavor! Sprinkle in your selected herbs and spices, such as thyme, garlic powder, or red pepper flakes. Mix thoroughly until all the ingredients are harmoniously blended. The aromatic notes from the herbs will complement the cheesy base, making your Cheesy Seed Crisps irresistibly tasty.
Step 4: Shape the Mixture
Using a spoon or your hands, shape the mixture into small, evenly sized mounds on the prepared baking sheet. Ensure there’s enough space between each mound, about 2 inches apart, as they will spread slightly during baking. This step helps to ensure that each Cheesy Seed Crisp cooks evenly for that delightful crunch.
Step 5: Bake to Crispy Perfection
Place the baking sheet in your preheated oven and bake for 6-8 minutes. Keep a close eye on the crisps; they should become golden brown and crisp around the edges. The delightful aroma will fill your kitchen, signaling that your lovely Cheesy Seed Crisps are just about done.
Step 6: Cool and Serve
Once the Cheesy Seed Crisps are golden and crispy, carefully remove them from the oven and allow them to cool completely on the baking sheet. This cooling time is crucial, as it helps the crisps firm up, making them easier to handle. Once cooled, enjoy them as a guilt-free snack or pair them with your favorite dip!
Make Ahead Options
These Easy Cheesy Seed Crisps are perfect for meal prep! You can prepare the cheese and seed mixture up to 24 hours in advance, allowing for a quick snack option during your busy week. Simply mix all ingredients (cheese, seeds, and spices) in a bowl and refrigerate in an airtight container. This will help maintain freshness and flavor. When you’re ready to enjoy, let the mixture sit at room temperature for about 15 minutes before shaping and baking. This ensures that your crisps turn out just as delicious and crispy as if they were made fresh, providing you with delightful, guilt-free snacks with minimal effort!
How to Store and Freeze Cheesy Seed Crisps
Room Temperature: Store your Cheesy Seed Crisps in an airtight container at room temperature for up to 1 week to maintain their crunchiness.
Fridge: If you prefer to keep them fresher for longer, place them in the fridge, but be aware this may soften their texture. Aim to consume within 3 days.
Freezer: For long-term storage, freeze the crisps in a single layer on a baking sheet until solid, then transfer to an airtight container. They will last up to 2 months in the freezer.
Reheating: Reheat the frozen Cheesy Seed Crisps in a preheated oven at 350°F (175°C) for about 5-7 minutes or until crisp to restore their delightful crunch.
Cheesy Seed Crisps Variations
Feel free to get creative and adapt these crisps to match your cravings and dietary needs!
-
Cheese Options: Swap aged cheddar for pepper jack or gouda for a bolder flavor profile. The choice of cheese can really transform these bites into whatever savory experience you desire.
-
Seed Variations: Incorporate chia seeds or flaxseeds for an extra nutritional punch. These tiny seeds add fiber and healthy omega-3 fatty acids, making your crisps even better for you.
-
Spice Adjustments: Add cayenne pepper for a spicy kick or lemon juice for a refreshing zest. Elevating the flavor of your crisps can turn them into a zingy, appetizing snack that delights the senses.
-
Herb Bundles: Experiment with fresh herbs like rosemary or basil instead of dried ones. Fresh herbs provide a vibrant flavor lift that can change the entire experience of your cheesy snack.
-
Sweet Twist: Drizzle with agave syrup instead of honey for a vegan option. This adds an unexpected and delightful sweetness that pairs beautifully with the savory cheese.
-
Nutty Crunch: Mix in crushed nuts like almonds or walnuts for an extra layer of crunch. The combination of seeds and nuts will not only enhance texture but also provide a nutty flavor that is simply irresistible.
-
Fiery Flavor: Toss in some red chili flakes for added heat. If you love a spicy snack, this slight adjustment can make all the difference in igniting your taste buds.
-
Serve with Dips: Pair these crisps with guacamole or your favorite hummus for a delightful treat.
If you’re in the mood for another delicious bite, check out the Cheesy Southwest Chicken for an incredible addition to your snacking repertoire!
Expert Tips for Cheesy Seed Crisps
-
Cheese Choice: Use finely shredded cheese to ensure that your Cheesy Seed Crisps melt and bind well, giving you a delightful crunch.
-
Don’t Rush Baking: Keep a watchful eye on the oven; these crisps can go from perfect to burnt in seconds. Pull them out when golden brown for the best results.
-
Even Spacing: Remember to place the mounds at least 2 inches apart on the baking sheet to prevent them from merging together during baking.
-
Cooling Is Key: Allow the crisps to cool completely on the baking sheet. This step helps them develop that perfect crunchy texture, ensuring they won’t crumble easily.
-
Storage Tips: Keep your Cheesy Seed Crisps in an airtight container at room temperature for up to a week. For longer storage, they can be frozen and then popped back into the oven to re-crisp!
What to Serve with Easy Cheesy Seed Crisps?
These crispy delights are sure to shine at your next gathering, but pairing them with the right accompaniments can elevate the experience even further.
-
Guacamole:
Creamy and rich, guacamole adds a refreshing, zesty contrast to the salty crisps, creating a perfect balance of flavors. -
Hummus:
The smooth, nutty profile of hummus complements the crunchiness, making for a delightful dip that elevates snack time. -
Salsa:
Fresh and tangy salsa brings a pop of freshness and sweetness, enhancing the overall snacking experience with its vibrant flavors. -
Cheese Platter:
Pairing with a variety of cheeses not only enhances the cheesy goodness of the crisps but offers guests a delightful charcuterie experience. -
Olives:
A bowl of marinated olives provides a savory, briny bite that contrasts beautifully with the cheesy texture of the crisps, adding a gourmet touch. -
Sparkling Water:
For a refreshing drink option, sparkling water with a squeeze of lime cleanses the palate and pairs perfectly with the crunchy bites. -
Mini Veggie Sticks:
Carrot and cucumber sticks add a crisp, fresh element and make for a colorful, healthy side that complements the richness of the crisps. -
Sweet Chili Sauce:
For those who enjoy a bit of heat, a drizzle of sweet chili sauce adds an addictive sweetness and spice that enhances the crispy texture.
Embrace the crunch of your Easy Cheesy Seed Crisps with these lip-smacking pairings that are sure to impress everyone at your next get-together!
Cheesy Seed Crisps Recipe FAQs
How do I choose the right cheese for Cheesy Seed Crisps?
Absolutely! Aged cheddar or mozzarella works beautifully, but you can also experiment with other cheeses like pepper jack or gouda for added flavor. Just ensure the cheese is finely shredded to ensure your crisps meld well during baking.
How should I store Cheesy Seed Crisps to maintain their freshness?
Store your Cheesy Seed Crisps in an airtight container at room temperature for up to 1 week. This method helps keep them nice and crunchy! If you’d like to preserve them a bit longer, freezing is also an option.
Can I freeze Cheesy Seed Crisps? If so, how?
Definitely! To freeze Cheesy Seed Crisps, lay them out in a single layer on a baking sheet and freeze until solid. Once frozen, transfer them to an airtight container or zip-top bag. They can last up to 2 months! When ready to enjoy, reheat them in a preheated oven at 350°F (175°C) for about 5-7 minutes to restore their crispiness.
What should I do if my Cheesy Seed Crisps are too soft?
If your crisps turn out too soft, it might be due to insufficient baking time or cooling on the baking sheet. Next time, ensure they get that golden brown color, which indicates crispiness. Also, be sure to allow them to cool completely on the baking sheet after baking—this helps them firm up!
Are Cheesy Seed Crisps pet-friendly?
While cheese in moderation isn’t harmful to pets, it’s best to avoid giving your Cheesy Seed Crisps to them as they contain spices and ingredients that could upset their stomach. Always check what’s safe for your furry friends, and stick with treats specifically made for them!
Can I customize the seeds in my Cheesy Seed Crisps?
The more, the merrier! Feel free to mix and match different seeds like chia, flaxseed, or even just go with one type. Just remember to keep the total measurement the same for the best texture!
Cheesy Seed Crisps: A Customizable Guilt-Free Delight
Ingredients
Equipment
Method
- Preheat your oven to 400°F (200°C) and line a baking sheet with parchment paper.
- In a mixing bowl, combine the finely shredded cheese with mixed seeds.
- Sprinkle in your selected herbs and spices and mix thoroughly.
- Shape the mixture into small mounds on the baking sheet, spaced 2 inches apart.
- Bake for 6-8 minutes until golden brown and crisp.
- Allow to cool completely on the baking sheet before serving.
Leave a Reply