
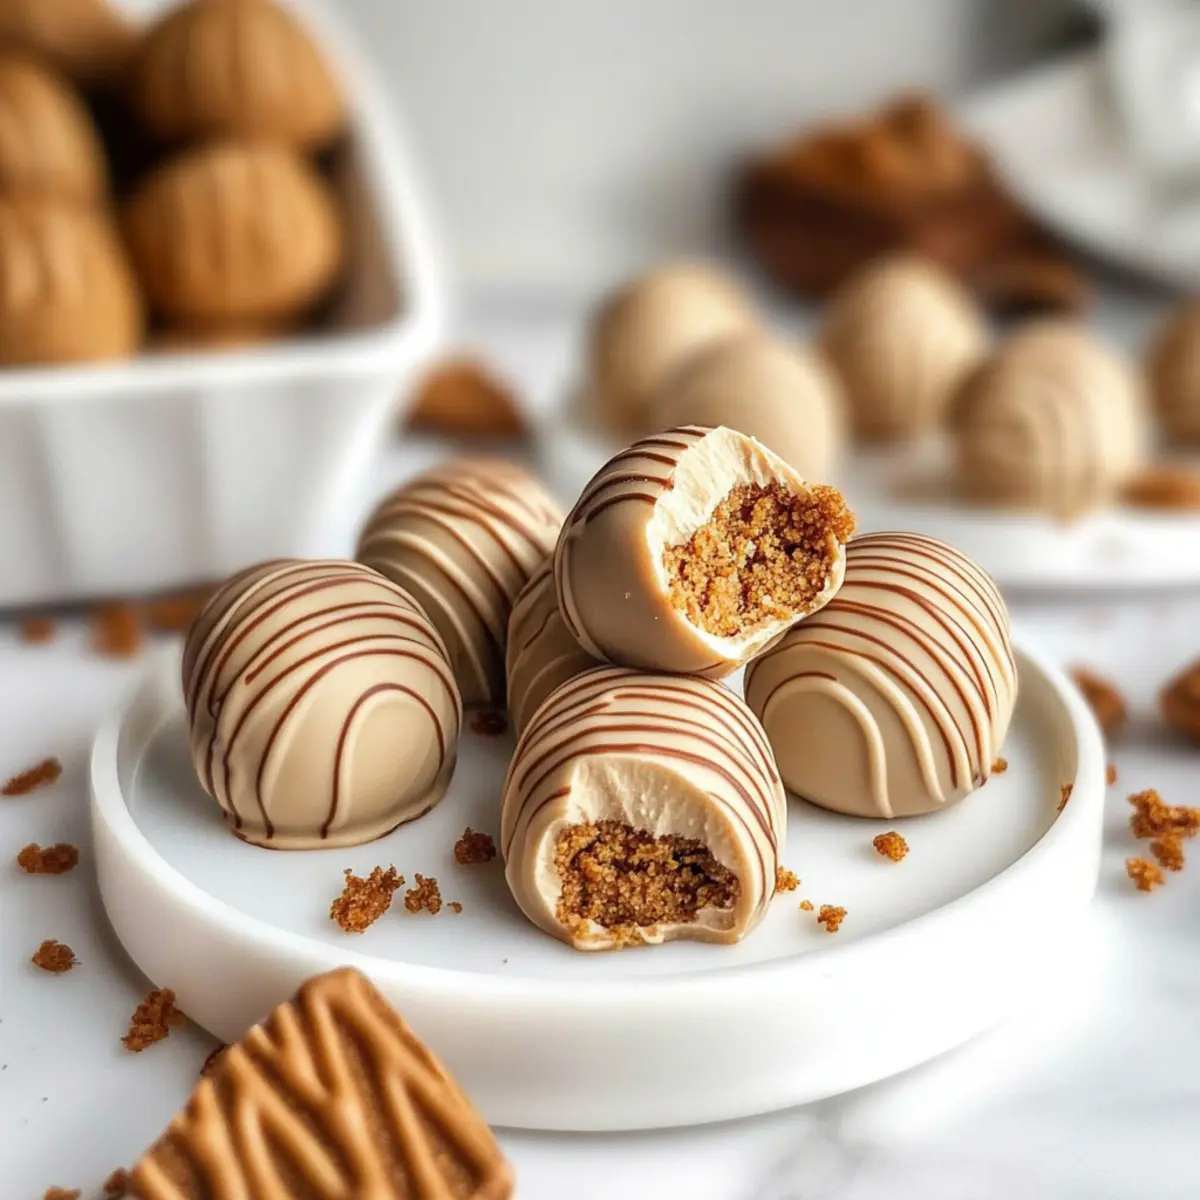
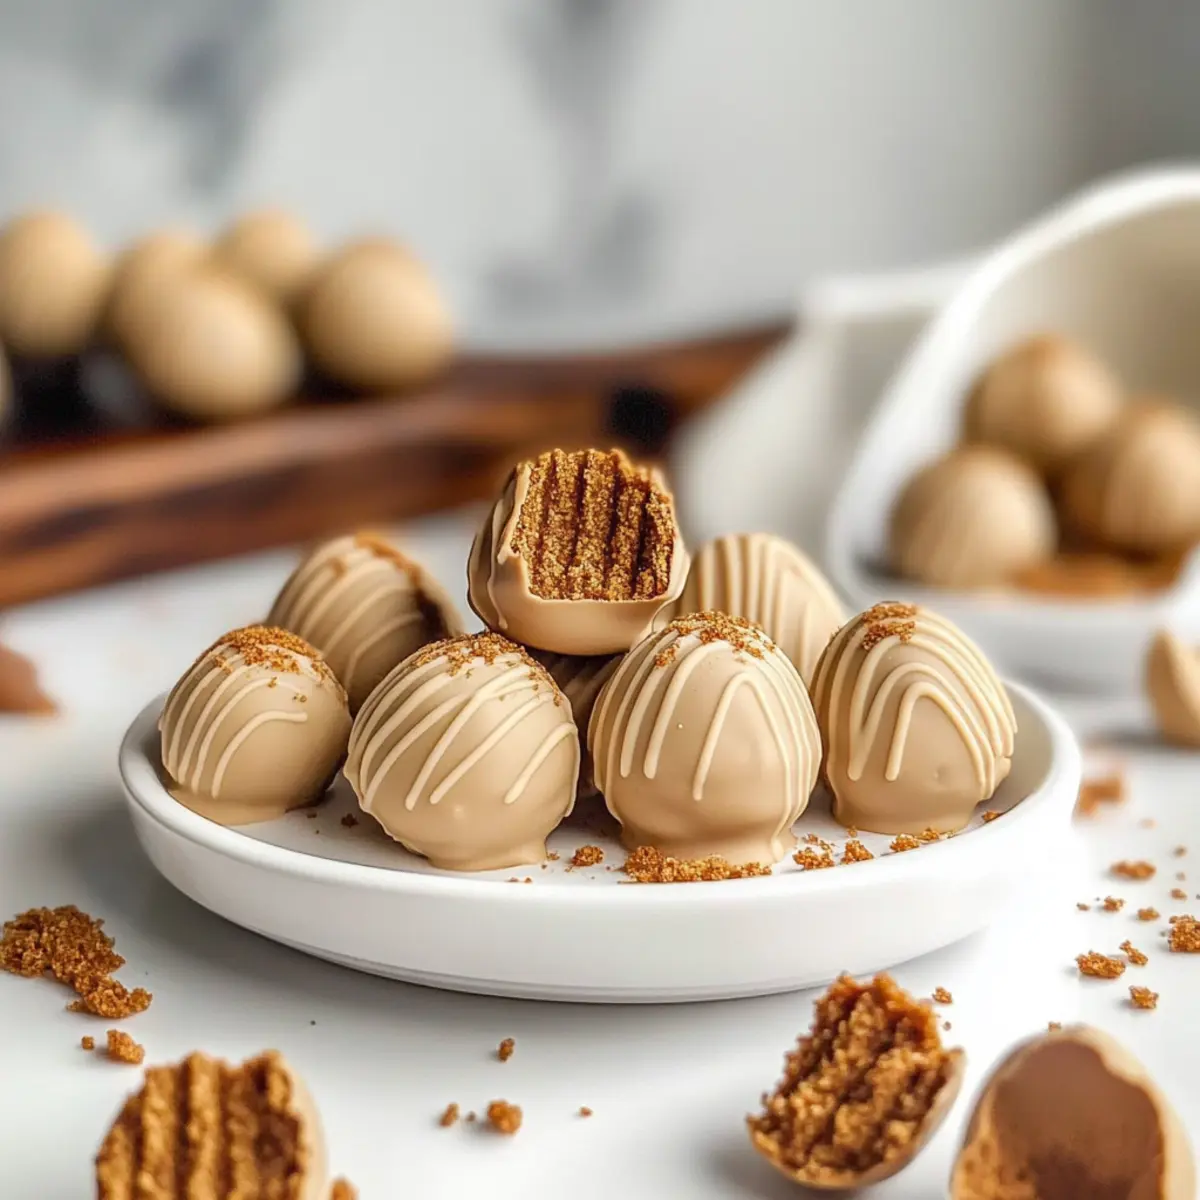
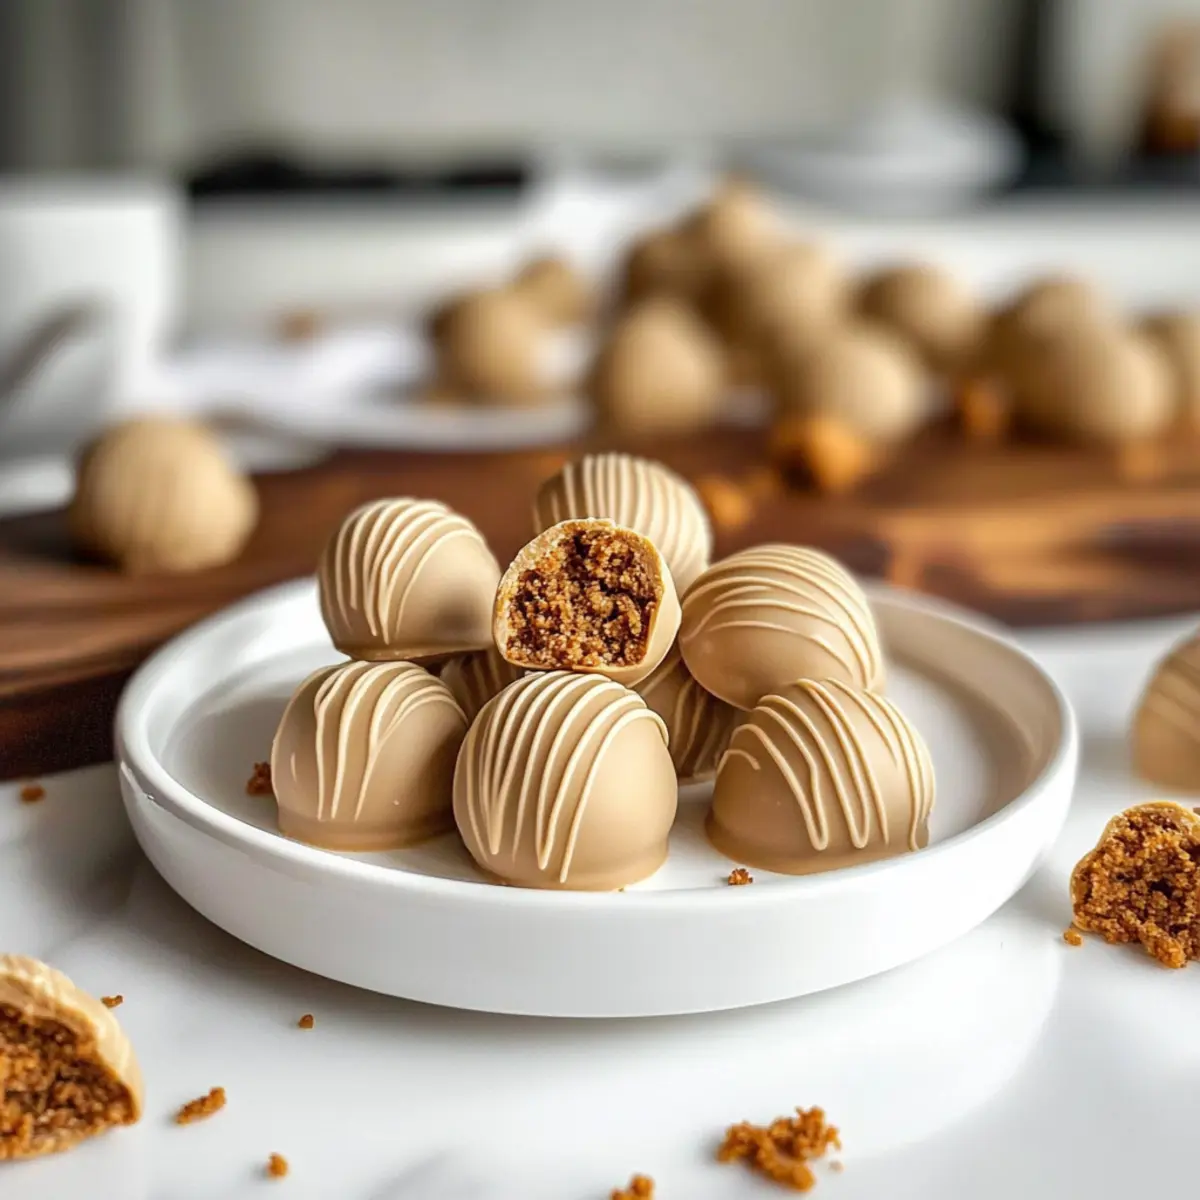
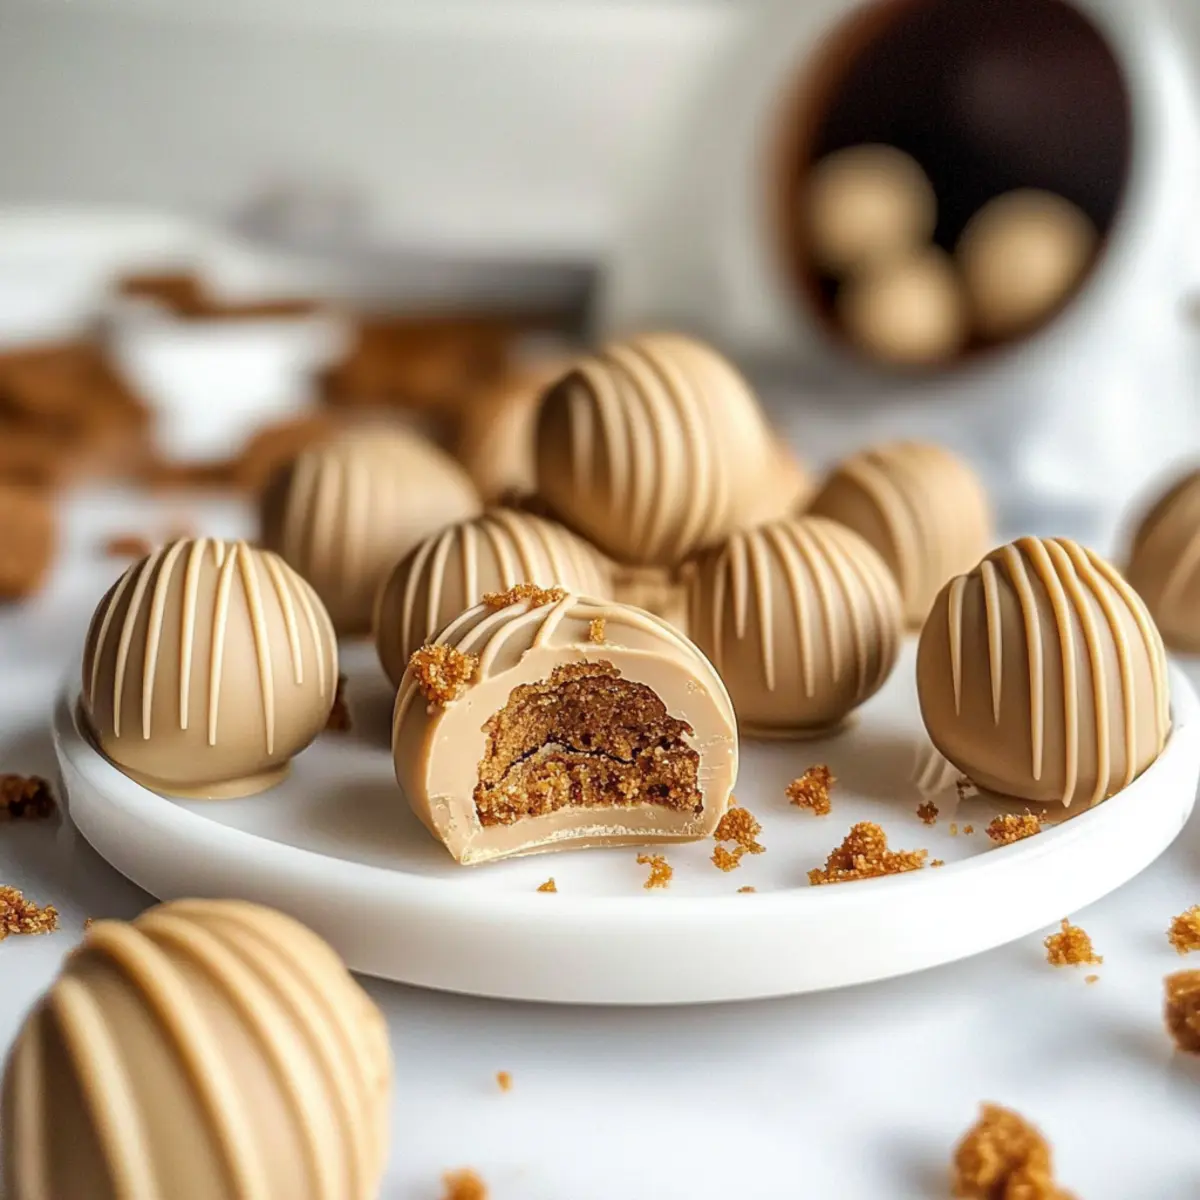
“Is there anything more delightful than a sweet treat that comes together in mere minutes?” The mere thought of indulging in these 4-Ingredient No Bake Biscoff Truffles sends a wave of warmth through me. With just four simple ingredients, these truffles are not only a breeze to prepare but also perfect for gifting or a spontaneous dessert craving. Imagine creamy, cookie butter centers wrapped in luscious white chocolate—this treat captures the essence of your favorite Biscoff cookies in every bite. Plus, they’re incredibly versatile; experiment with different chocolate coatings or flavor pairings like raspberry for a fun twist! Ready to whip up these delectable bites? I can’t wait to share this easy recipe with you!
Why are Biscoff Truffles a Must-Try?
Irresistible flavor packed in every bite! These Biscoff truffles bring the beloved taste of cookie butter and warm spices to life.
Quick and easy to make: With just four ingredients, you can whip these up in no time—perfect for busy days or last-minute dessert needs.
Versatile options: Experiment with different chocolate coatings, or try adding fruit flavors for a unique twist.
Perfect for gifting: Bundle these truffles in a cute box, and you have a lovely homemade gift that friends and family will adore.
Crowd-pleaser: Whether at a holiday party or a casual get-together, these truffles are sure to vanish quickly!
You might also love pairing these treats with our inviting Biscoff Banana Pudding for a delightful dessert duo!
Biscoff Truffles Ingredients
• Here’s everything you need to make these delightful truffles!
For the Truffler Filling
- Biscoff cookie crumbs – These provide the delightful flavor base and texture; feel free to substitute with any ground speculoos cookies or spiced biscuits.
- Cookie butter (Biscoff spread) – Adds moisture and that intense caramelized flavor; other nut butters or vegan spreads can be used as substitutes.
- Cream cheese – Creates a rich, creamy center; opt for dairy-free cream cheese if you’re looking for a vegan option.
- Ground cinnamon (optional) – Enhances the warm spices; you can omit this if it’s not your preference.
For the Coating
- Additional Biscoff spread – This will be melted to coat the truffles; using the same brand ensures consistency in flavor.
- White chocolate – Forms a sweet outer shell; feel free to substitute with milk or dark chocolate for a different flavor profile.
Dive into the delightful world of Biscoff truffles—your taste buds will thank you!
Step‑by‑Step Instructions for Biscoff Truffles
Step 1: Mix the Creamy Center
In a mixing bowl, combine the Biscoff spread and cream cheese. Using a stand mixer or a spatula, blend them together until the mixture is smooth and creamy, about 2-3 minutes. This step ensures your Biscoff truffles have a luscious, rich filling, so take your time to achieve that velvety texture.
Step 2: Incorporate the Cookie Crumbs
Add the crushed Biscoff cookie crumbs to the creamy mixture. If you’re using ground cinnamon, now is the time to sprinkle it in. Gently mix until everything is well incorporated, creating a cohesive dough that holds together nicely. The mixture should start to resemble a thick cookie dough, ready to be shaped into delightful truffles.
Step 3: Shape the Truffles
With your hands, scoop out 1-inch portions of the dough and roll them into small balls. Place each truffle on a parchment-lined baking sheet, keeping space between them. This process not only gives shape to your Biscoff truffles but also adds a personal touch—feel free to make them as round as you like!
Step 4: Chill to Firm Up
Transfer the baking sheet to the freezer and chill the truffles for 15-30 minutes. This step helps the truffles firm up and makes them easier to coat. You’ll know they’re ready when they feel solid to the touch—perfect for that smooth chocolate coating.
Step 5: Melt the Coating
While the truffles are chilling, melt the additional Biscoff spread and white chocolate together. Use a microwave-safe bowl and heat in 30-second intervals, stirring after each interval until the mixture is completely smooth. This melted coating will envelop your Biscoff truffles in sweetness, enhancing their appealing look and taste.
Step 6: Dip and Decorate
Once the truffles are firm, dip each one into the melted chocolate mixture until fully coated. Use a fork to lift them out, letting any excess coating drip back into the bowl. Place the coated truffles back on the parchment-lined sheet, and if desired, drizzle remaining chocolate on top or sprinkle with extra cookie crumbs for a festive touch.
Step 7: Chill Until Set
Finally, return the coated truffles to the refrigerator for about 30 minutes to allow the chocolate coating to set completely. Once firm, your Biscoff truffles are ready to be enjoyed or gifted. Store them in the fridge and relish the joy of making these indulgent treats!
Biscoff Truffles Variations & Substitutions
Feel free to get creative with these delightful Biscoff truffles; customizing them will make them even more enjoyable!
-
Dairy-Free: Substitute cream cheese with dairy-free cream cheese for a vegan option without compromising taste.
-
Different Coatings: Switch white chocolate for dark or milk chocolate to create different flavor profiles and sweetness levels. Dark chocolate offers a rich contrast to the cookie butter.
-
Nutty Delight: Add chopped nuts like almonds or hazelnuts to the center for a crunchy texture; it adds a lovely surprise in every bite.
-
Fruit Forward: Incorporate raspberry or strawberry puree into the filling for a fruity twist. This can brighten the flavors and adds a beautiful color contrast!
-
Flavor Boost: Stir in a teaspoon of vanilla or almond extract to the filling for an extra layer of warmth and richness.
-
Spiced Fun: Experiment by adding pumpkin spice or chai spices to the filling. These warm spices complement the cookie butter beautifully during the fall season!
-
Mini Truffles: Roll the dough into smaller balls for bite-sized treats. They’re perfect for serving at parties or gatherings!
Don’t forget, you can pair your freshly made Biscoff truffles with our inviting Biscoff Banana Pudding for a perfectly sweet dessert experience! Explore these variations and see how many delightful combinations you can whip up!
Expert Tips for Biscoff Truffles
-
Mix with Care: Combine the ingredients gently until just mixed. Overmixing can lead to a dense texture rather than the desired creamy center.
-
Coating Consistency: Ensure your melted chocolate is smooth and warm but not too hot. If it’s too hot, it can cause the truffles to sweat and become oily.
-
Chill Before Coating: Always freeze the truffles before dipping. This step not only firms them up but also helps the chocolate adhere beautifully without melting them away.
-
Storage Solutions: To keep your Biscoff truffles fresh, layer them between paper towels in an airtight container, absorbing excess moisture and oil.
-
Flavor Experimentation: Feel free to mix in a dash of sea salt or even a few drops of flavor extracts to elevate the Biscoff taste and create a delightful twist!
Storage Tips for Biscoff Truffles
Fridge: Store your Biscoff truffles in an airtight container in the fridge for up to 2 weeks. Keeping them chilled helps maintain their creamy texture and flavor.
Freezer: For longer storage, freeze the truffles in a sealed container for up to 2 months. Layer them with paper towels between each layer to prevent sticking.
Reheating: No need to reheat! These truffles are best enjoyed chilled or at room temperature. Just take them out of the fridge or freezer and savor the deliciousness!
Enjoyment: Consider gifting them! Presentation can elevate your homemade Biscoff truffles to a charming gift for friends and family during special occasions.
What to Serve with No Bake Biscoff Truffles
Indulging in a batch of these creamy, cookie butter delights is like wrapping yourself in a warm, cozy blanket of flavor.
- Rich Chocolate Cake: The deep chocolate flavor complements the sweet spices in the truffles, creating a decadent dessert duo.
- Fresh Berries: Their tartness cuts through the sweetness, offering a refreshing contrast that enhances the truffles’ richness beautifully.
Pair these truffles with a sweet dessert wine, like Moscato. Its fruity notes amplify the Biscoff flavors, bringing a touch of elegance to your treat.
- Vanilla Ice Cream: Creamy and classic, ice cream provides a cool touch that pairs perfectly with the warm spice notes of the truffles.
- Coffee or Espresso: The bold flavors of coffee complement the sweetness, enhancing every bite and making it the ideal afternoon pick-me-up.
Serve your Biscoff truffles alongside a simple fruit salad. The fresh ingredients will lighten up the dessert experience, adding a burst of color and wholesome goodness to your plate.
Make Ahead Options
These No Bake Biscoff Truffles are perfect for meal prep and can save you time during busy weeks! You can prepare the creamy filling and roll the truffles into balls up to 24 hours in advance, then simply refrigerate them on a parchment-lined baking sheet. To maintain their quality, store them in an airtight container after they firm up. When you’re ready to serve, all you need to do is melt the additional cookie butter and white chocolate, dip each truffle, and chill them again until the coating sets—just like fresh out of the kitchen! Enjoy the convenience and deliciousness of these Biscoff truffles without the last-minute rush!
Biscoff Truffles Recipe FAQs
How do I choose the right Biscoff cookie crumbs?
Absolutely! For the best flavor and texture, opt for authentic Biscoff cookie crumbs, as they provide the signature taste that complements the creaminess of the truffles. If you can’t find them, any spiced biscuit or speculoos cookies ground into fine crumbs will do. Just make sure they’re fresh, without dark spots or an off smell!
What’s the best way to store Biscoff truffles?
I recommend storing your Biscoff truffles in an airtight container in the fridge for up to two weeks. This keeps them chilled and maintains their creamy consistency. If you want to keep them longer, freeze them! Just layer them between paper towels in a sealed container, and they’ll last up to two months.
Can I freeze Biscoff truffles?
Absolutely! Freezing is a great option for longer storage. To freeze, lay each truffle in a single layer with space in between on a parchment-lined baking sheet and freeze until solid (about 1-2 hours). Then, transfer them to an airtight container, layering with paper towels to prevent sticking. They’ll retain their delicious flavor and texture for up to 2 months!
Why are my truffles oily after dipping?
Very! If you notice your truffles become oily after dipping, it may be due to the chocolate being too hot or improper storage. To remedy this, ensure you let the melted chocolate cool slightly before dipping, and store the truffles layered with paper towels to absorb excess oil. This will help keep them looking and tasting fabulous!
Is there a vegan option for the ingredients in Biscoff truffles?
Absolutely! For a delicious vegan version, substitute the cream cheese with dairy-free cream cheese, and use vegan chocolate options for coating. You can also replace Biscoff spread with any vegan-friendly nut or seed butter. Enjoy tweaking it to fit your dietary needs while keeping the delightful flavor intact!
Can pets eat Biscoff truffles?
Not at all! While Biscoff cookies are safe for humans, they contain sugar and spices that can be harmful to pets, especially dogs. Always keep these sweet treats out of reach from your furry friends to ensure their safety.
Irresistible Biscoff Truffles You Can Make in Minutes
Ingredients
Equipment
Method
- In a mixing bowl, combine the Biscoff spread and cream cheese. Blend until smooth and creamy, about 2-3 minutes.
- Add the crushed Biscoff cookie crumbs to the creamy mixture. If using, sprinkle in the ground cinnamon. Mix gently until well combined.
- Scoop out 1-inch portions of the dough, rolling them into small balls. Place on a parchment-lined baking sheet.
- Transfer the baking sheet to the freezer and chill the truffles for 15-30 minutes.
- Melt the additional Biscoff spread and white chocolate together in a microwave-safe bowl.
- Dip each truffle into the melted chocolate mixture until fully coated. Let excess coating drip off.
- Return the coated truffles to the refrigerator for about 30 minutes to set completely.
Leave a Reply