
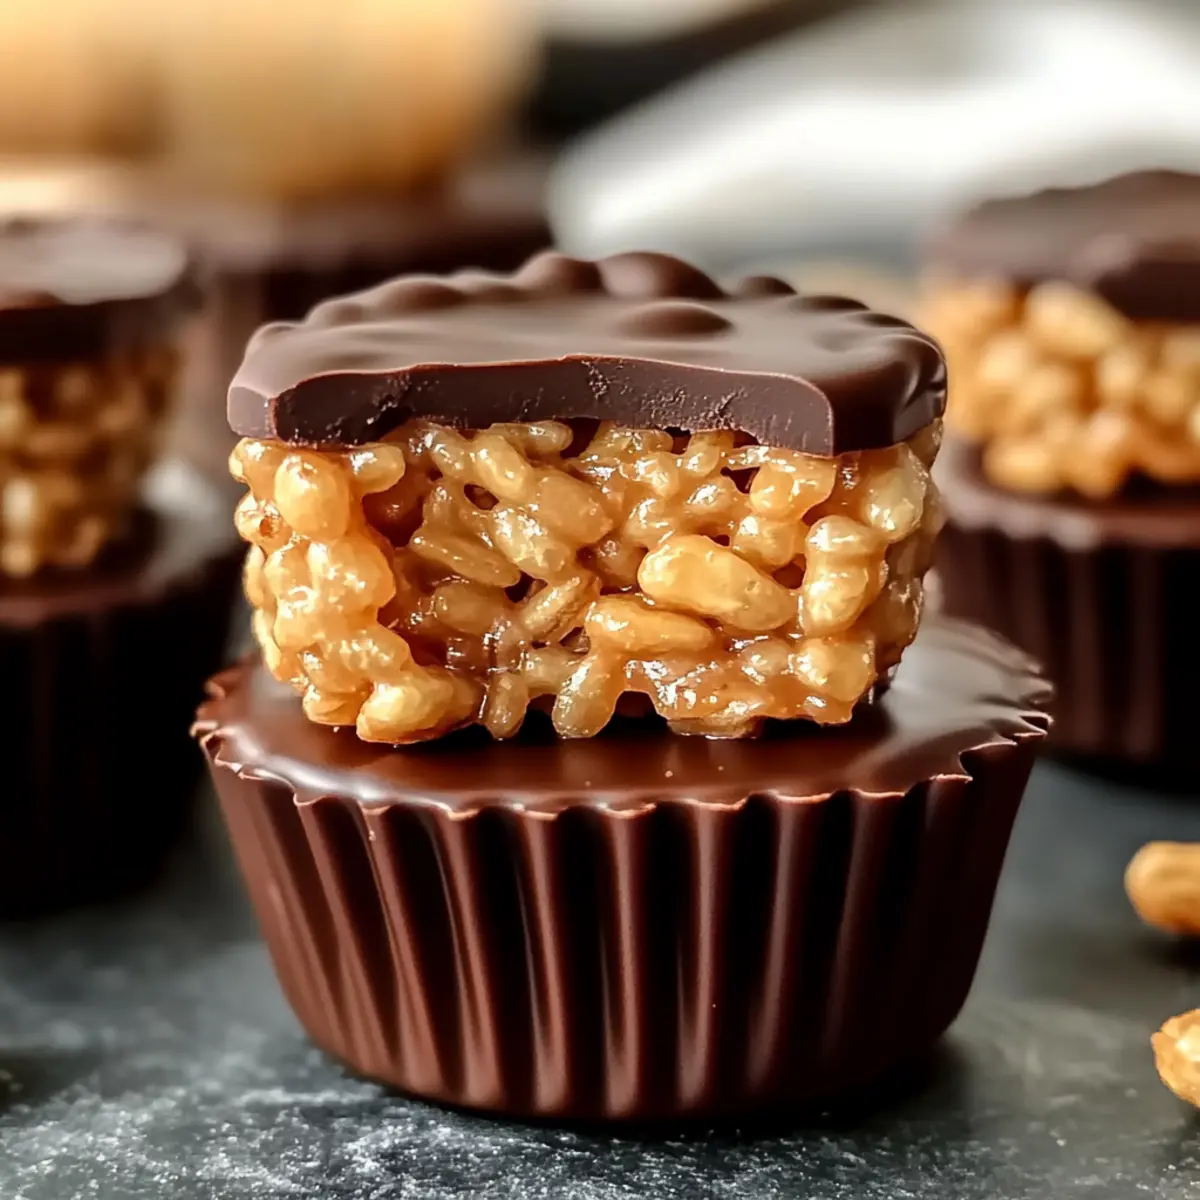
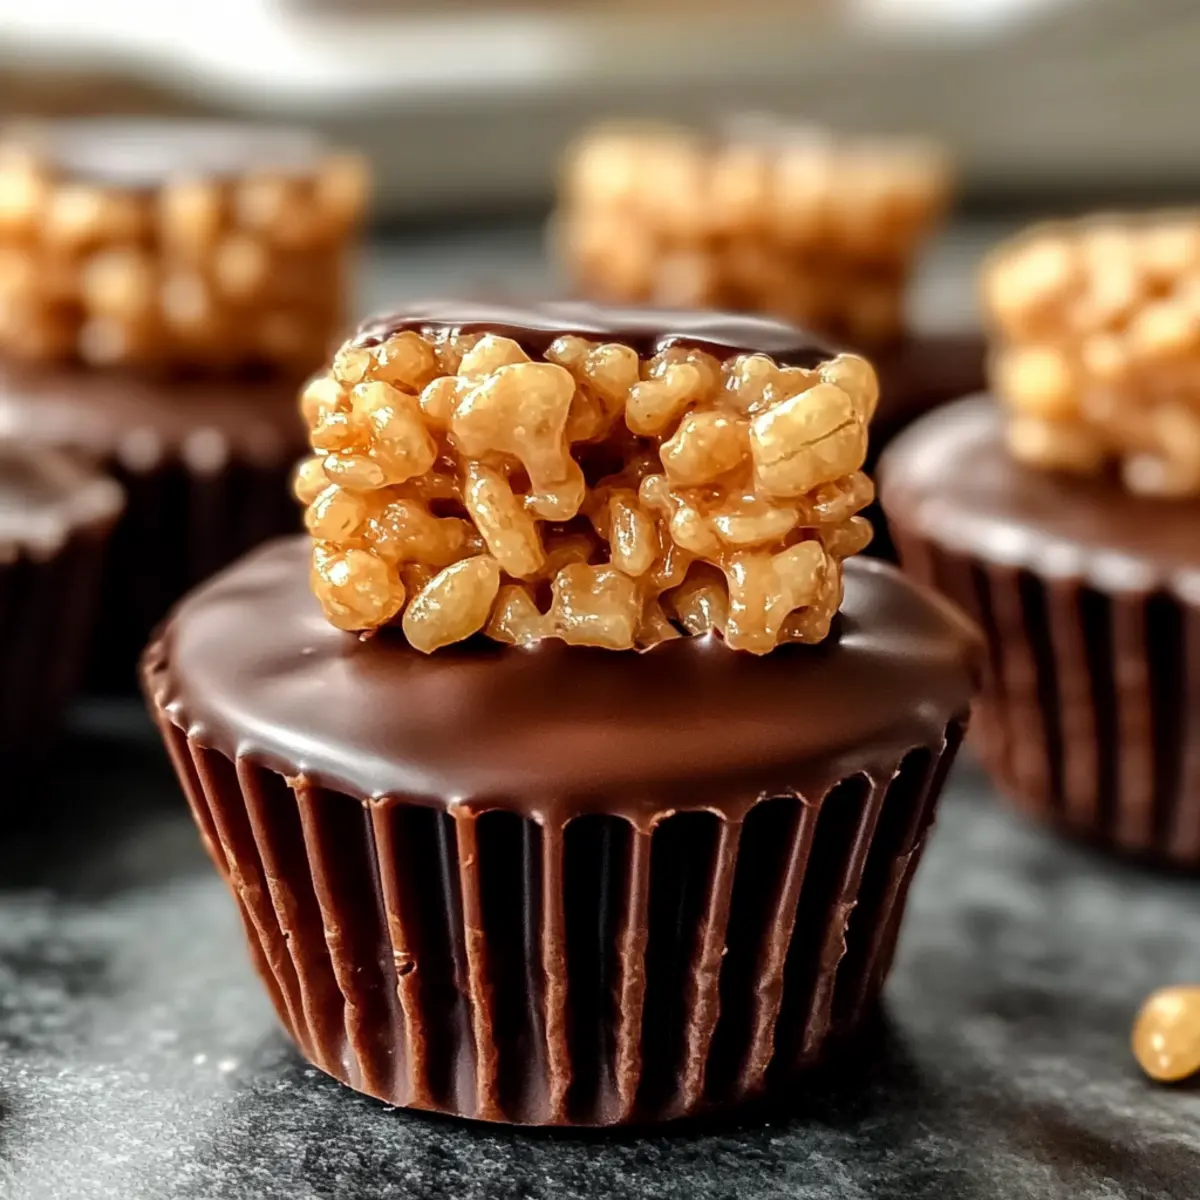
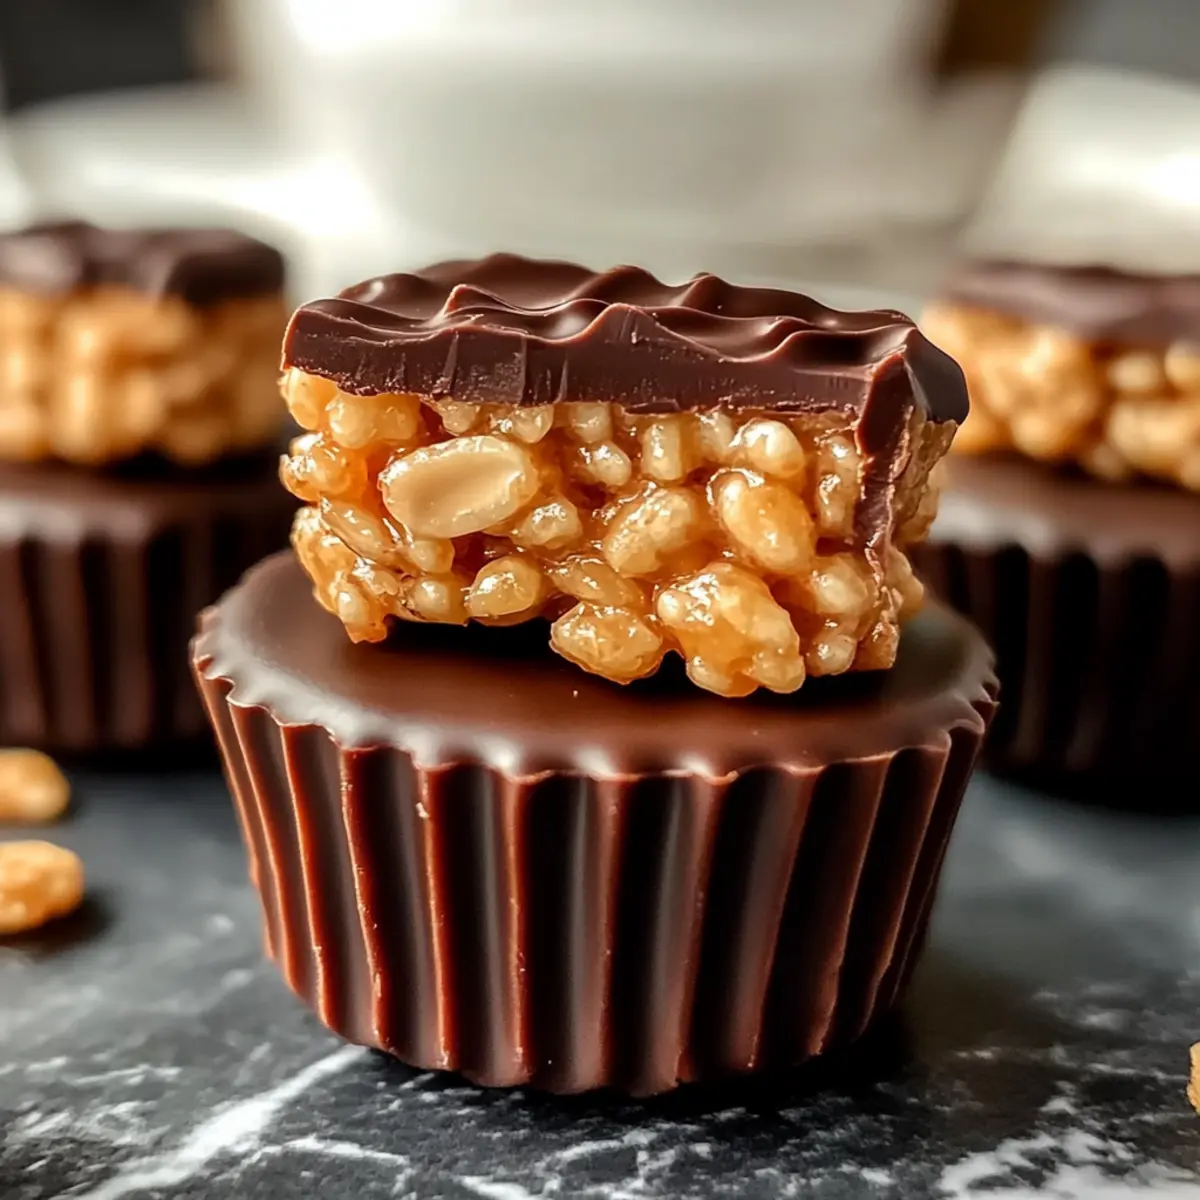
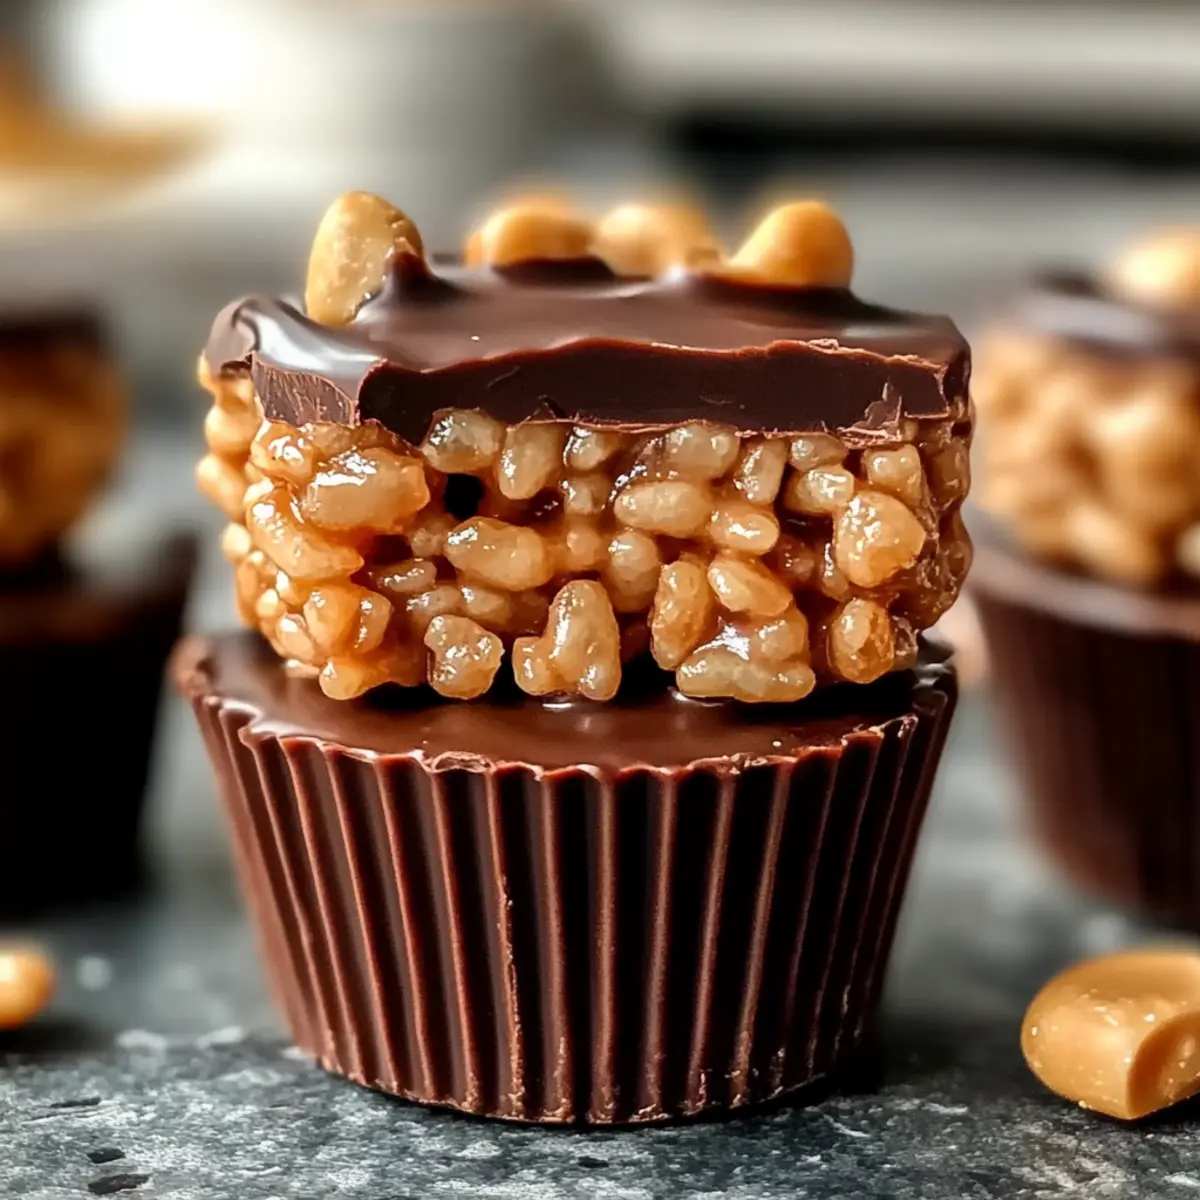
The sweet aroma of melting chocolate filled my kitchen as I whipped up a batch of these irresistible Chocolate Peanut Butter Rice Krispie Cups. No bins of baking supplies or hours spent in the kitchen required here—this no-bake recipe is a quick and easy delight that comes together in minutes! Combining the creamy richness of peanut butter with the satisfying crunch of Rice Krispies, it’s a dessert that hits the spot every time. Plus, with endless customization options, you can swap in dark chocolate or crunchy peanut butter for a fun twist on this classic treat. Whether you’re looking to impress guests at your next gathering or simply satisfy a late-night sweet craving, these cups are sure to become your new go-to. Are you ready to make a treat that will leave everyone asking for seconds?
Why are these Rice Krispie Cups irresistible?
Simplicity: With just five main ingredients, this recipe is a breeze to whip up, perfect for beginner bakers or those short on time.
Versatility: Customize to your heart’s content! Use crunchy peanut butter, dark chocolate, or toss in your favorite toppings for a unique twist.
Quick and No-Bake: Prep takes mere minutes, making it ideal for spontaneous cravings or last-minute gatherings. No oven required!
Crowd-Pleasing: These delightful cups are a guaranteed hit, whether served at parties or enjoyed during family movie nights. You’ll definitely want to try them alongside important classics like Chocolate Croissants Decadent or a refreshing Butter Beans with Leeks dish!
Flavor Explosion: The creamy peanut butter paired with rich chocolate and crunchy Rice Krispies creates a mouthwatering experience in every bite.
Chocolate Peanut Butter Rice Krispie Ingredients
For the Base
• Rice Krispies – Adds delightful texture and crunch; other crispy cereals can be used if desired.
• Creamy Peanut Butter – Provides a rich and nutty flavor while binding the ingredients together; opt for crunchy peanut butter for extra texture.
• Unsalted Butter – Melts with marshmallows to create the base; margarine can serve as a dairy-free substitute.
• Mini Marshmallows – Adds sweetness and helps bind the mixture; for a plant-based version, use vegan marshmallows.
For the Chocolate Topping
• Chocolate Chips – Creates a luscious chocolate layer on top; feel free to use dark chocolate or vegan chocolate chips for a different flavor.
• Vanilla Extract (optional) – Enhances the overall flavor profile; can be omitted if not on hand.
• Sea Salt (optional) – Adds a lovely contrast to the sweetness; omit if you prefer a purely sweet treat.
Dive into this Chocolate Peanut Butter Rice Krispie Cups recipe and customize it as you please!
Step‑by‑Step Instructions for Chocolate Peanut Butter Rice Krispie Cups
Step 1: Melt the Base
In a medium saucepan, combine 4 tablespoons of unsalted butter and 2 cups of mini marshmallows over low heat. Stir continuously for about 5 minutes until the marshmallows have completely melted and the mixture is smooth and glossy. Keep an eye on the heat to prevent any burning, ensuring a perfect base for your Chocolate Peanut Butter Rice Krispie Cups.
Step 2: Add Peanut Butter
Once the butter and marshmallows are blended, remove the saucepan from heat and immediately stir in 1 cup of creamy peanut butter and a splash of vanilla extract, if using. Mix thoroughly for about 1-2 minutes until fully incorporated, creating a deliciously creamy mixture. This peanut butter goodness will bind everything together in your delightful treats!
Step 3: Combine Cereal
In a large mixing bowl, pour in 6 cups of Rice Krispies, creating the foundation for your crunchy cups. Carefully fold the melted peanut butter mixture into the cereal using a spatula, ensuring all pieces are evenly coated without crushing them. This should take about 2-3 minutes, and you’ll notice the mixture becoming sticky and well-combined, setting the stage for the shaping step ahead.
Step 4: Shape the Cups
Prepare a muffin tin with paper liners. Using a spoon or your hands, scoop the Rice Krispie blend evenly into each liner, pressing down gently but firmly to pack them in without losing crunch. Aim to fill each cup to the top, creating a sturdy base for your no-bake Chocolate Peanut Butter Rice Krispie Cups. Once filled, set the tin aside while you prepare the chocolate layer.
Step 5: Add Chocolate Layer
In a microwave-safe bowl, place 1 cup of chocolate chips. Microwave in 20-second intervals, stirring in between, until fully melted and smooth—this should take about 1-2 minutes. Once ready, spoon the melted chocolate generously over each packed cup, ensuring an even layer covers the top and creates a glossy finish. Feel free to sprinkle some sea salt on top for an extra flavor boost!
Step 6: Set & Serve
Allow your Chocolate Peanut Butter Rice Krispie Cups to cool at room temperature for about 20 minutes until the chocolate has hardened. For quicker setting, pop the muffin tin in the refrigerator for 10-15 minutes. Once firm, gently remove the cups from the liners and savor these delightful no-bake treats, perfect for sharing or enjoying during a sweet craving!
Chocolate Peanut Butter Rice Krispie Variations
Customize these delightful cups to suit your taste and mood!
-
Crunchy Twist: Use crunchy peanut butter instead of creamy for an extra layer of texture. The added crunch pairs beautifully with the Rice Krispies.
-
Dark Chocolate Delight: Swap in dark chocolate for a richer flavor that balances the sweetness perfectly. This is a wonderful option for dark chocolate lovers!
-
Nutty Flavor: Sprinkle in some chopped nuts like almonds or hazelnuts. The nutty bit adds a delightful crunch and a boost of flavor.
-
Add Some Spice: Mix a pinch of cayenne pepper or cinnamon into the peanut butter for a warm, spicy kick. It’s a surprising twist that will leave your taste buds dancing!
-
Vegan Version: Use vegan butter and marshmallows along with dairy-free chocolate chips. This allows everyone to enjoy these treats without dietary restrictions.
-
Flavor Explosion: Try mixing in butterscotch chips or even some caramel for an extra sweet surprise. The layers will create a flavor harmony unlike any other.
-
Fruity Addition: Fold in some dried fruit like cranberries or raisins for a tart contrast that brightens every bite. It’s a fun way to add sweetness and chewiness!
These variations keep the spirit of the classic while offering something new with each batch! Whichever option you choose, don’t forget to enjoy these alongside other treats like White Chocolate Cheesecake or even a fresh No-Bake Peanut Butter Pie for a delightful sweet table that everyone will love.
Storage Tips for Chocolate Peanut Butter Rice Krispie Cups
-
Room Temperature: Store your cups in an airtight container at room temperature for up to 1 week. This keeps them fresh and ready to satisfy your sweet cravings anytime!
-
Fridge: For extended freshness, wrap the cups in plastic wrap and refrigerate them for up to 2 weeks. Just allow them to come to room temperature before enjoying.
-
Freezer: To freeze, place the cups in a single layer in a freezer-safe container or zip-lock bag, separating layers with parchment paper. They can be stored for up to 3 months.
-
Reheating: Enjoy these no-bake treats cold or at room temperature. If you prefer a melty chocolate topping, microwave them for just 10-15 seconds to warm slightly!
Make Ahead Options
These Chocolate Peanut Butter Rice Krispie Cups are fantastic for meal prep, allowing you to enjoy a sweet treat ready when you are! You can prepare the base mixture (steps 1-4) up to 24 hours in advance—simply pack the cereal mixture into the muffin tin and store it in the fridge. For added convenience, you can also melt the chocolate topping (step 5) ahead of time, keeping it covered at room temperature. When you’re ready to serve, just spoon the melted chocolate over the pressed cups and allow them to set for about 20 minutes at room temperature, or refrigerate for about 10-15 minutes. This prep will save you time and ensure each cup is just as delicious when served!
What to Serve with Chocolate Peanut Butter Rice Krispie Cups
Warm up your gatherings with these delightful treats, perfectly complemented by enticing sides that elevate your dessert table.
-
Fresh Berries: Serve juicy strawberries or raspberries on the side for a refreshing contrast, balancing the sweet flavors of the Rice Krispie cups.
-
Vanilla Ice Cream: Pair these cups with a scoop of creamy vanilla ice cream for a decadent dessert experience that will have everyone reaching for more.
-
Coffee or Espresso: A rich cup of coffee or espresso enhances the chocolate and peanut butter flavors, making for a cozy afternoon treat or after-dinner delight.
-
Milkshake: Blend together ice cream and milk for a thick milkshake that echoes the sweet flavors of the cups while adding a frosty texture that’s incredibly satisfying.
-
Nutty Trail Mix: A crunchy trail mix with nuts and dried fruit brings texture and a bit of saltiness that contrasts beautifully with the sweetness of the Chocolate Peanut Butter Rice Krispie Cups.
-
Chocolate Dipping Sauce: For the chocolate lovers, a warm chocolate sauce on the side invites guests to dip their cups, intensifying the rich chocolate experience.
-
Whipped Cream: A dollop of homemade or store-bought whipped cream adds a light, airy touch that perfectly balances the heaviness of peanut butter and chocolate sweetness.
-
Fruity Smoothie: A refreshing banana or berry smoothie cleanses the palate between bites, complementing the rich flavors while keeping the mood light and fun.
-
Chilled Sparkling Water: Offer guests a glass of bubbly sparkling water for a delightful contrast that refreshes the taste buds while enjoying the sweet treats.
Elevate your dessert experience with these delightful pairings that invite more joy and satisfaction into every bite.
Expert Tips for Chocolate Peanut Butter Rice Krispie Cups
-
Use Low Heat: When melting butter and marshmallows, keep the heat low to prevent burning. Stir constantly for a smooth and even mixture.
-
Be Gentle with Cereal: Fold the Rice Krispies into the peanut butter mixture carefully to maintain their crunch. A heavy hand can lead to mushy treats.
-
Properly Pack the Cups: Press the mixture gently but firmly into the muffin liners. This helps them hold their shape without losing that delightful crunch.
-
Chill to Set: After adding the chocolate topping, refrigerate the cups for quicker setting. This prevents the chocolate from melting when served.
-
Experiment with Variations: Feel free to switch up ingredients, such as using crunchy peanut butter or dark chocolate, to create your perfect Chocolate Peanut Butter Rice Krispie Cups!
Chocolate Peanut Butter Rice Krispie Cups Recipe FAQs
How do I choose ripe ingredients for this recipe?
Absolutely! For the best flavor, select creamy peanut butter without added sugars or oils. If you’re using marshmallows, look for ones that are soft and fluffy without any signs of being hard or stale. When it comes to chocolate chips, opt for good-quality brands that melt well, ensuring a smooth topping.
What’s the best way to store leftover Rice Krispie Cups?
Very simple! Store your Chocolate Peanut Butter Rice Krispie Cups in an airtight container at room temperature for up to 1 week. If you want them to stay fresh even longer, wrap them in plastic wrap and refrigerate them for up to 2 weeks. Before enjoying, let them come to room temperature for the best experience!
Can I freeze Chocolate Peanut Butter Rice Krispie Cups, and if so, how?
Yes, indeed! To freeze, layer your cups in a freezer-safe container or zip-lock bag, placing parchment paper between each layer to prevent sticking. They can be stored for up to 3 months. Just remember to let them thaw at room temperature or in the fridge before serving—this way, they’ll retain their deliciousness!
What if my mixture is too dry or crumbly?
Great question! If your mixture seems too dry or crumbly when you’re combining the Rice Krispies, you can try adding a little more melted butter or peanut butter—start with 1 tablespoon at a time until you achieve the desired consistency. Be sure that you coat the Rice Krispies thoroughly to keep them moist and delicious!
Are there any dietary considerations for pets or allergies?
Absolutely! Peanut butter is generally safe for dogs in moderation, but avoid any chocolate for pets, as it can be toxic. If you’re catering to someone with peanut allergies, consider using sunflower seed butter as a substitute. Also, if there’s a vegan requirement, opt for vegan marshmallows and dark chocolate chips. Always double-check labels to steer clear of allergens!
How long do the Rice Krispie Cups take to set?
I recommend letting them set at room temperature for about 20 minutes, or if you’re short on time, just pop the muffin tin in the refrigerator for about 10-15 minutes. This will ensure the chocolate layer hardens properly, making it easier to enjoy these delightful treats without any melting mishaps!
Decadent Chocolate Peanut Butter Rice Krispie Cups Made Easy
Ingredients
Equipment
Method
- In a medium saucepan, combine 4 tablespoons of unsalted butter and 2 cups of mini marshmallows over low heat. Stir continuously for about 5 minutes until the marshmallows have completely melted and the mixture is smooth and glossy.
- Remove the saucepan from heat and stir in 1 cup of creamy peanut butter and a splash of vanilla extract. Mix thoroughly for about 1-2 minutes until fully incorporated.
- In a large mixing bowl, pour in 6 cups of Rice Krispies. Carefully fold the melted peanut butter mixture into the cereal using a spatula.
- Prepare a muffin tin with paper liners. Scoop the Rice Krispie blend evenly into each liner, pressing down gently to pack them in.
- In a microwave-safe bowl, place 1 cup of chocolate chips. Microwave in 20-second intervals, stirring in between, until fully melted and smooth. Spoon the melted chocolate over each packed cup.
- Allow your Chocolate Peanut Butter Rice Krispie Cups to cool at room temperature for about 20 minutes until the chocolate has hardened. Refrigerate for quicker setting if desired.
Leave a Reply