
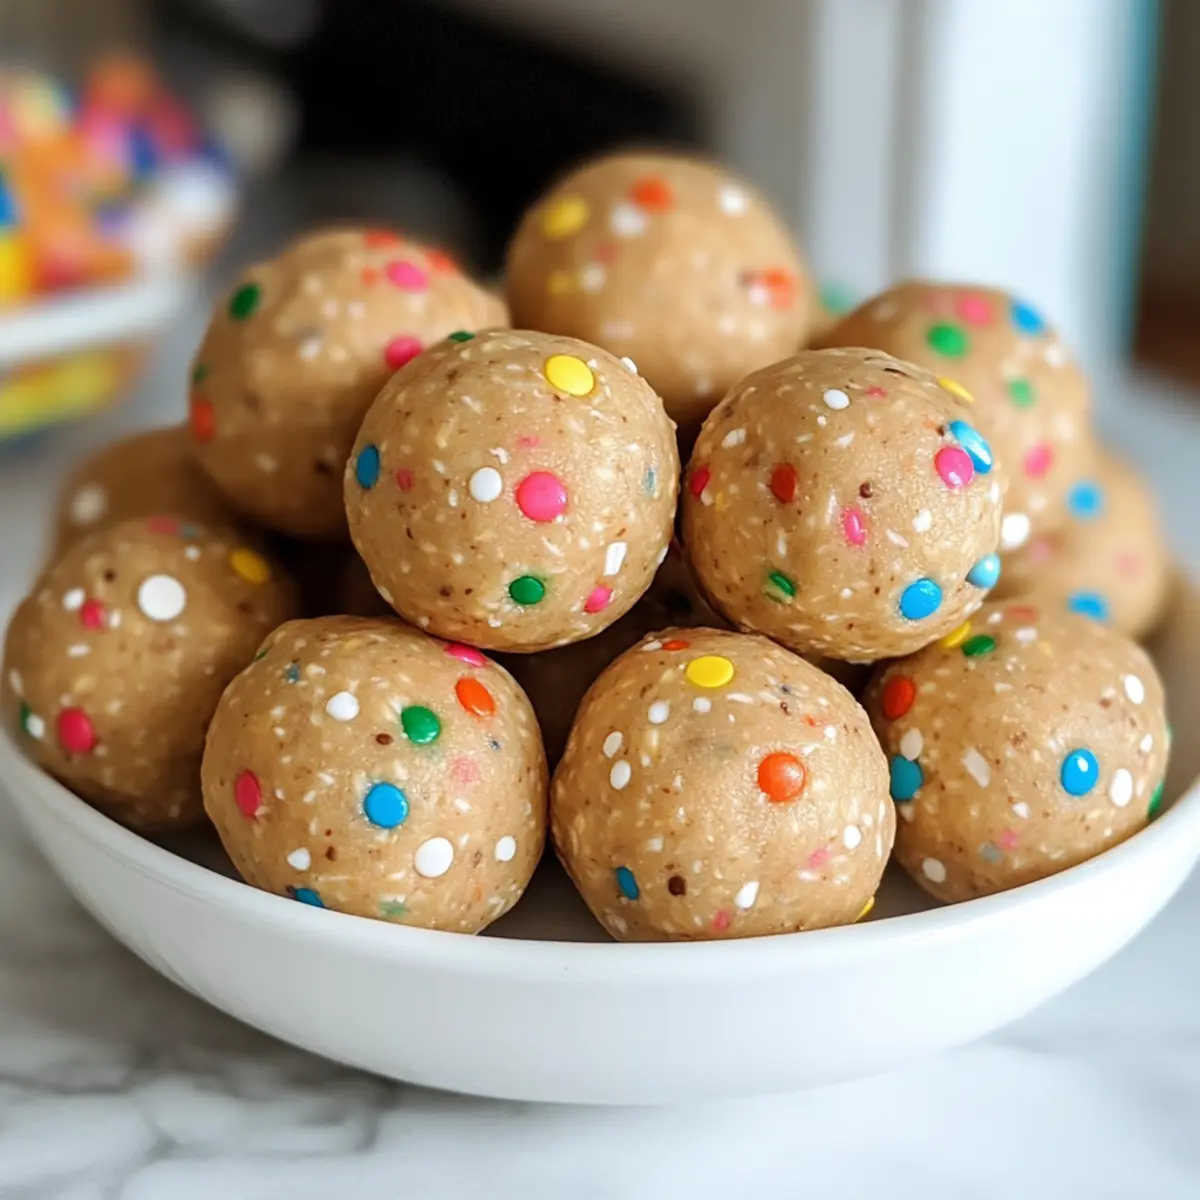
As I rummaged through my kitchen, I stumbled upon a bag of almond flour and a craving for something sweet yet wholesome. That little spark turned into a delightful creation: No Bake Cake Batter Protein Balls. These little bites are not just a snack; they strike the perfect balance between nostalgia and nutrition, giving you the vibrant flavor of cake batter without the guilt. The best part? They come together in just a few minutes with minimal cleanup, making them ideal for busy days and after-school treats. Plus, you can easily tweak the ingredients to fit your dietary needs, whether you’re going vegan or gluten-free. Ready to experience a deliciously easy treat that will satisfy your sweet tooth? Let’s dive into the recipe and make these energy-packed gems together!
Why Make No Bake Cake Batter Protein Balls?
Nostalgic Flavor: These protein balls encapsulate the joyous taste of cake batter, offering a sweet indulgence without any guilt.
Quick & Easy: With no baking required, you can throw these together in minutes—perfect for those busy afternoons or spontaneous cravings.
Customizable: Swap in different nut butters or protein powders to create your own unique flavor profile, just like with my Dumpling Ramen Bake or Salmon Sushi Bake.
Healthy Snack: Each ball packs around 8g of protein, making them a nutritious choice for kids and adults alike.
Fun Experience: Kids love rolling these up and adding sprinkles—it’s a great way to get them involved in the kitchen!
No Bake Cake Batter Protein Balls Ingredients
For the Base
- Oats – Base ingredient for structure and chewiness; use rolled oats for best texture.
- Almond Flour – Adds a nutty flavor to the mix; substitute with oat flour if you’re avoiding nuts.
- Protein Powder – Essential for a protein boost; opt for plant-based protein if going vegan.
For Binding and Sweetness
- Almond Butter – Helps bind the mixture and adds healthy fats; can be swapped with sunflower seed butter for nut allergies.
- Maple Syrup – Provides natural sweetness; reduce if you want less sweetness or add more almond butter for a thicker texture.
- Vanilla Extract – Enhances the delightful flavor of cake batter; ensure you use pure extract for the best taste.
- Milk – Incorporates moisture into the dough; use plant-based milk for a vegan adaptation.
For a Fun Touch
- Sprinkles – Adds that festive, fun element; consider using sugar-free or vegan sprinkles for dietary preferences.
These No Bake Cake Batter Protein Balls are not only a treat but also a great way to indulge your sweet cravings guilt-free!
Step‑by‑Step Instructions for No Bake Cake Batter Protein Balls
Step 1: Gather Ingredients
Start by laying out all the ingredients for your No Bake Cake Batter Protein Balls. Ensure you have oats, almond flour, protein powder, almond butter, maple syrup, vanilla extract, milk, and sprinkles ready. Having everything on hand will make your preparation smoother and more enjoyable, so you can focus on the fun of creating these delightful snacks.
Step 2: Mix Dry Ingredients
In a large mixing bowl, combine rolled oats, almond flour, and protein powder. If desired, add a pinch of salt to enhance flavor. Use a wooden spoon or spatula to mix the dry ingredients thoroughly, ensuring there are no clumps. This base will provide the chewy texture and nutty flavor for your protein balls, setting the stage for a tasty treat.
Step 3: Combine Wet Ingredients
Next, add in almond butter, maple syrup, vanilla extract, and your choice of milk into the bowl with dry ingredients. Stir well with your spoon until everything is evenly combined and a dough starts to form. If the mixture seems too dry, don’t hesitate to add a splash more of milk, aiming for a dough that holds together without being sticky.
Step 4: Fold in Sprinkles
Once your dough is mixed, gently fold in the sprinkles. Be careful not to break them down too much; you want their cheerful colors to shine through in your No Bake Cake Batter Protein Balls. This step brings the fun element to the recipe, making it visually appealing and just as delightful to look at as it is to eat.
Step 5: Scoop and Shape
Using a tablespoon, scoop portions of the dough and roll them into bite-sized balls in your hands. Each ball should be about the size of a golf ball. If your hands get sticky, wet them slightly, which will help shape the protein balls without the mixture clinging to you. Place the formed balls onto a parchment-lined tray for easy removal later.
Step 6: Chill to Firm Up
Now, place the tray of No Bake Cake Batter Protein Balls in the refrigerator. Allow them to chill for at least 20 minutes, letting the flavors meld and the texture firm up. This step is crucial for achieving a satisfying bite, so be patient as they cool and transform into the perfect nutritious snack ready to enjoy.
What to Serve with No Bake Cake Batter Protein Balls
These delightful bites pair perfectly with a variety of delicious sides, enhancing your snack experience.
- Fresh Fruit Platter: Bright, juicy fruits like strawberries and bananas provide a refreshing contrast to the rich protein balls.
- Yogurt Dip: A creamy yogurt dip, perhaps flavored with honey or vanilla, complements their sweetness beautifully. The combination makes a delightful, nutritious bite.
- Nutty Granola: Sprinkle a bit of crunchy granola on your plate for added texture and an extra boost of energy; it’s a perfect pairing for these chewy treats.
- Vegetable Sticks: Pair with crunchy carrot and celery sticks for a savory palate cleanser that balances the sweetness.
- Dark Chocolate Drizzle: A light drizzle of dark chocolate adds indulgence and satisfies any chocolate craving alongside your protein balls.
- Homemade Trail Mix: Craft your own trail mix with nuts, seeds, and dried fruits; it makes for a fun, munchable side that elevates your snacking game.
- Milk Alternatives: Serve alongside a tall glass of almond or coconut milk for a creamy, satisfying drink that ties the whole snack together.
- Chia Seed Pudding: A light, fruity chia seed pudding enhances the nutritious aspect and works as a refreshing dessert option post-snack.
Make Ahead Options
These No Bake Cake Batter Protein Balls are ideal for meal prep! You can prepare the entire mixture up to 24 hours in advance by combining the dry and wet ingredients, rolling them into balls, and then storing them in an airtight container in the fridge. Just remember to chill them for at least 20 minutes after forming for optimal texture. To maintain freshness, wrap each ball individually in plastic wrap or store them in a single layer in a container. When you’re ready to indulge, simply grab them straight from the fridge or let them sit at room temperature for a few minutes. Enjoy the convenience of these energy-packed bites whenever you need a quick, satisfying snack!
Variations & Substitutions for No Bake Cake Batter Protein Balls
Feel free to get creative and personalize these delightful protein balls to suit your tastes and dietary needs!
-
Nut-Free: Swap almond flour with oat or sunflower seed flour for a nut-free version, perfect for anyone with allergies.
-
Vegan-Friendly: Substitute almond butter with sunflower seed butter, and opt for a plant-based protein powder and milk to keep it vegan.
-
Chocolatey Twist: Mix in 2 tablespoons of cocoa powder for a rich chocolate cake batter flavor that will satisfy any sweet tooth.
-
Fruit Fusion: Incorporate dried fruits like cranberries or apricots for a chewy texture and a burst of natural sweetness in each bite.
-
Flavor Boost: Add a pinch of cinnamon or nutmeg to the dry ingredients for a warm and cozy flavor, reminiscent of freshly baked cookies.
-
Extra Crunch: Stir in mini chocolate chips or chopped nuts to create a delightful crunch and extra richness in every protein ball.
-
Sprinkle Variation: Get creative with different types of sprinkles or even shredded coconut for a tropical twist that adds color and flair.
-
Protein Punch: Experiment with different flavors of protein powder, like vanilla or chocolate peanut butter, to give your protein balls a unique taste, just like my French Butter Cake or Girls Coffee Cake.
These variations allow everyone to enjoy a delicious treat while catering to their specific tastes and dietary restrictions. So go ahead, mix it up and find your perfect blend!
How to Store and Freeze No Bake Cake Batter Protein Balls
Fridge: Store your No Bake Cake Batter Protein Balls in an airtight container for up to 10 days, ensuring they stay fresh and delicious.
Freezer: For longer storage, freeze the protein balls in a single layer on a baking sheet, then transfer to a zip-top bag for up to 2 months.
Thawing: When you’re ready to enjoy, simply take out as many balls as you need and let them thaw in the fridge for a few hours or at room temperature for about 30 minutes.
Reheating: There’s no need to heat these treats; they’re delightful straight from the fridge or freezer—perfect for a quick snack anytime!
Expert Tips for No Bake Cake Batter Protein Balls
-
Use Quality Ingredients: Choose high-quality almond butter and pure vanilla extract to elevate the flavor profile of your protein balls.
-
Adjust Consistency: If your mixture is too crumbly, add more almond butter or a splash of milk. Aim for a soft, moldable dough for the best texture.
-
Get Creative: Feel free to customize your No Bake Cake Batter Protein Balls with mix-ins like chocolate chips, dried fruits, or different nut butters for a unique twist.
-
Chill Well: For a firmer texture, ensure you chill the protein balls in the fridge for at least 20 minutes—this helps them hold their shape better.
-
Engage the Kids: Involve your children in the process of rolling the balls and adding sprinkles; it makes for a fun and interactive cooking experience!
No Bake Cake Batter Protein Balls Recipe FAQs
How do I choose the best oats for this recipe?
When making No Bake Cake Batter Protein Balls, I recommend using rolled oats for their chewy texture. If you prefer a smoother consistency, you can pulse instant oats in a food processor before adding them to the mixture. Just avoid quick oats—they can get too mushy in this recipe!
How should I store the protein balls?
Store your No Bake Cake Batter Protein Balls in an airtight container in the fridge for up to 10 days. If you’re thinking ahead, you can also freeze them for up to 2 months. Make sure to label your container with the date so you can keep track of freshness!
Can I freeze No Bake Cake Batter Protein Balls?
Absolutely! Freezing is a great option. First, place the protein balls in a single layer on a baking sheet; this prevents them from sticking together. Once frozen solid (about 2 hours), transfer them to a zip-top bag. They’ll be perfect for a quick snack later—just thaw in the fridge or on the countertop before eating.
What if my mixture is crumbly?
If you find the mixture too crumbly when making your No Bake Cake Batter Protein Balls, don’t fret! Simply add a bit more almond butter or a splash of milk, mixing it in gradually until the dough holds together. You want a firm yet moldable consistency, so feel free to adjust as needed!
Are these protein balls safe for kids with allergies?
Yes! This recipe is highly customizable. For nut allergies, substitute almond butter with sunflower seed butter, and for gluten-sensitivity, be sure to use certified gluten-free oats and flour. Always check labels on your ingredients to ensure they meet any dietary restrictions or allergies.
Are there any dairy-free options for this recipe?
Definitely! To make your No Bake Cake Batter Protein Balls dairy-free, use plant-based milk, like almond or oat milk. For the binding agent, almond butter can be swapped with sunflower seed butter, keeping everything vegan-friendly while still delicious!
No Bake Cake Batter Protein Balls for Guilt-Free Indulgence
Ingredients
Equipment
Method
- Gather all the ingredients for your No Bake Cake Batter Protein Balls.
- Mix rolled oats, almond flour, and protein powder in a large bowl.
- Add almond butter, maple syrup, vanilla extract, and milk; stir until combined.
- Gently fold in the sprinkles.
- Scoop dough and roll into bite-sized balls.
- Chill in the refrigerator for at least 20 minutes.
Leave a Reply