
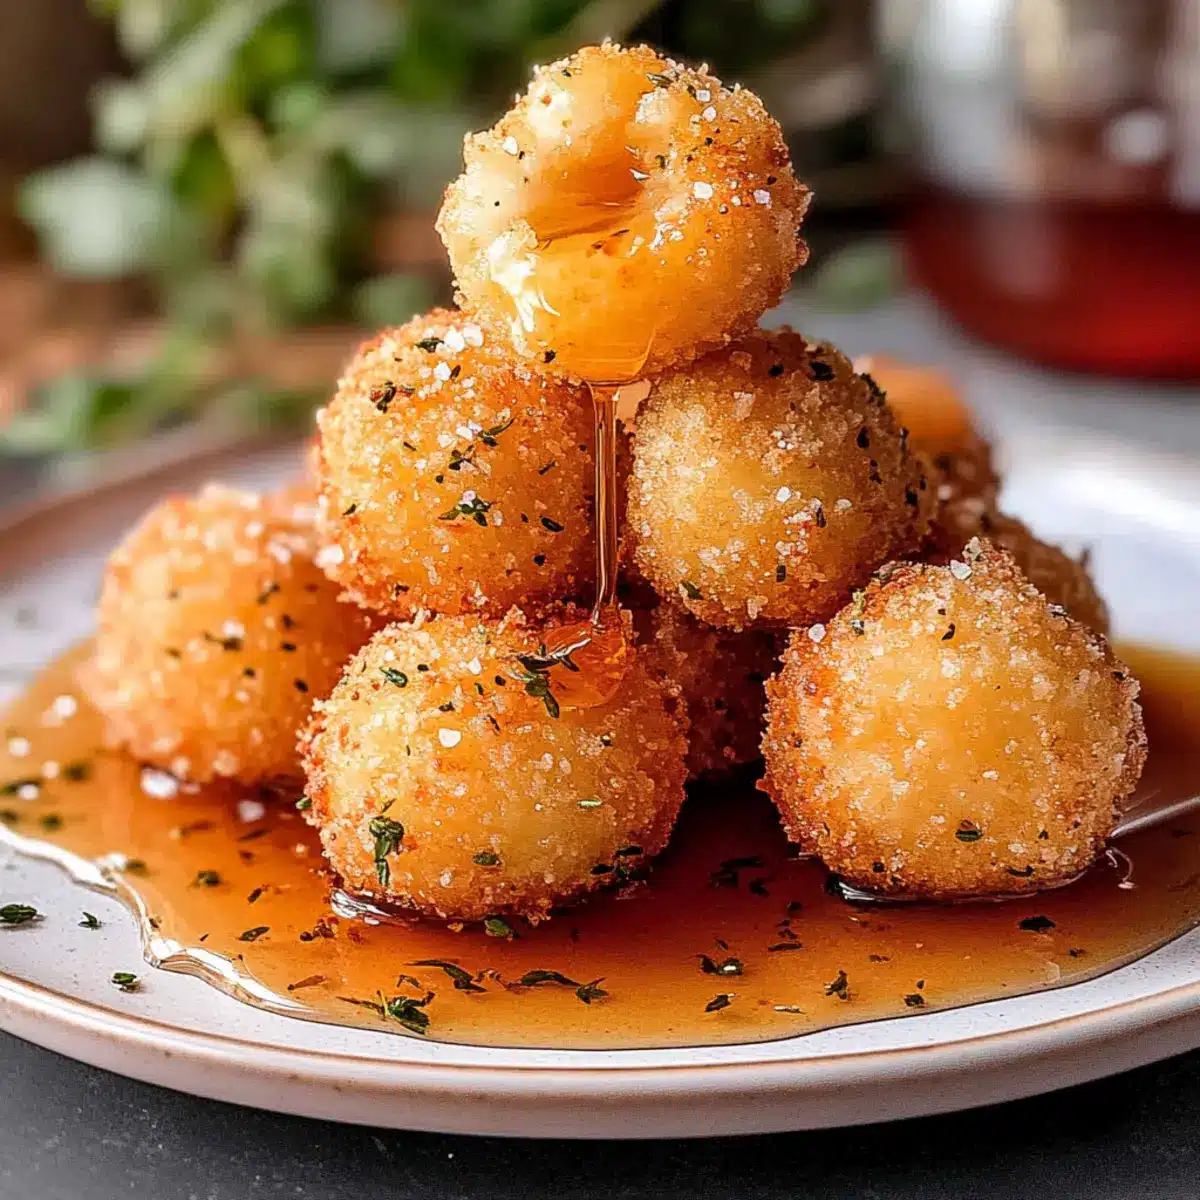
As the sizzling sound of oil fills your kitchen, anticipation dances in the air. That’s how it feels when I’m preparing these crispy fried goat cheese balls—an appetizer that has quickly become my go-to for gatherings and cozy nights in. With simple ingredients and the option for air fryer preparation, these little bites of joy are not just easy to whip up but also gluten-free if you choose the right breadcrumbs. Just imagine the contrast of a crunchy exterior giving way to warm, creamy goat cheese inside, perfect when drizzled with honey and sprinkled with sea salt. Whether you’re hosting a dinner party or simply treating yourself, these crispy fried goat cheese balls are bound to impress. Curious about the secret to achieving that perfect crunch? Let’s dive into this delightful recipe!

Why Are These Goat Cheese Balls Amazing?
Crunchy Perfection: The panko breadcrumbs create a light and crispy crust that pairs perfectly with the creamy goat cheese inside.
Versatile Delight: These cheese balls can be served as a fancy appetizer for gatherings or enjoyed as a snack during a cozy night in.
Quick Prep Time: With just a few steps—especially if you opt for the air fryer—you can whip these up in no time!
Endless Variations: Want to spice things up? Experiment with different herbs and spices or pair them with your favorite dipping sauces like hot honey for an extra kick!
Make-Ahead Option: You can easily make these cheese balls ahead of time and freeze them, ensuring you’re always just a fry away from a delicious snack.
These irresistible crispy fried goat cheese balls are sure to become a staple in your recipe collection!
Crispy Fried Goat Cheese Balls Ingredients
• For the perfect blend of taste and texture!
For the Cheese Balls
• Goat Cheese Log – The heart of this dish; choose a log for the creamiest results.
• All Purpose Flour – Acts as a base coating; gluten-free flour works wonderfully too!
• Garlic Powder – Boosts flavor; fresh garlic is a lovely alternative.
• Kosher Salt – Essential for balance; enhances the richness of goat cheese.
• Large Egg – Binds everything together; a flax egg is a vegan option.
• Milk – Helps the breadcrumbs adhere; switch to non-dairy milk for a dairy-free version.
For the Coating
• Panko Breadcrumbs – Light and crunchy; use regular breadcrumbs in a pinch.
• Minced Fresh Thyme – Infuses the cheese balls with herby goodness; dried thyme can substitute.
For Frying
• Canola Oil – Ideal for frying; vegetable or peanut oil are good alternatives.
Dive into the world of crispy fried goat cheese balls and impress your loved ones with this delightful appetizer!
Step‑by‑Step Instructions for Crispy Fried Goat Cheese Balls
Step 1: Prepare the Cheese Balls
Start by cutting the goat cheese log into 1-inch medallions, then gently roll each piece into smooth balls using your hands. Place the shaped cheese balls on a lined plate and put them in the freezer for about 30 minutes. This initial freezing step helps firm them up, making them easier to coat.
Step 2: Set Up Dredging Station
Create a dredging station by preparing three separate bowls. In the first bowl, combine flour, garlic powder, and kosher salt. In the second, whisk together the large egg and milk until smooth. Finally, mix the panko breadcrumbs with minced fresh thyme in the third bowl. These stations will streamline the process of coating your crispy fried goat cheese balls.
Step 3: Dredge the Balls
Using your dominant hand (the “dry” hand), roll each chilled cheese ball in the flour mixture, ensuring they are well coated. Next, dip the floured balls into the egg mixture with your other hand (the “wet” hand), allowing excess to drip off. Finally, coat each ball thoroughly in the panko mixture, pressing gently to ensure the crumbs adhere well.
Step 4: Second Freeze
Place the coated cheese balls back onto the lined plate and return them to the freezer for another 30 minutes. This second chilling helps firm up the coating, allowing it to hold together better during frying and ensuring your crispy fried goat cheese balls achieve that perfect crunch.
Step 5: Heat the Oil
In a heavy pot or deep skillet, pour in enough canola oil to cover the balls about 2 inches deep. Heat the oil over medium-high heat until it reaches 350°F. Use a kitchen thermometer for accuracy, as maintaining the right oil temperature is key to achieving a golden brown exterior without the cheese leaking out.
Step 6: Fry the Balls
Carefully lower a few cheese balls into the hot oil, avoiding overcrowding the pot. Fry them for 30 seconds to 1 minute, or until they are golden brown and crispy. Use a slotted spoon to remove them and drain on paper towels. Immediately sprinkle with flaky sea salt while they’re hot, enhancing the flavor of your crispy fried goat cheese balls for the ultimate delicious finish.

Expert Tips for Crispy Fried Goat Cheese Balls
-
Double Dredging: For an extra crunchy texture, double dredge your cheese balls by repeating the flour and egg steps before coating in panko.
-
Oil Temperature Check: Always ensure your oil is heated to 350°F; if it’s too cool, the cheese will leak and become messy.
-
Air Fryer Option: If using an air fryer, preheat it to 400°F and lightly spray the cheese balls with cooking spray; air fry for about 5 minutes until golden and crispy.
-
Freezing Convenience: You can freeze the formed cheese balls before frying for up to 2 months, making them a quick appetizer option.
-
Ingredient Alternatives: Experiment with gluten-free breadcrumbs for a gluten-free version or try different herbs for unique flavor profiles in your crispy fried goat cheese balls.
Make Ahead Options
These crispy fried goat cheese balls are perfect for meal prep enthusiasts! You can prepare the cheese balls up to 24 hours in advance by coating and freezing them before frying. Just roll the goat cheese into balls and freeze for about 30 minutes, then follow the dredging steps, and place them back in the freezer. To maintain their quality, ensure they’re well-coated and stored in an airtight container. When you’re ready to serve, simply fry them directly from the freezer or air fry them at 400°F for about 5 minutes until golden. This make-ahead option means you’ll always have a delightful appetizer ready to impress your guests or satisfy your cravings with minimal effort!
What to Serve with Crispy Fried Goat Cheese Balls?
When it comes to crafting the ultimate spread, these golden bites serve as the perfect centerpiece, inviting a symphony of flavors to join them.
- Fresh Arugula Salad: A peppery arugula salad drizzled with lemon vinaigrette cuts through the richness of the cheese balls, making every bite brighter.
- Roasted Beet Salad: The earthiness of roasted beets complements the tangy goat cheese, while the addition of walnuts adds the perfect crunch for texture.
- Sweet Fig Jam: Serve a dollop of fig jam alongside for a delightful sweet contrast that elevates the savory goat cheese.
- Garlic Toasts: Crispy garlic toasts are an ideal vessel for piling on cheese balls, creating layered tastes that delight the palate.
- Chardonnay Pairing: A chilled glass of Chardonnay enhances the crispy fried goat cheese balls with its fruity notes, making for an elegant pairing.
- Honey Drizzle: Drizzling extra honey on top enhances the flavors beautifully and adds a touch of sweetness that balances the savory elements.
- Mediterranean Platter: Pair with olives, roasted red peppers, and assorted nuts for a vibrant Mediterranean-inspired spread that’s sure to impress.
- Herbed Quinoa: The nutty flavor of herbed quinoa provides a nutritious base, making for a wholesome side that complements the creamy cheese balls splendidly.
- Spicy Marinara Dipping Sauce: For a flavorful contrast, serve with a side of spicy marinara, perfect for dipping and enhancing every crunchy mouthful!
Storage Tips for Crispy Fried Goat Cheese Balls
- Room Temperature: Crispy fried goat cheese balls are best enjoyed fresh but can sit out for up to 2 hours at room temperature if you’re serving them at a gathering.
- Fridge: Store leftover cheese balls in an airtight container in the fridge for up to 3 days. Reheat in the oven to regain crispiness.
- Freezer: Freeze the cheese balls before or after frying for up to 2 months. For best results, individually wrap them in plastic wrap, then place in a freezer bag.
- Reheating: Reheat frozen cheese balls directly in the oven at 375°F for about 10 minutes or air fry at 400°F for about 5 minutes until heated through, ensuring they retain their crispy coating.
Crispy Fried Goat Cheese Balls: Delightful Variations
Feel free to get creative with this recipe and make it your own—I promise your taste buds will thank you!
- Herb Swap: Try using rosemary or oregano instead of thyme for a different aromatic profile. These fresh herbs can beautifully enhance the flavor of the cheese balls.
- Spice It Up: Add cayenne pepper or red pepper flakes to your flour mixture for a spicy kick. It transforms these crispy bites into a tantalizing treat that’s sure to impress!
- Air Fryer Option: For a lighter version, use the air fryer! Preheat to 400°F and air fry the coated cheese balls for about 5 minutes until golden and crisp, perfect for those avoiding deep frying.
- Cheese Alternatives: Mix in cheddar or cream cheese to the goat cheese for a different taste and texture. Each offers a unique twist while maintaining that creamy center.
- Gluten-Free Delight: Use gluten-free breadcrumbs instead of traditional panko to keep this dish gluten-free, allowing everyone to enjoy this tasty appetizer.
- Sweet Dipping Sauce: Pair with fig preserves or marinara sauce for a sweet and savory blend. A drizzle of hot honey can also elevate the flavor and bring on a delightful contrast!
- Add Some Crunch: Toss in some finely chopped nuts, like almonds or pistachios, into the panko mixture for an enticing crunch that adds extra texture.
- Vegetable Infusion: Finely chop some spinach or sundried tomatoes to mix with the cheese before forming the balls. This adds a burst of flavor and color to your crispy fried goat cheese balls!
Want to explore more mouthwatering flavor combinations? Don’t miss out on the dreamy taste of my Cottage Cheese Mushroom soup, or elevate your next breakfast with a satisfying Fried Egg Quesadilla. Happy cooking!
Crispy Fried Goat Cheese Balls Recipe FAQs
What kind of goat cheese should I use?
Absolutely! Opt for a goat cheese log rather than crumbles for the best texture and flavor. Logs provide the creamy consistency that makes each bite of your crispy fried goat cheese balls delightful.
How can I store leftover cheese balls?
Very! You can stick leftover cheese balls in an airtight container in the fridge for up to 3 days. For the best results when reheating, place them in the oven to regain their signature crispiness.
Can I freeze these cheese balls?
Yes, indeed! You can freeze the goat cheese balls before frying for up to 2 months. Just wrap each ball tightly in plastic wrap, then store them in a freezer bag. When you’re ready to enjoy, fry them straight from frozen for a quick appetizer!
What should I do if the cheese leaking out during frying?
The key to preventing leakage is ensuring your oil is hot enough, ideally around 350°F. If you’re still facing issues, let the cheese balls chill in the freezer for an additional 15 minutes before frying, which helps the coating hold better.
Can I make these cheese balls gluten-free?
Absolutely! Simply substitute the all-purpose flour and panko breadcrumbs with gluten-free alternatives. This way, you can enjoy your crispy fried goat cheese balls without worries, perfect for those following a gluten-free diet!
Is it safe for pets?
While goat cheese is not toxic to pets, moderation is essential. Dogs and cats can have small bites as a treat, but watch out for lactose intolerance, which is common in many animals. Always consult your vet for any specific dietary concerns regarding your pets.
Crispy Fried Goat Cheese Balls Recipe FAQs

Crispy Fried Goat Cheese Balls: Irresistibly Crunchy Bites
Ingredients
Equipment
Method
- Start by cutting the goat cheese log into 1-inch medallions, then gently roll each piece into smooth balls using your hands. Place the shaped cheese balls on a lined plate and put them in the freezer for about 30 minutes.
- Create a dredging station by preparing three separate bowls. In the first bowl, combine flour, garlic powder, and kosher salt. In the second, whisk together the large egg and milk until smooth. Finally, mix the panko breadcrumbs with minced fresh thyme in the third bowl.
- Using your dominant hand (the 'dry' hand), roll each chilled cheese ball in the flour mixture, ensuring they are well coated. Next, dip the floured balls into the egg mixture with your other hand (the 'wet' hand), allowing excess to drip off. Finally, coat each ball thoroughly in the panko mixture.
- Place the coated cheese balls back onto the lined plate and return them to the freezer for another 30 minutes.
- In a heavy pot or deep skillet, pour in enough canola oil to cover the balls about 2 inches deep. Heat the oil over medium-high heat until it reaches 350°F.
- Carefully lower a few cheese balls into the hot oil, avoiding overcrowding the pot. Fry them for 30 seconds to 1 minute, or until they are golden brown and crispy.
Leave a Reply